UI Editor Basics
Smartface WYSIWYG editor grants you a unique ability to Drag&Drop components and ability to use them on your code on a fast fashion. In order to utilize its usage, let's cover the basics and a use case.
If you have not created a project already, please refer to this document to create one, it's super easy!
First Project on Smartface IDEAfter you clone the project, this screen will greet you on your next journey:
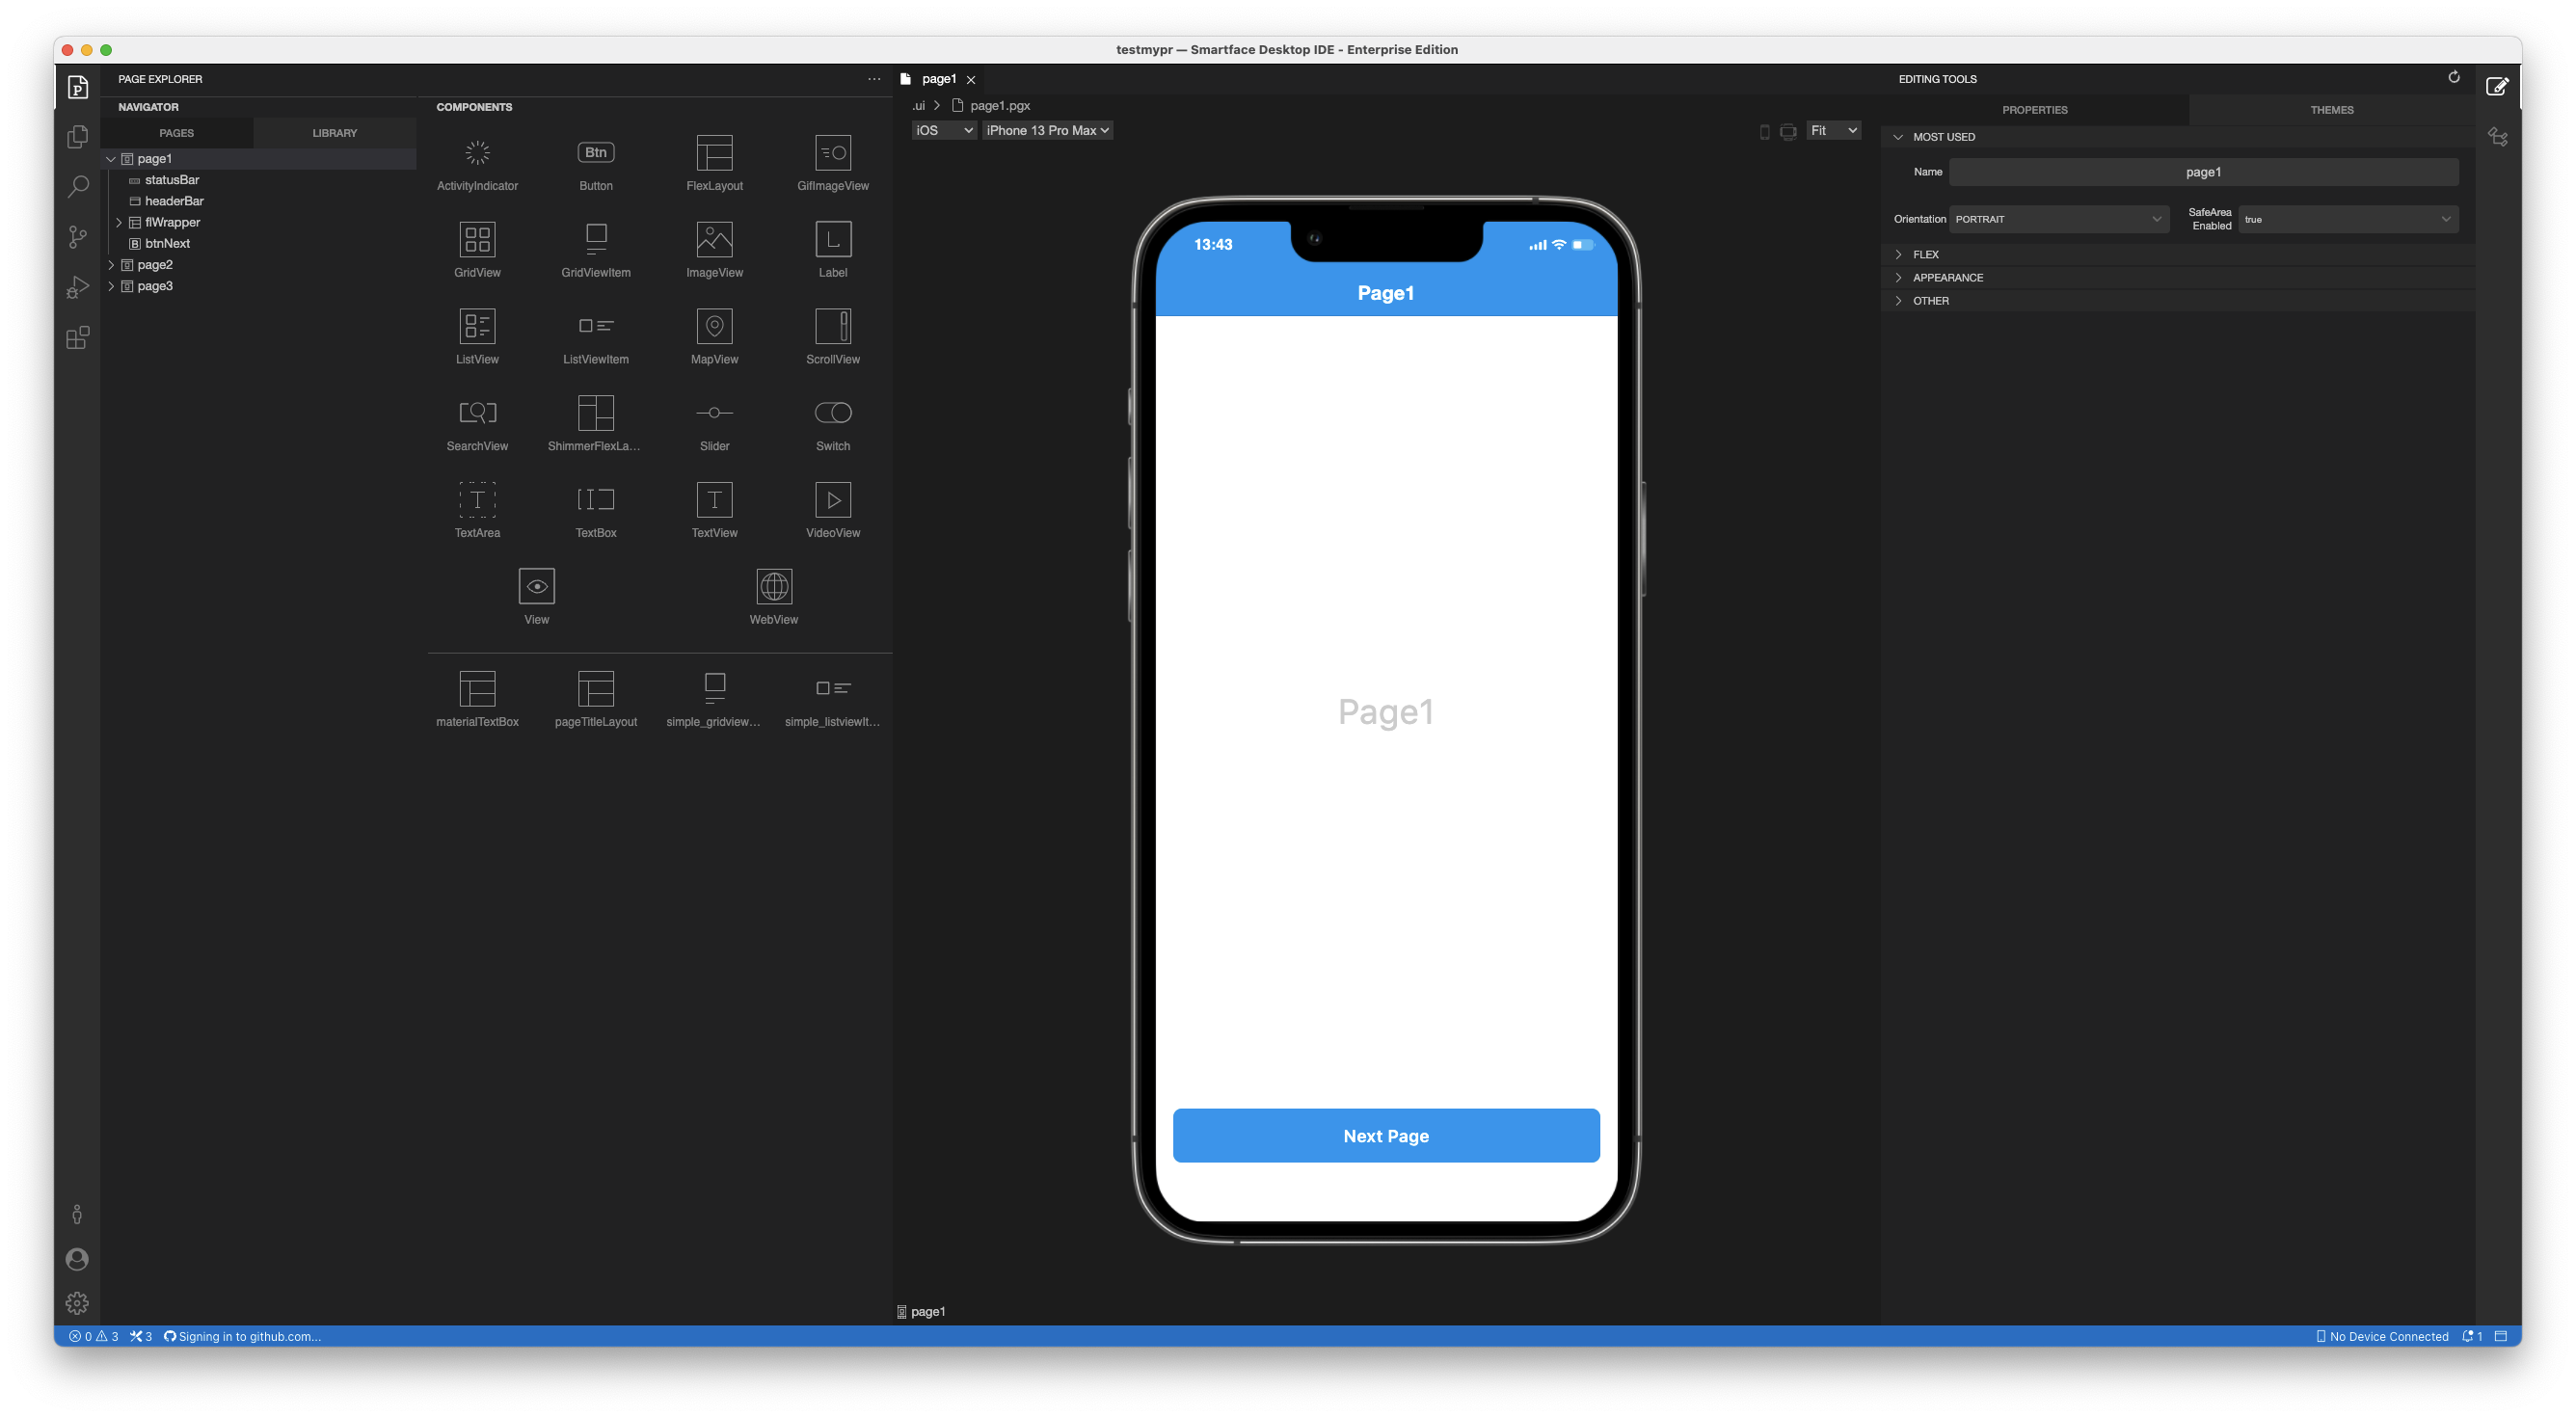
At this point, you can directly use Run on Device feature to see the application on your mobile phone:
On-Device EmulatorsBy default, page1 will be shown in the device. You can change that by editing app.ts file or checking out the routing on the project.
Tweaking your First Page
Navigate to Page1 file on the Top Left Panel to open page1 by clicking on the page1.
After that, we can Drag&Drop our first component in the UI Editor by holding the component as shown on the example:
ListView and GridView are special containers. They only accept their respective ListViewItem and GridViewItem components. If you want to use them, please refer to the document linked below:
Changing order of the Components on UI Editor
If you want to re-order the UI Elements, simply hold their name on the left panel:
Holding them on the mobile device screen does not work when you are changing their order. You have to drag them on the Page Explorer Panel.
Creating Containers
One of the most powerful asset of the Smartface WYSIWYG editor is that it can create nested components with a few clicks:
In order to add a FlexLayout as container, simply follow these steps:
- Find the FlexLayout located at Built-in Components
- Drag&Drop the FlexLayout normally or by clicking Insert built-in component button
- Double click the newly created FlexLayout component.
The components which behave like containers are derived from ViewGroup. The most common container which is widely used on Smartface is FlexLayout
For more information, please refer to this document:
Tips and Tricks about Reusable ComponentsCreating Nested Components
Did you know that you can create containers recursively on Smartface? You can put a container inside of a container and let it do it's magic:
You can create as many nested components as you want.
Getting out of the Container
After you have added a container, you might want to revert back to the top level of the component(page). To do that, simply click on the parent container:
You will be reverted to page level when you click on an empty space on the UI Editor
To get a level back instead of the root container, you have to go back to the root and than double click until you reach the component you wish.
Moving the Components to a Different Place
You can cut, copy and paste the Smartface components as much as you want! Simply select them on the UI Editor, then use your hotkeys to move them to a different place, just like how you would cut-paste a file. In order to cut a file:
- Navigate through the file while double clicking
- Press
ctrl+x/cmd+x(or copy). The component will be cut/copied to clipboard - Double click again to the component you wish to paste
- Paste!

That was all there is to it on drag&dropping components to the page. You are one step closer to master the WYSIWYG Editor!
Responsive Design on Smartface UI Editor
Smartface uses Facebook Yoga as their layout engine for flex methodology. This means you can create fully mobile-responsive designs while using flex properties.
To learn more about Flexbox methodology, please refer official Yoga page below:
Smartface recommends to not use fixed width height while creating components unless necessary. Always try to design your components following responsive design guidelines.
While creating responsive layouts, there might be times when you would want your component to not use flexGrow but have dynamic width/height as well. On these occasions, you might not see your component visible on the Page itself since you have set your width to null.
On those occurrences, prefer to use Reusable Components since you can set width/heigh on those components and it will not be applied on the place where you use them.
For more information, please refer to Reusable Components Documentation:
Reusable ComponentsUsing UI Editor Components From Code
After you have created your components, you might want to set things like click events or actions to your component. Those actions have to be declared from code, since Smartface is a low-code platform.
When a component is created from UI Editor via drag & drop, it updates the generated file located at scripts/generated/my-pages folder.
- Typescript
// onShow method of a Page
function onShow(this: Page1, superOnShow: () => void) {
  superOnShow();
  this.flexLayout2.visible = false;
}
If you want to change UI Properties like margin, height, check this document:
Changing UI Properties on RuntimeDid you know that Smartface also supports Reusable components which you can use everywhere? The concept is basically the same with using the components on Page. See more at the documentation below:
Reusable ComponentsSplitting the FlexLayout into specific row and column
You can split the FlexLayout into specific row and column by using right click on the FlexLayout and select "Split".
Wrapping the UI Elements into a FlexLayout - ScrollView - ShimmerFlexLayout
You can wrap the UI Elements into a FlexLayout, ScrollView or ShimmerFlexLayout by using right click on the UI Element and select "Wrap with..".

Export to Library
You can export the UI Elements to a reusable component library by using right click on the UI Element and select "Export to Library".

Go to Code
You can go to the code of the page by using right click on the UI Element and select "Go to Code".