Push Notification
API Reference: Device.Notifications
Firebase Plugin is used to receive push notifications. Please refer to the Firebase Plugin Guide: Firebase Plugin
A notification is a message that device displays outside your app's UI to provide the user with reminders, communication from other people, or other timely information from your app. Users can tap the notification to open your app or take an action directly from the notification.
Push Notification services only work with published projects. It will not work with Smartface Emulator.
Notification Handlers
There are bunch of notification providers. There is no guarantee that the received notification data schema is same for all and also, handling of notifications are differs between OS. Especially, Android, Firebase Message Services can receive any type of json schemas. But somehow, notification handler needs to know what title, body, icon etc of notification. To keep the things easier, our developers don't have to write own notification handler. Instead, we came up with solution that makes clear the properties of notification.
Implement Push Notification into your Project
Before implementing Push Notification, make sure to make following changes:
- Change your packagename on Android and bundleId on iOS to declare a unique ID for your project. All Push Notification services will need this variable.
- Register your application with given ID above on Firebase or any other Push Notification providers.
- Install the Firebase plugin into your project. Refer to sf-plugins-firebase for installation steps.
Android Requirements
If you are using FCM or GCM, follow the steps on the Firebase Plugin.
Also, make sure that following lines are active in AndroidManifest.xml
<!-- Defines the FCM  listener service to receive the push messages. -->
        <service android:exported="false" android:name="io.smartface.android.notifications.FCMListenerService">
            <intent-filter>
                <action android:name="com.google.firebase.MESSAGING_EVENT" />
            </intent-filter>
        </service>
Runtime permission for notifications
Android 13 (API level 33) introduces a runtime notification permission: POST_NOTIFICATIONS. This change helps users focus on the notifications that are most important to them.
By default applications cannot send notifications unless user grant notification permission in API Level 33 (Android 13) and above. This behaviour effects Firebase Push Notification and Local Notifications on Android.
To support this behaviour, you should add POST_NOTIFICATIONS permission to config/Android/AndroidManifest.xml file.
<manifest ...>
<uses-permission android:name="android.permission.POST_NOTIFICATIONS"/>
<application ...>
...
</application>
</manifest>
At runtime, you should check if the app has notification permission and if not, request the user for permission.
Below, you can see a sample code to request notification permission to post local notification.
async requestPermission() {
        const permissionResult = await Permission.android.requestPermissions(Permissions.android.notification);
        return permissionResult[0] === PermissionResult.GRANTED;
    }
    checkPermission() {
        return Permission.android.checkPermission(Permissions.android.notification);
    }
    async checkPermissonAndPostNotification() {
     if (this.checkPermission()) {
        //post notification
      } else {
        if (await this.requestPermission()) {
            //post notification
        }
      }
    }
iOS Requirements
Push Notification services should be enabled on signing certificates. This APNs certificate must be used during publishing.
Create app.entitlements File
- Create a new file named
app.entitlementsunderconfig/iOSin your workspace - Here is a sample
app.entitlementsfile:
There is no file extension. The name should exactly be app.entitlements. Otherwise device will not receive a token.
<?xml version="1.0" encoding="UTF-8"?>
<!DOCTYPE plist PUBLIC "-//Apple//DTD PLIST 1.0//EN" "http://www.apple.com/DTDs/PropertyList-1.0.dtd">
<plist version="1.0">
<dict>
    <key>aps-environment</key>
    <string>production</string>
</dict>
</plist>
How to Receive Remote Push Notification in your Application
After the plugin is installed and configurations are made, you are ready to receive token from firebase to receive notification.
As an alternative, you can refer to Smartface Push Notification Sample Project to gain more insight.
In your app.ts or any file which is executed at the start of the project, you can receive token with Firebase.messaging.getToken event:
import Firebase from "@smartface/plugin-firebase";

// Your other code in the file.

/**
 * e parameter is the token, as string.
 */
Firebase.messaging.subscribeToTopic("all"); //this triggers register for notifications
Firebase.messaging.getToken((e) => {
  alert("FCM Token : " + JSON.stringify(e, null, "\t")); // For debug purposes, should be removed afterwards
  // Do stuff, send to API etc.
});
Smartface recommends to keep Firebase configurations and callbacks in a separate file.
It is even better to keep them in separate folder, since Firebase Plugin also supports Crashlytics and Analytics.
Push Notification Badge
- On Android, badges are handled by the Operating System itself. There is nothing to be done by the application side.
- On iOS, badges are handled by the Notification Provider.
- For Firebase, you should send the badge information from backend. Refer to the relevant firebase docs for this info.
- You can also set the badge of the Application from the Smartface Code. Refer to the Notifications.applicationIconBadgeNumber property for more details.
Push Notification Sound & Vibrate
- On Android, sound is handled by the Operating System itself. There is nothing to be done by the application side.
- On iOS, sounds are handled by the Notification Provider.
- For Firebase, you should send the badge information from backend. Refer to the relevant firebase docs for this info.
- You can also set which sound or is going to be prompted from the Smartface Code. Refer to the Notifications.onNotificationReceive event for more details.
Notifications.onNotificationReceive = (e) => {
  const alertMessage = {
    onNotificationReceive: e,
  };
  alert(JSON.stringify(e, null, 4));
  return [
    Notifications.iOS.NotificationPresentationOptions.SOUND,
    Notifications.iOS.NotificationPresentationOptions.ALERT,
  ]; // or []
};
Configure Push Notification Handler
As we described, handler needs to know properties of notification. Thus, there is a json file which named as pushnotification and placed under the ~/workspace/config/Androidfolder. It contains all properties of notification. The notification handler searches for keys as title, body and so on from this file and then found keys are exposed with hierarchical path. For example, $notification.title, here is notification is root object and title is key and was what we are searching.
Exposed path matches with the received notification data. That means, the title key also will be searched in the received notification data with the exposed path ($notification.title). So, the pushnotification.json prepared according to the received notification json schema.
The below example pushnotification.json includes above examples and, the mapping between actual and desired key . Here, desired key is title-key which is name of your key (checkout example 2) and actual key is title that is title property of notifications.
Push Notification Examples
pushnotification.json
Example 1:
{
   "notification":{
      "title":"title-key",
      "body":"body-key",
      "icon":"icon-key",
      "channelId":"channelId-key",
      "channelIdTitle":"channelIdTitle-key",
      "channelIdImportance":"channelIdImportance-key",
      "deleteChannelId":"deleteChannelId-key",
      "showBadge":"showBadge-key"
   }
   "configuration_version":"2"
}
configuration_version: to support backward parsing.
Example 2:
Push notification data: used while requesting fcm end-point
{
   "to":"{device-token}",
   "data":{
      "notification":{
         "title-key":"Test-Title",
         "body-key":"Test-Body",
         "icon-key":"Test-Icon",
         "channelId-key":"50",
         "channelIdTitle-key":"Smartface",
         "channelIdImportance-key":"4",
         "deleteChannelId-key":"49",
         "showBadge-key":"false"
      }
   }
}
Above examples are easy, what if you need to handle schema which you don't know ? onNotificationReceive method receive all data send by your notification provider. Thus, you can examine all its schema.
Adding Custom Sound to Push Notification
For iOS
When you want to add a custom sound to a push notification, follow the steps below in order:
- Find the
~/workspace/configfolder in the folder tree within Smartface IDE, and create a folder called~/resourcesinside of it. - This 'resources' folder should only contain the sound files that will be used exclusively for push notifications.
- Drag and drop the sound file/files you want to use for push notifications into
~/resourcesfolder.
After these steps, push notification can ben configured.
The only thing that needs to be done while configuring is to add the "sound":"(your sound name).wav" parameter with its extension inside the pushnotification.json file.
iOS only supports sound files with the ".wav" extension. If you use a sound file with a different extension, the push notification sound will not work.
The ~/resourcesfolder should be used exclusively for the sounds that you want to use for push notifications. If you have a sound file that is used within your application, please do not drop it into this folder.
{
   "to":"{device-token}",
   "data":{
      "notification":{
         "title-key":"Test-Title",
         "body-key":"Test-Body",
         "sound":"Your-Sound-Name.wav"
         "icon-key":"Test-Icon",
         "channelId-key":"50",
         "channelIdTitle-key":"Smartface",
         "channelIdImportance-key":"4",
         "deleteChannelId-key":"49",
         "showBadge-key":"false"
      }
   }
}
Notification Basic Properties
Notification appears on device with title, body and icon.
"title" : "title of notification"
"body" : "body of notification"
"sound" : "name of sound with extension (ex: "sound.wav")"
"icon":" icon name of notification. It searches the name from images folder. No need to specify file extension."
Notification Channel on Android
Starting in Android 8.0, all notifications must be assigned to a channel. If channelId and title aren't exist, default values assigned.
"channelId": "any number as unique notification id for an app "
"channelIdTitle": "title of notification(app name etc.)"
"channelIdImportance": "a number between 1-5"
"deleteChannelId": "deletes exist channel"
Please refer to here for more information.
Badge
Apps are appear with dot or number badge when receives notification.
"showBadge" : "if sets false, badge won't appear on app icon."
FCM Push Send Example
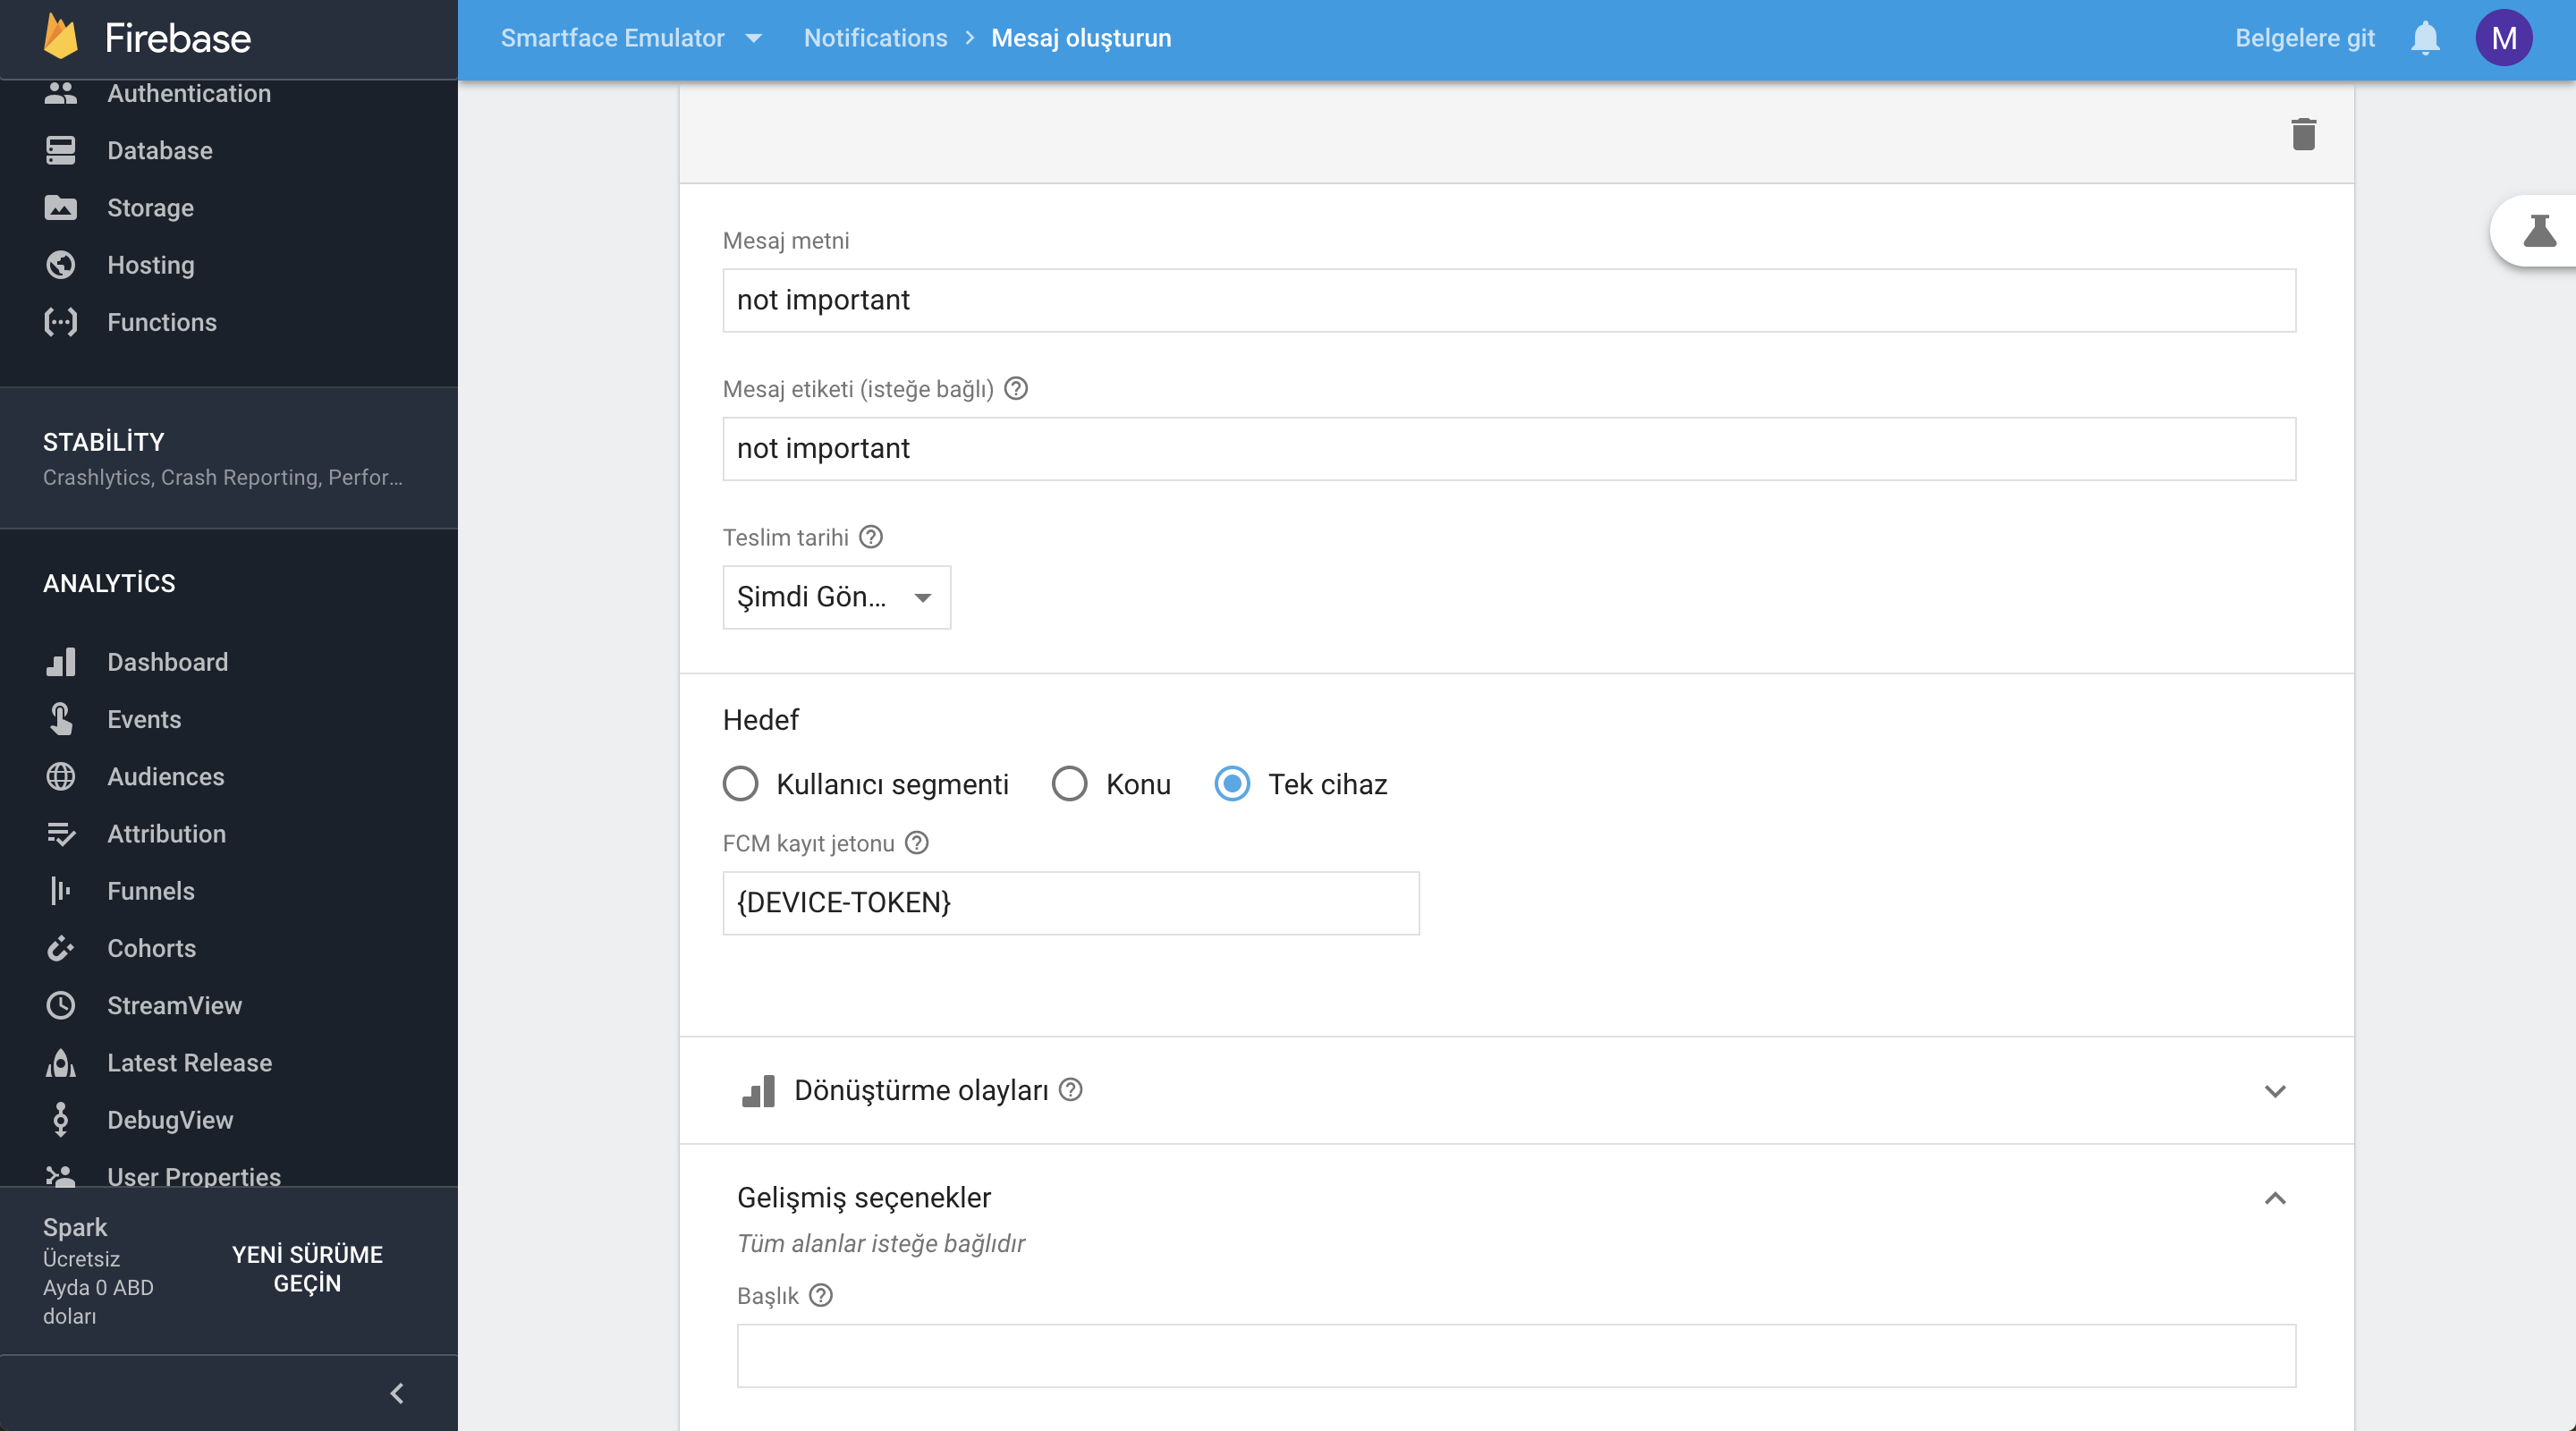
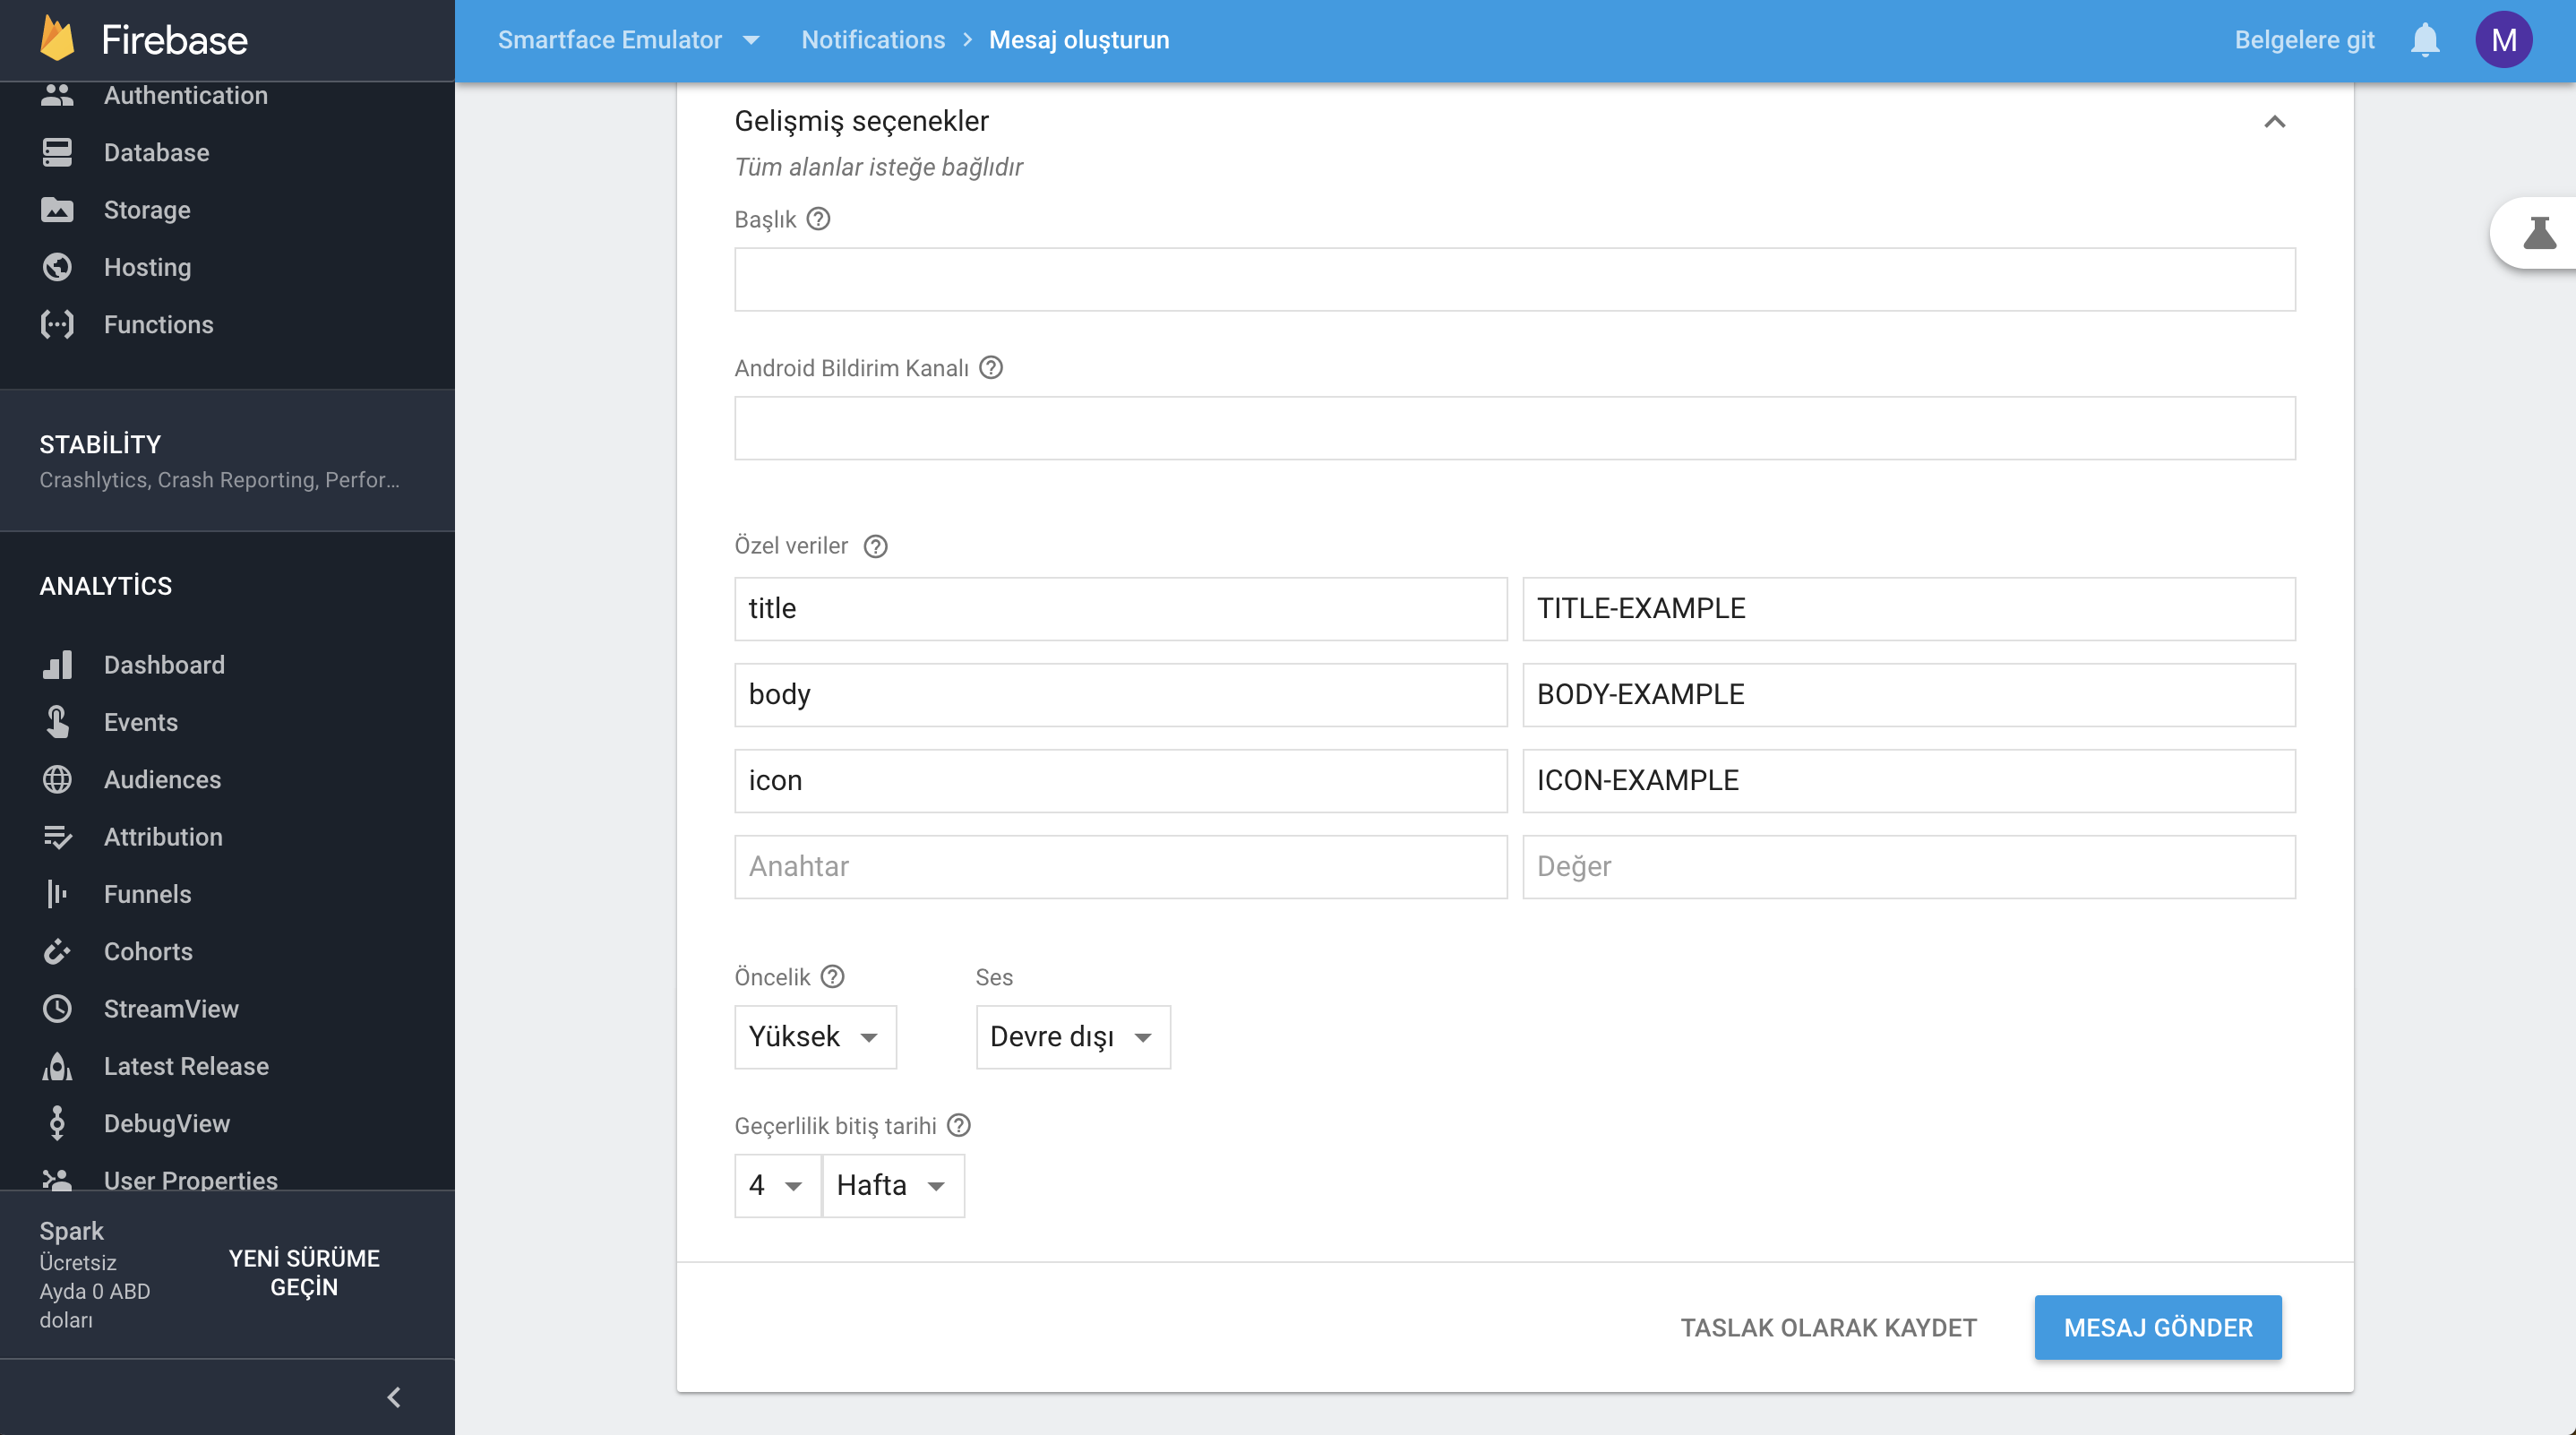
FCM cURL
Developers can use curl to send push notifications as well. The HTTP header must contain the following headers:
Authorization: key: This is the server key, where values are available in your Firebase project console under Project Settings > Cloud Messaging.Content-Type: application/json for JSON; application/x-www-form-urlencoded;charset=UTF-8 for plain text.
Sending Push Notification On Android With cURL
to: Registered tokendata: should contain the body, title and icon as specified above (notification content)
curl -X POST --header "Authorization: key= SERVER_API_KEY" --Header "Content-Type: application/json" https://fcm.googleapis.com/fcm/send -d '{
  “to”: “YOUR_TOKEN”,
  “body”:{
    "title-key": "Test-Title",
    "body-key": "Test-Body",
    "icon-key": "Test-Icon"
    }
}'
Sending Push Notification On iOS With cURL
First of all, you should obtain the FCM token acquired from the registerForPushNotifications method. For this purpose, you need to use the curl information below:
curl -X POST -H "Authorization: key=YOUR_FCM_SERVER_KEY" -H "Content-Type: application/json" -d '{
    "application": "com.sample.application",
    "sandbox":false,
    "apns_tokens":[
        "472aaacdedb539abc4a6bcd1b1795b6131194234b816e4f624ffa12",
        "642d2acceaadee8400b9952c2f45325ab9831c1998ed70859d86"
    ]
}' "https://iid.googleapis.com/iid/v1:batchImport"
With the returned FCM token, you can send push notifications with the curl information below:
notification: notification contentregistration_ids: registered token
curl -i -H 'Content-type: application/json' -H 'Authorization: key=<YOUR_SERVER_KEY>' -XPOST https://fcm.googleapis.com/fcm/send -d '{
  "registration_ids":["<YOUR_TOKEN>"],
  "notification": {
      "title":"Notification Title",
      "body":"Notification Content"
  },
  "data": {
    "CUSTOMKEY" : "CUSTOMVALUE"
  }
}'
Using Push Notifications
First, you need to register for the APNS services. If registration is successful, it returns a unique token for device identification.
import Firebase from "@smartface/plugin-firebase";

// Your other code in the file.

/**
 * e parameter is the token, as string.
 */
Firebase.messaging.subscribeToTopic("all"); //this triggers register for notifications
Firebase.messaging.getToken((e) => {
  alert("FCM Token : " + JSON.stringify(e, null, "\t")); // For debug purposes, should be removed afterwards
  // Do stuff, send to API etc.
});
Multiple Scenarios With Push Notification
Foreground:
Notifications.onNotificationReceive = (e) => {
  alert("Notification received : " + JSON.stringify(e, null, "\t"));
  return [
    Notifications.iOS.NotificationPresentationOptions.SOUND,
    Notifications.iOS.NotificationPresentationOptions.ALERT,
  ]; // or []
};
When Clicked On Push Notification
Notifications.onNotificationClick = (e): void => {
  alert("onNotificationClick onNotificationClick");
};
Local Notifications
LocalNotification is an interface between user and application that enables an application to inform its users that it has something for them. You can schedule local notification to be fired at a specific time. After scheduling a notification, regardless of the application being running or being in the background, scheduled notification will be fired on the specified time.
For Android, application icon must be placed in the apk. For this reason, you can see your own icon as a notification icon only in the published builds.
For iOS, if you present a local notification while your application is running in foreground you cannot get a visual alert. However, Application.onReceivedNotification callback will fire if you implement it.
import Notifications from "@smartface/native/global/notifications";
let notification = new Notifications.LocalNotification();
notification.alertAction = "Notification alertAction";
notification.alertBody = "Notification alertBody";
notification.android.vibrate = true;
notification.ios.hasAction = true;
notification.present();