Supporting Different Screen Sizes in Android
Android devices come with different screen and pixel sizes. Such as, one device has 160 pixels per square inch, another device fits 480 pixels in the same space. If variations in pixel density are not considered, the system might rescale the images or display it as a completely wrong size. As a result image quality will be changed.
This guide shows you how you can design splash images to support different screen sizes & resolutions in smartface app.
As we indicated that, devices screen sizes unpredictable (due to the many mobile manufacturers). Thus, Android apps can solve it by 9-patch images.
What is 9-patch images ?
A nine-patch image is a stretchable bit map. Android automatically resize it to accommodate the contents of the view and the size of the screen. Selected parts of the image are scaled horizontally or vertically based on indicators drawn within the image. Output file extension must be end with .9.png.
Relative sizes for an image at different density sizes
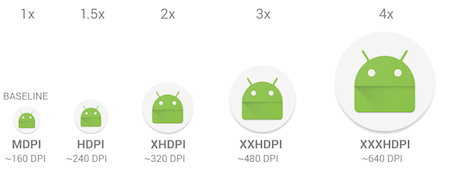
Based on the figure above, the corresponding splash images are used based on the device DPI. Images given to each corresponding folder should be kept at the minimum size to avoid shrinking. Keep in mind that 9-patch doesn't support image resize. Thus, the appearance of splash screen might change on smaller device screens.
| Density | Width | Height |
|---|---|---|
| ldpi (Small) | 240 | 320 |
| mdpi (Medium) | 320 | 480 |
| hdpi (Large) | 480 | 640 |
| xhdpi (XLarge) | 720 | 960 |
| xxhdpi (XXLarge) | 1080 | 1920 |
Note that the table above indicates the most popular minimum screen size of android devices. It is not absolute.
Here, we need to consider all minimum sizes and the stretching in 9-patch. You can decide the sizes according to the specific requirements as well.
Conversion of Image to 9-patch Image
There are two methods for this implementation:
- Creating the images with Android Studio tool.
- Using an online 9-patch tool credited by romannurik.
If you are going to convert your splash image to 9-patch, your filename before conversion should be splash_image.png.
Using Android Studio for Generating 9-patch Images
Example original splash image:

Step 1 : Download the Android Studio Draw9Patch tool and launch it.
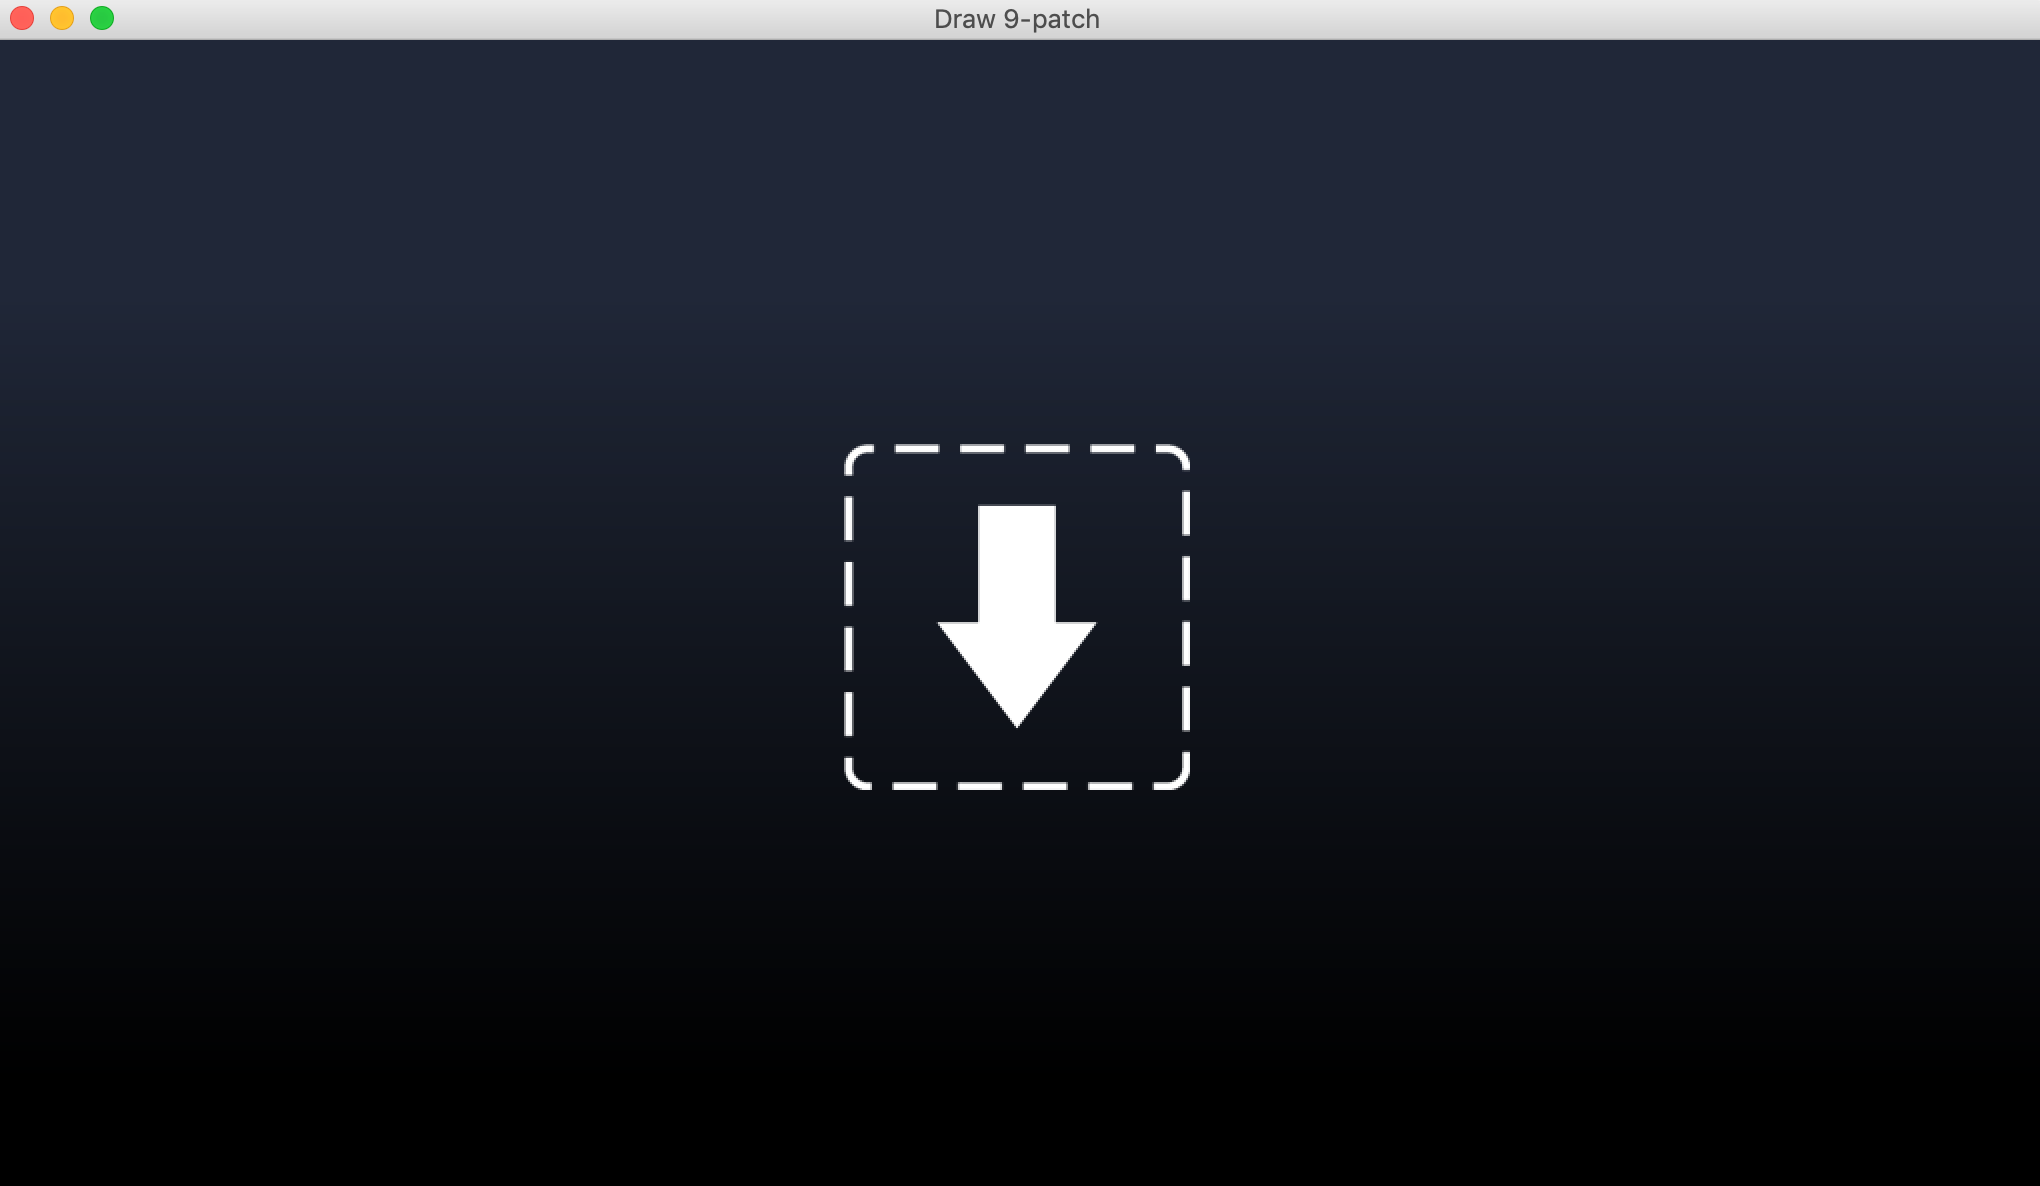
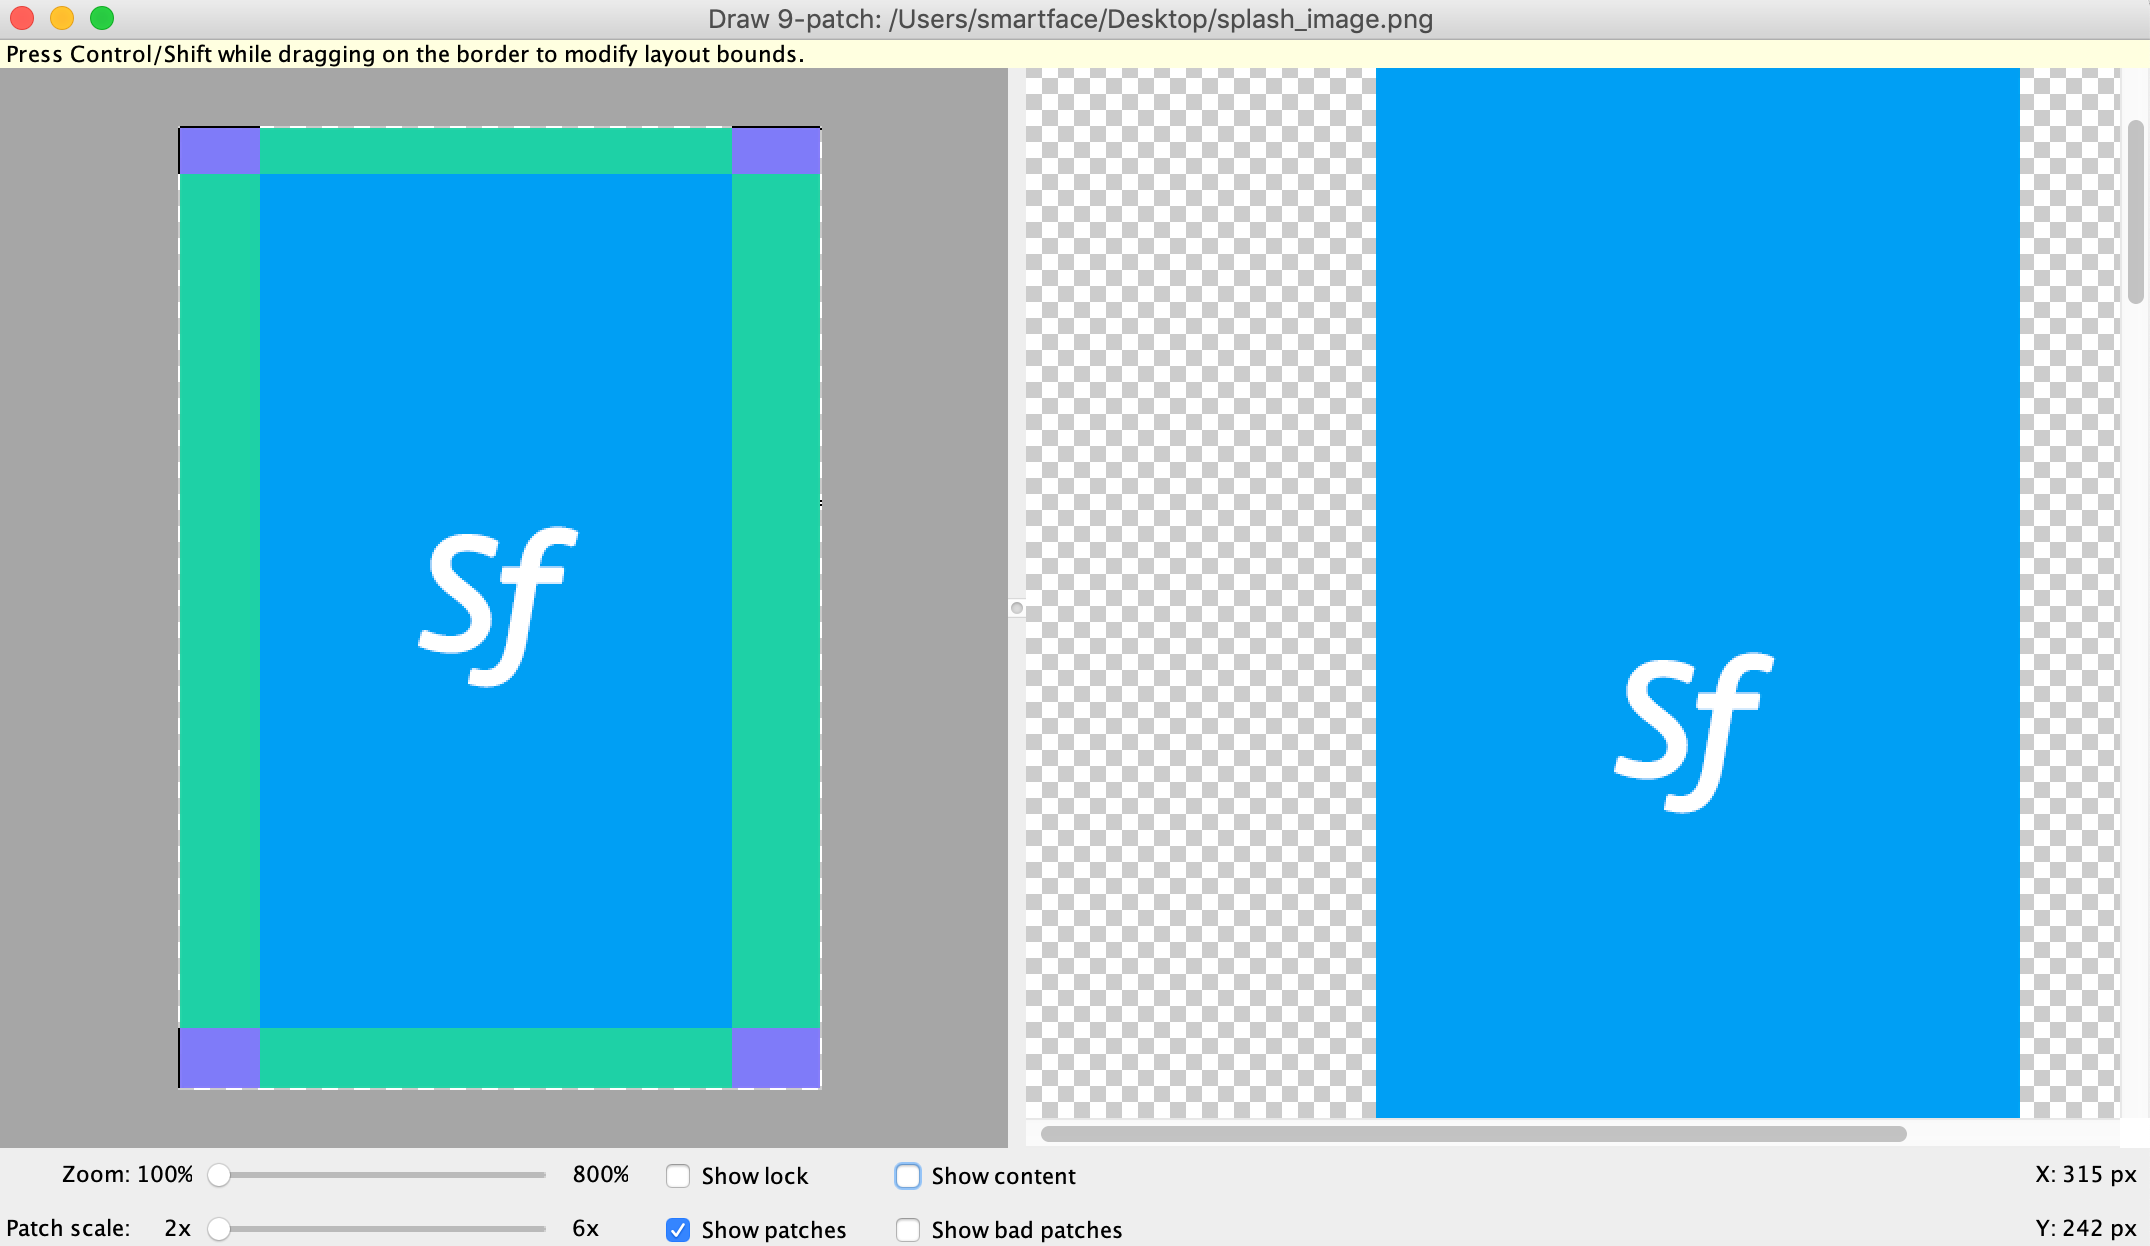
Step 2 : Drag & drop the splash image over the app. There is 1 pixel space from each edge to draw an indicator for configuration. The left window is the configurable area; the right one shows how it appears when stretched vertically and horizontally.
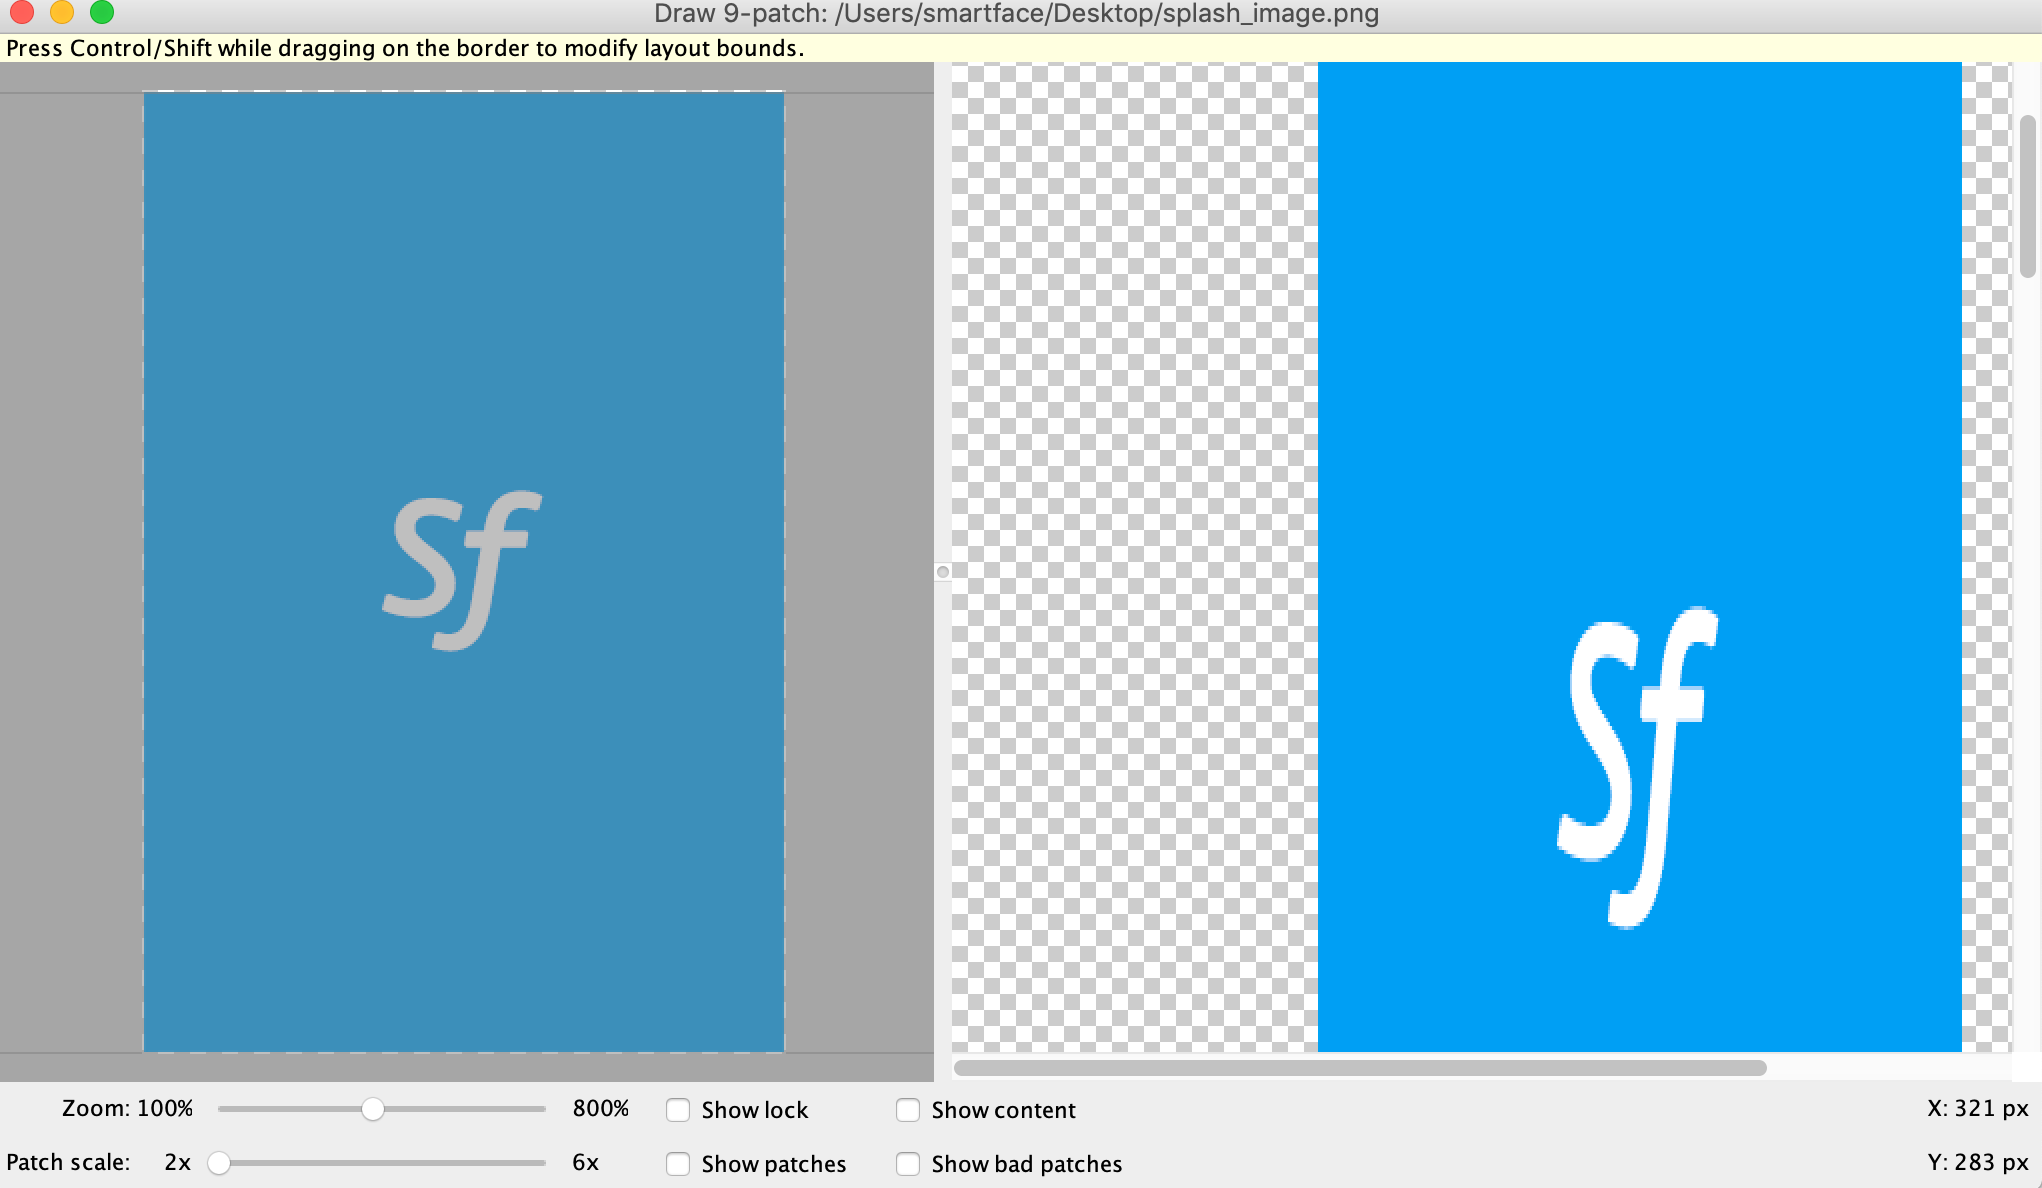
Step 3 : Enable the Show patches toggle to preview the stretchable patches in the drawing area (purple is a stretchable patch). Here, the splash screen is going to be stretched in horizontal but not in vertical.
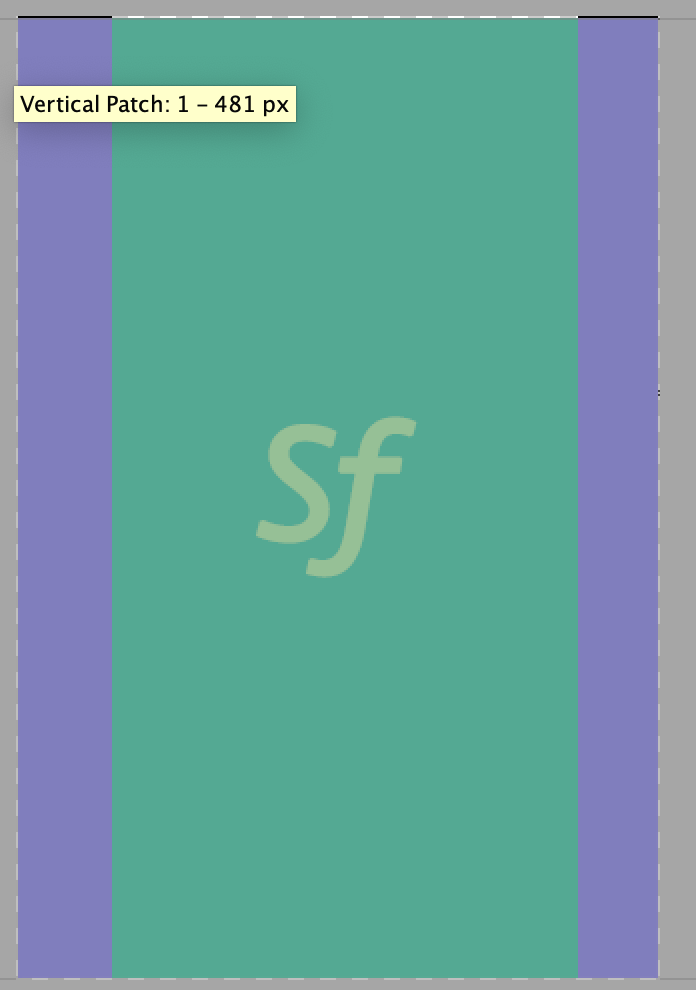
In this case, we would like to stretch the edges rather than the Smartface logo.
For this purpose, draw only the top & left border of the image. After the changes, the Smartface logo isn't stretched in vertical and horizontal as seen in the right pane.
Step 4 : Save the 9-patch image (File > Save 9-patch) which would generate the files with the .9.png extension.
E.g. If your file is splash_image.png, the new filename should be splash_image.9.png
Using Online Tool for Generating 9-Patch Images
The process is fairly similar with Android Studio. The idea is to create 1 px estate to specify which areas your image should extend.
If you are converting your splash image, your drawable name should be splash_image.

After you are done download the zip and extract it. There will be different images inside of different drawable sizes.
Adding Converted 9-patch Image to Smartface IDE
After either converting through online tool or Android Studio, the output should look similar to this:

Before you add this to your Smartface IDE, you should remove the existing splash_image.png files in drawable folders, then add newly generated splash_image.9.png files to their respectable drawable folders.
To remove existing image, easily:
- Add the image in
images/automateddirectory - Right click on it and click Delete Generated Image