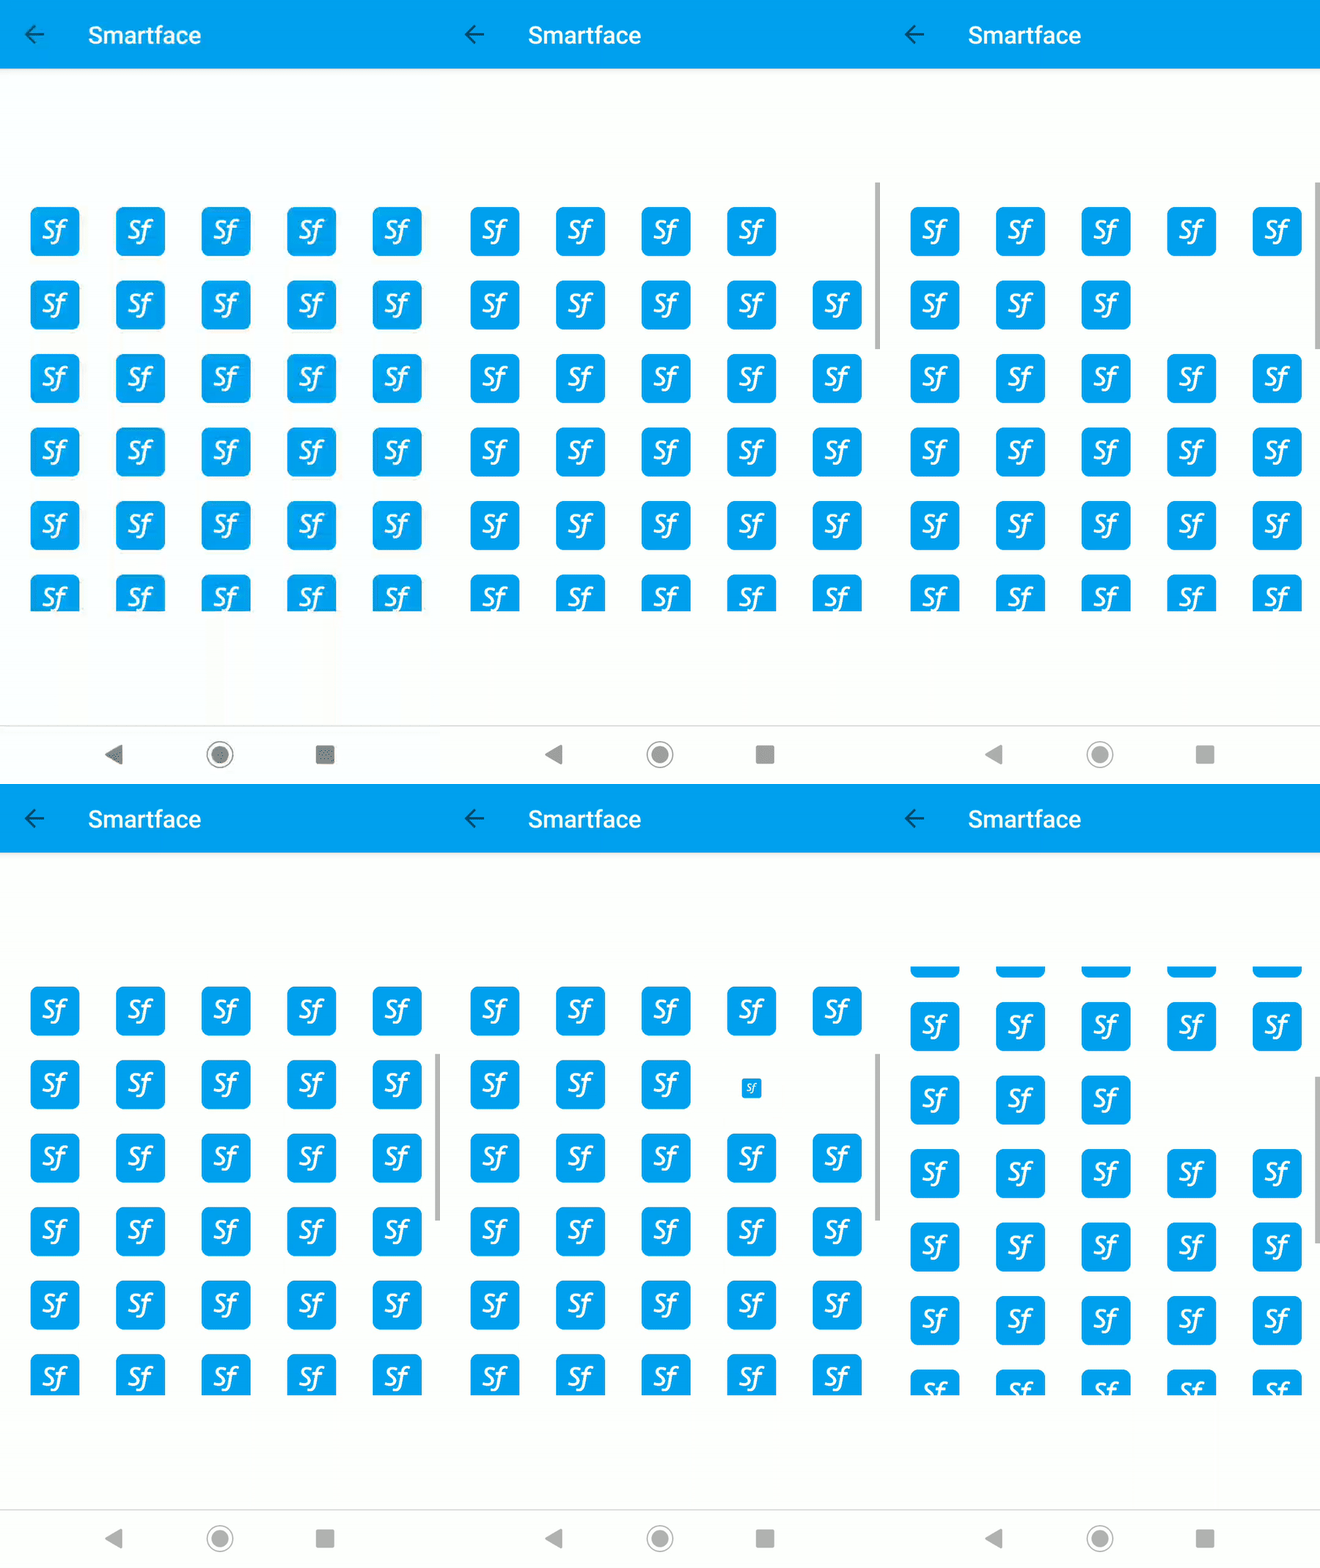
Badge Animation Sample Code
It is possible to achieve this kind of animation code by using nothing but ListView.
While preparing this example, the guide below was used:
Using ListView or GridView with UI Editor- Page Code
- Page UI
- Badge ListViewItem UI
- Single Image Item UI
scripts/pages/pgBadgeAnimation.ts
import PgBadgeAnimationDesign from "generated/pages/pgBadgeAnimation";
import System from "@smartface/native/device/system";import { Route, Router } from "@smartface/router";
import Animator from "@smartface/native/ui/animator";
import LviBadge from "components/LviBadge";
import FlImage from "components/FlImage";


//You should create new Page from UI-Editor and extend with it.
export default class PgBadgeAnimation extends PgBadgeAnimationDesign {
    myButton: Button;
    constructor(private router?: Router, private route?: Route) {
    super({});
  }

  // The page design has been made from the code for better
  // showcase purposes. As a best practice, remove this and
  // use WYSIWYG editor to style your pages.
  centerizeTheChildrenLayout() {
    this.dispatch({
        type: "updateUserStyle",
        userStyle: {
            flexProps: {
              flexDirection: 'ROW',
              justifyContent: 'CENTER',
              alignItems: 'CENTER',
              flexWrap: 'WRAP'
            }
        }
    })
  }

  initListView() {
    this.myListView.onPullRefresh = () => {
      this.refreshListView();
      this.myListView.stopRefresh();
    };

    this.myListView.onRowSelected = (listViewItem: LviBadge, index: number) => {
      console.log("selected index = " + index);
      const visibleScale = { x: 1, y: 1 };
      const inVisibleScale = { x: 0, y: 0 };
      const animationTime = 150;
      const flexlayouts: FlImage[] = [
        listViewItem.flImage,
        listViewItem.flImage1,
        listViewItem.flImage2,
        listViewItem.flImage3,
        listViewItem.flImage4,
      ];
      flexlayouts.forEach((layout) => {
        layout.scale = inVisibleScale;
      });

      Animator.animate(flexlayouts[0].getParent(), animationTime, () => {
        flexlayouts[0].scale = visibleScale;
      })
        .then(animationTime, () => (flexlayouts[1].scale = visibleScale))
        .then(animationTime, () => (flexlayouts[2].scale = visibleScale))
        .then(animationTime, () => (flexlayouts[3].scale = visibleScale))
        .then(animationTime, () => (flexlayouts[4].scale = visibleScale))
        .complete(() => {
          console.log(" Animation is over ");
        });
    };
    }

    refreshListView() {
        this.myListView.refreshData();
      }
  onShow() {
    super.onShow();
    const { headerBar } = System.OS === System.OSType.ANDROID ? this : this.parentController;
    Application.statusBar.visible = true;
    headerBar.visible = true;
  }

  onLoad() {
    super.onLoad();
    this.centerizeTheChildrenLayout();

    this.initListView();
  }
}
.ui/pgBadgeAnimation.pgx
{
    "components": [
        {
            "className": ".sf-page",
            "id": "9fb4-4b97-2e3b-2be8",
            "initialized": true,
            "props": {
                "children": [
                    "e0ab-8566-6341-7b50",
                    "f5d1-1544-8212-67a5",
                    "c5cc-9604-3a19-15f6"
                ],
                "name": "pgBadgeAnimation",
                "orientation": "PORTRAIT",
                "parent": null
            },
            "type": "Page",
            "userProps": {}
        },
        {
            "className": ".sf-statusBar",
            "id": "e0ab-8566-6341-7b50",
            "props": {
                "children": [],
                "isRemovable": false,
                "name": "statusBar",
                "parent": "9fb4-4b97-2e3b-2be8"
            },
            "type": "StatusBar",
            "userProps": {}
        },
        {
            "className": ".sf-headerBar",
            "id": "f5d1-1544-8212-67a5",
            "props": {
                "children": [],
                "isRemovable": false,
                "name": "headerBar",
                "parent": "9fb4-4b97-2e3b-2be8",
                "title": "pgBadgeAnimation"
            },
            "type": "HeaderBar",
            "userProps": {
                "title": "pgBadgeAnimation"
            }
        },
        {
            "className": ".sf-listView",
            "id": "c5cc-9604-3a19-15f6",
            "props": {
                "children": [
                    "aa52-d4d8-c577-db1f"
                ],
                "itemCount": 15,
                "name": "myListView",
                "parent": "9fb4-4b97-2e3b-2be8",
                "rowHeight": 60,
                "usePageVariable": true
            },
            "type": "ListView",
            "userProps": {
                "flexProps": {
                    "flexGrow": 1
                },
                "height": 350,
                "itemCount": 15,
                "rowHeight": 60,
                "testId": "Ul-fB6APP",
                "usePageVariable": true
            }
        },
        {
            "className": ".sf-listViewItem",
            "hiddenComponent": false,
            "id": "aa52-d4d8-c577-db1f",
            "initialized": true,
            "props": {
                "children": [],
                "name": "lviBadge",
                "parent": "c5cc-9604-3a19-15f6"
            },
            "source": {
                "page": "__library__",
                "type": "lviBadge",
                "id": "ec6e-9daa-21e4-274e"
            },
            "type": "ListViewItem",
            "userProps": {
                "flex": {
                    "positionType": 0
                },
                "flexProps": {
                    "positionType": "RELATIVE"
                },
                "left": 0,
                "testId": "TIeR1NGuG",
                "top": 0
            }
        }
    ]
}
.ui/library/lviBadge.cpx
{
    "components": [
        {
            "className": ".sf-listViewItem",
            "id": "ec6e-9daa-21e4-274e",
            "initialized": true,
            "props": {
                "children": [
                    "8d92-d42a-c5d6-2f63"
                ],
                "name": "lviBadge",
                "parent": "57f4-201f-4bfc-5fc6"
            },
            "source": {
                "page": "__library__"
            },
            "type": "ListViewItem",
            "userProps": {
                "flexProps": {},
                "left": 0,
                "testId": "TIeR1NGuG",
                "top": 514.5454545454545
            }
        },
        {
            "className": ".sf-flexLayout",
            "id": "8d92-d42a-c5d6-2f63",
            "props": {
                "children": [
                    "0a0b-b039-6c11-6f37",
                    "6dcc-977c-9027-2582",
                    "a2c1-bda9-0d04-b0d3",
                    "f3fa-7639-7215-9a51",
                    "1187-81d0-5205-fe41"
                ],
                "name": "flWrapper",
                "parent": "ec6e-9daa-21e4-274e",
                "usePageVariable": true
            },
            "source": {
                "page": "__library__"
            },
            "type": "FlexLayout",
            "userProps": {
                "flexProps": {
                    "flexGrow": 1,
                    "flexDirection": "ROW"
                },
                "testId": "t3XWR0grK",
                "usePageVariable": true
            }
        },
        {
            "className": ".sf-flexLayout",
            "hiddenComponent": false,
            "id": "0a0b-b039-6c11-6f37",
            "initialized": true,
            "props": {
                "children": [],
                "name": "flImage",
                "parent": "8d92-d42a-c5d6-2f63",
                "usePageVariable": true
            },
            "source": {
                "page": "__library__",
                "type": "flImage",
                "id": "2ca1-cb03-95f1-c455"
            },
            "type": "FlexLayout",
            "userProps": {
                "flex": {
                    "flexDirection": 2,
                    "positionType": 0
                },
                "flexProps": {
                    "flexDirection": "ROW",
                    "positionType": "RELATIVE"
                },
                "height": 50,
                "left": 0,
                "marginLeft": 20,
                "testId": "HCZssz8KW",
                "top": 0,
                "usePageVariable": true,
                "width": 50
            }
        },
        {
            "className": ".sf-flexLayout",
            "hiddenComponent": false,
            "id": "6dcc-977c-9027-2582",
            "initialized": true,
            "props": {
                "children": [],
                "name": "flImage1",
                "parent": "8d92-d42a-c5d6-2f63",
                "usePageVariable": true
            },
            "source": {
                "page": "__library__",
                "type": "flImage",
                "id": "2ca1-cb03-95f1-c455"
            },
            "type": "FlexLayout",
            "userProps": {
                "flex": {
                    "flexDirection": 2,
                    "positionType": 0
                },
                "flexProps": {
                    "flexDirection": "ROW",
                    "positionType": "RELATIVE"
                },
                "height": 50,
                "left": 0,
                "marginLeft": 20,
                "testId": "HCZssz8KW",
                "top": 0,
                "usePageVariable": true,
                "width": 50
            }
        },
        {
            "className": ".sf-flexLayout",
            "hiddenComponent": false,
            "id": "a2c1-bda9-0d04-b0d3",
            "initialized": true,
            "props": {
                "children": [],
                "name": "flImage2",
                "parent": "8d92-d42a-c5d6-2f63",
                "usePageVariable": true
            },
            "source": {
                "page": "__library__",
                "type": "flImage",
                "id": "2ca1-cb03-95f1-c455"
            },
            "type": "FlexLayout",
            "userProps": {
                "flex": {
                    "flexDirection": 2,
                    "positionType": 0
                },
                "flexProps": {
                    "flexDirection": "ROW",
                    "positionType": "RELATIVE"
                },
                "height": 50,
                "left": 0,
                "marginLeft": 20,
                "testId": "HCZssz8KW",
                "top": 0,
                "usePageVariable": true,
                "width": 50
            }
        },
        {
            "className": ".sf-flexLayout",
            "hiddenComponent": false,
            "id": "f3fa-7639-7215-9a51",
            "initialized": true,
            "props": {
                "children": [],
                "name": "flImage3",
                "parent": "8d92-d42a-c5d6-2f63",
                "usePageVariable": true
            },
            "source": {
                "page": "__library__",
                "type": "flImage",
                "id": "2ca1-cb03-95f1-c455"
            },
            "type": "FlexLayout",
            "userProps": {
                "flex": {
                    "flexDirection": 2,
                    "positionType": 0
                },
                "flexProps": {
                    "flexDirection": "ROW",
                    "positionType": "RELATIVE"
                },
                "height": 50,
                "left": 0,
                "marginLeft": 20,
                "testId": "HCZssz8KW",
                "top": 0,
                "usePageVariable": true,
                "width": 50
            }
        },
        {
            "className": ".sf-flexLayout",
            "hiddenComponent": false,
            "id": "1187-81d0-5205-fe41",
            "initialized": true,
            "props": {
                "children": [],
                "name": "flImage4",
                "parent": "8d92-d42a-c5d6-2f63",
                "usePageVariable": true
            },
            "source": {
                "page": "__library__",
                "type": "flImage",
                "id": "2ca1-cb03-95f1-c455"
            },
            "type": "FlexLayout",
            "userProps": {
                "flex": {
                    "flexDirection": 2,
                    "positionType": 0
                },
                "flexProps": {
                    "flexDirection": "ROW",
                    "positionType": "RELATIVE"
                },
                "height": 50,
                "left": 0,
                "marginLeft": 20,
                "testId": "HCZssz8KW",
                "top": 0,
                "usePageVariable": true,
                "width": 50
            }
        }
    ]
}
.ui/library/flImage.cpx
{
    "components": [
        {
            "className": ".sf-flexLayout",
            "id": "2ca1-cb03-95f1-c455",
            "initialized": true,
            "props": {
                "children": [
                    "e484-4e90-7ed1-3e83"
                ],
                "name": "flImage",
                "parent": "57f4-201f-4bfc-5fc6"
            },
            "source": {
                "page": "__library__"
            },
            "type": "FlexLayout",
            "userProps": {
                "flexProps": {
                    "flexDirection": "ROW"
                },
                "height": 50,
                "marginLeft": 20,
                "testId": "HCZssz8KW",
                "width": 50
            }
        },
        {
            "className": ".sf-imageView",
            "id": "e484-4e90-7ed1-3e83",
            "props": {
                "children": [],
                "name": "imgIcon",
                "parent": "2ca1-cb03-95f1-c455",
                "usePageVariable": true
            },
            "source": {
                "page": "__library__"
            },
            "type": "ImageView",
            "userProps": {
                "height": 40,
                "image": "icon.png",
                "imageFillType": "ASPECTFIT",
                "testId": "AzxLc9-mQ",
                "usePageVariable": true,
                "width": 50
            }
        }
    ]
}
info
For the image, icon.png was used as app icon, but iOS is unable to get that image. You should generate icon.png as Smartface icon in order to get this example working. Check below on how to generate image:

