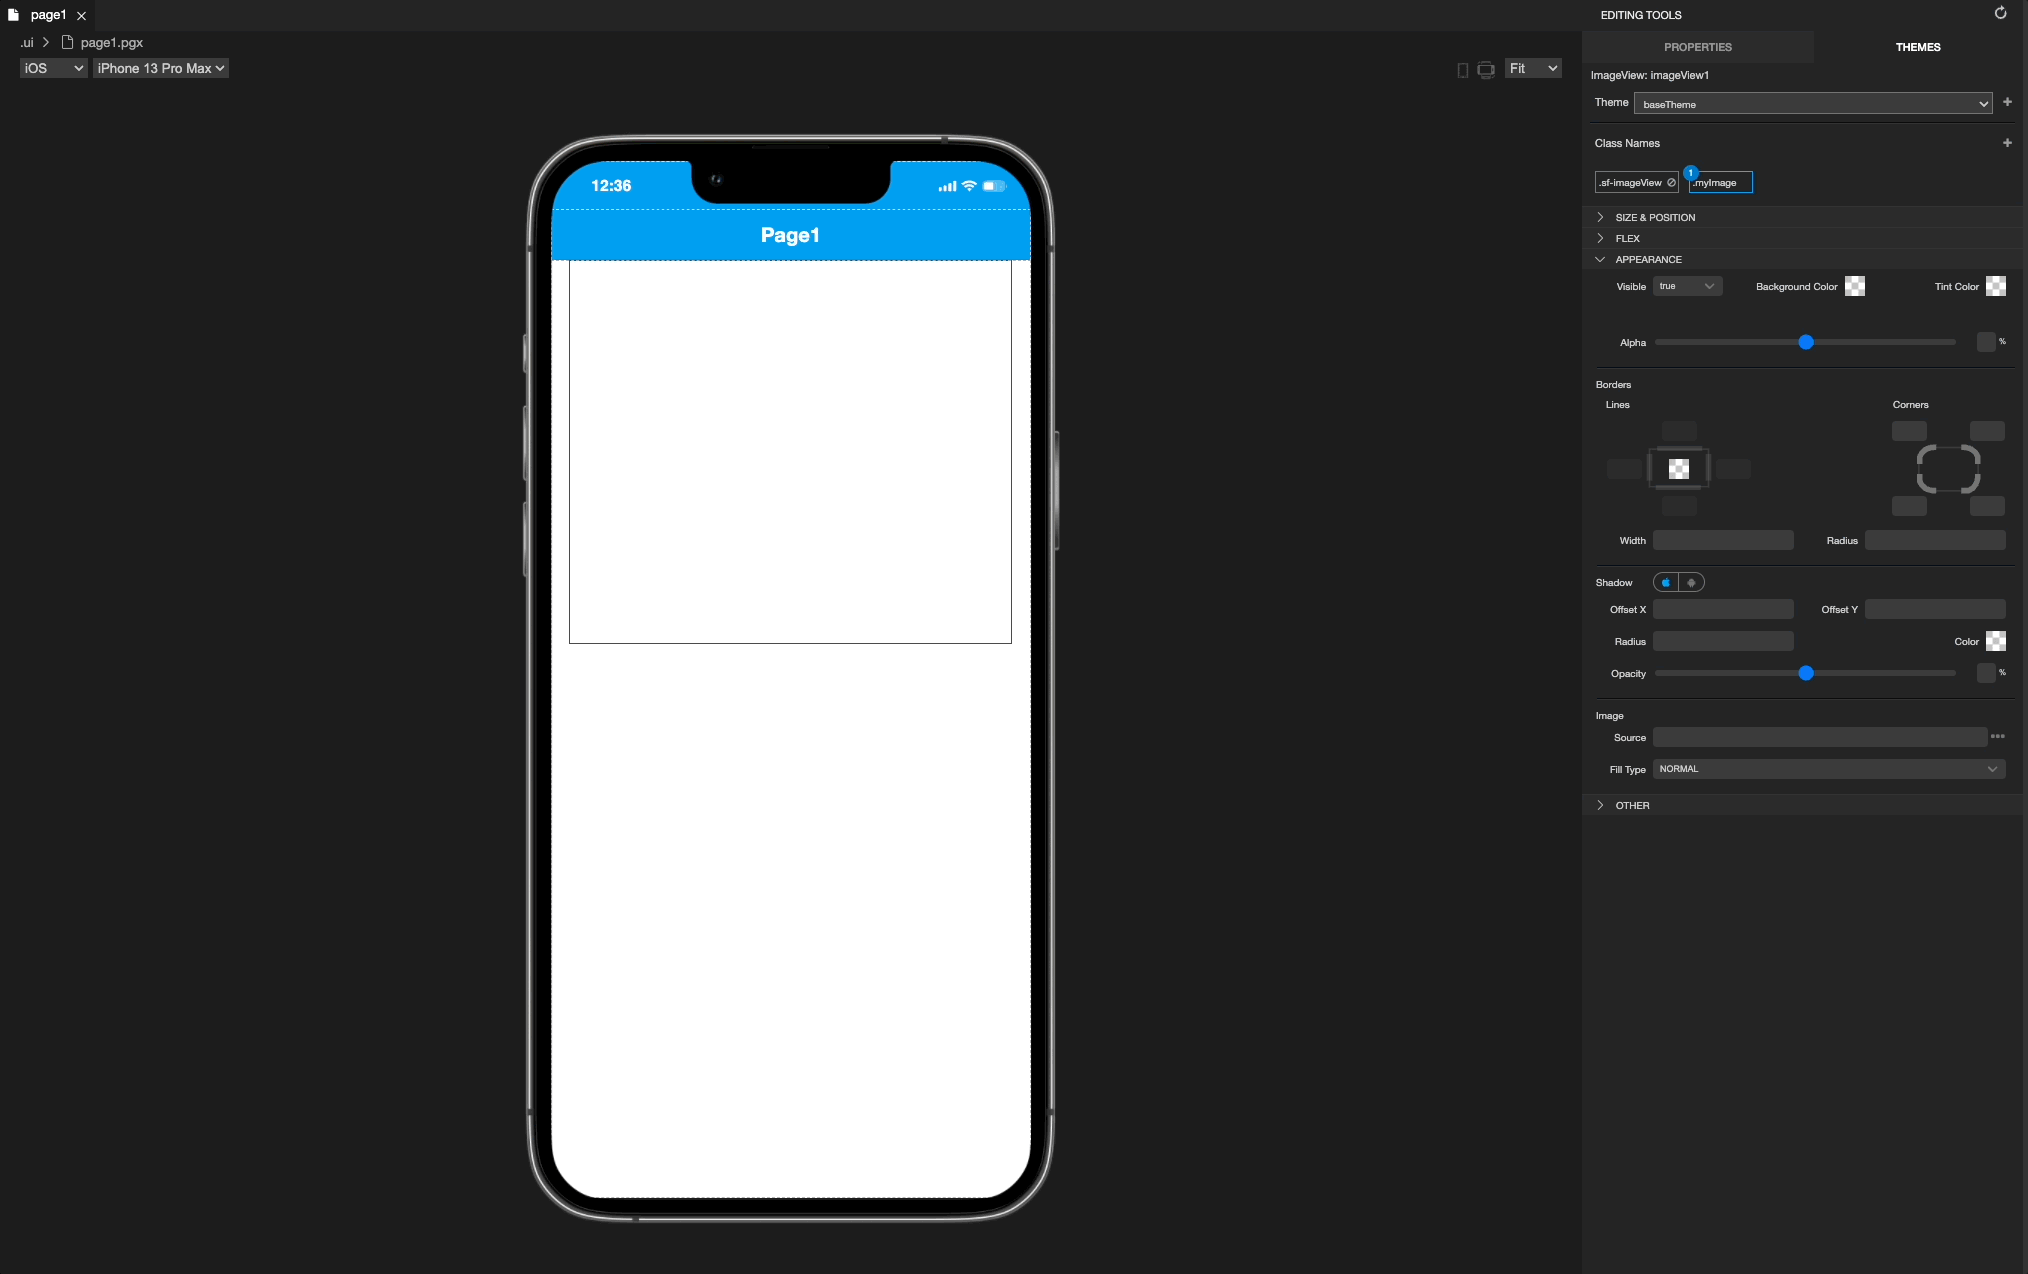
ImageView
API Reference: UI.ImageView ImageView is simply an image container where UI.Image is displayed inside.
Since 6.16.8, ImageView on Android uses Glide instead of Picasso as library.
The components in the example are added from the code for better showcase purposes. To learn more about the subject you can refer to:
Adding Component From CodeAs a best practice, Smartface recommends using the WYSIWYG editor in order to add components and styles to your page or library. To learn how to use UI Editor better, please refer to this documentation
UI Editor Basicsimport PageSampleDesign from "generated/pages/page3";
import Application from "@smartface/native/application";
import Image from "@smartface/native/ui/image";
import ImageView from "@smartface/native/ui/imageview";
import { Route, Router } from "@smartface/router";
import { styleableComponentMixin } from "@smartface/styling-context";
class StyleableImageView extends styleableComponentMixin(ImageView) {}
//You should create new Page from UI-Editor and extend with it.
export default class Sample extends PageSampleDesign {
myImageView: StyleableImageView;
myImage: Image;
constructor(private router?: Router, private route?: Route) {
super({});
}
// The page design has been made from the code for better
// showcase purposes. As a best practice, remove this and
// use WYSIWYG editor to style your pages.
centerizeTheChildrenLayout() {
this.dispatch({
type: "updateUserStyle",
userStyle: {
flexProps: {
flexDirection: "ROW",
justifyContent: "CENTER",
alignItems: "CENTER",
},
},
});
}
onShow() {
super.onShow();
const { headerBar } = this;
Application.statusBar.visible = false;
headerBar.visible = false;
}
onLoad() {
super.onLoad();
this.centerizeTheChildrenLayout();
this.myImage = Image.createFromFile("images://smartface.png");
this.myImageView = new StyleableImageView({
image: this.myImage,
});
this.addChild(this.myImageView, "myImageView", ".sf-imageView", {
left: 0,
width: 300,
height: 400,
});
}
}
While using glide, fade option is not available if the ImageView has fixed width/height assigned as property. If you need a fade option, it is recommend to use flexGrow method instead.
How to make a rounded imageView?
To get the best rounded image, the dimensions of the ImageView should be square(equal width and height).
There are differences for iOS and Android, since Android doesn't accept borderRadius property directly.
iOS
You can directly use borderRadius property on iOS.
Android
Since Android doesn't round the corners of an image depending on the value of imageView borderRadius, you cannot use a directly borderRadius property of imageView on Android
In order to make an Image rounded, please use the following snippet:
this.myImage = this.myImage.android.round(borderRadius);
Example Code with differences showing File and URL:
The components in the example are added from the code for better showcase purposes. To learn more about the subject you can refer to:
Adding Component From CodeAs a best practice, Smartface recommends using the WYSIWYG editor in order to add components and styles to your page or library. To learn how to use UI Editor better, please refer to this documentation
UI Editor Basics- ImageView as File
- ImageView as URL
import PageSampleDesign from "generated/pages/pageSample";
import Application from "@smartface/native/application";
import Image from "@smartface/native/ui/image";
import ImageView from "@smartface/native/ui/imageview";
import { Route, Router } from "@smartface/router";
import {
  styleableContainerComponentMixin,
  styleableComponentMixin,
} from "@smartface/styling-context";
import FlexLayout from "@smartface/native/ui/flexlayout";
import { ImageFillType } from "@smartface/native/ui/imageview/imageview";

class StyleableFlexLayout extends styleableContainerComponentMixin(
  FlexLayout
) {}
class StyleableImageView extends styleableComponentMixin(ImageView) {}

//You should create new Page from UI-Editor and extend with it.
export default class Sample extends PageSampleDesign {
  myImageView: StyleableImageView;
  myFlexLayout: StyleableFlexLayout;
  myImage: Image;
  borderRadius: number = 50;

  constructor(private router?: Router, private route?: Route) {
    super({});
  }

  // The page design has been made from the code for better
  // showcase purposes. As a best practice, remove this and
  // use WYSIWYG editor to style your pages.
  centerizeTheChildrenLayout() {
    this.dispatch({
      type: "updateUserStyle",
      userStyle: {
        flexProps: {
          flexDirection: "ROW",
          justifyContent: "CENTER",
          alignItems: "CENTER",
        },
      },
    });
  }

  onShow() {
    super.onShow();
    const { headerBar } = this;
    Application.statusBar.visible = false;
    headerBar.visible = false;
  }

  onLoad() {
    super.onLoad();
    this.centerizeTheChildrenLayout();

    let { borderRadius } = this;

    this.myFlexLayout = new StyleableFlexLayout();

    this.myImage = Image.createFromFile("images://icon.png");
    this.myImage = this.myImage.android.round(borderRadius);

    this.myImageView = new ImageView({
      image: this.myImage,
    });

    this.addChild(this.myFlexLayout, "myFlexLayout", ".sf-flexLayout", {
      width: 100,
      height: 100,
      borderRadius: borderRadius,
      borderWidth: 3,
    });

    this.myFlexLayout.addChild(
      this.myImageView,
      "myImageView",
      ".sf-imageView",
      {
        flexGrow: 1,
        imageFillType: ImageFillType.STRETCH,
      }
    );
  }
}
import PageSampleDesign from "generated/pages/pageSample";
import Application from "@smartface/native/application";
import Image from "@smartface/native/ui/image";
import ImageView from "@smartface/native/ui/imageview";
import { Route, Router } from "@smartface/router";
import {
  styleableContainerComponentMixin,
  styleableComponentMixin,
} from "@smartface/styling-context";
import FlexLayout from "@smartface/native/ui/flexlayout";
import { ImageFillType } from "@smartface/native/ui/imageview/imageview";

class StyleableFlexLayout extends styleableContainerComponentMixin(
  FlexLayout
) {}
class StyleableImageView extends styleableComponentMixin(ImageView) {}

//You should create new Page from UI-Editor and extend with it.
export default class Sample extends PageSampleDesign {
  myImageView: StyleableImageView;
  myFlexLayout: StyleableFlexLayout;
  myImage: Image;
  borderRadius: number = 50;

  constructor(private router?: Router, private route?: Route) {
    super({});
  }

  // The page design has been made from the code for better
  // showcase purposes. As a best practice, remove this and
  // use WYSIWYG editor to style your pages.
  centerizeTheChildrenLayout() {
    this.dispatch({
      type: "updateUserStyle",
      userStyle: {
        flexProps: {
          flexDirection: "ROW",
          justifyContent: "CENTER",
          alignItems: "CENTER",
        },
      },
    });
  }

  onShow() {
    super.onShow();
    const { headerBar } = this;
    Application.statusBar.visible = false;
    headerBar.visible = false;
  }

  onLoad() {
    super.onLoad();
    this.centerizeTheChildrenLayout();

    let { borderRadius } = this;

    this.myFlexLayout = new StyleableFlexLayout();

    this.myImage = Image.createFromFile("images://icon.png");
    this.myImage = this.myImage.android.round(borderRadius);

    this.myImageView = new ImageView({
      image: this.myImage,
    });

    this.myImageView.loadFromUrl({
      url: value,
      onSuccess: () => {
        if (this.imgIcon?.android.round) {
          this.imgIcon = this.imgIcon.android.round(borderRadius);
        }
      },
    });

    this.addChild(this.myFlexLayout, "myFlexLayout", ".sf-flexLayout", {
      width: 100,
      height: 100,
      borderRadius: borderRadius,
      borderWidth: 3,
    });

    this.myFlexLayout.addChild(
      this.myImageView,
      "myImageView",
      ".sf-imageView",
      {
        flexGrow: 1,
        imageFillType: ImageFillType.STRETCH,
      }
    );
  }
}
This snippet creates another flexLayout in order to give the black rounding corners. If you don't want to use that, you don't need to create a flexLayout as wrapper for your ImageView.
Success & Failure Events Of LoadFromUrl
It is possible to retrieve an image from a remote source and use it within an ImageView. Success and failure events are provided when retrieving the image.
Android onSuccess and onFailure fire events are async when sending displaying image at a time. But synch when retrieving from cache. iOS always fire events async.
The components in the example are added from the code for better showcase purposes. To learn more about the subject you can refer to:
Adding Component From CodeAs a best practice, Smartface recommends using the WYSIWYG editor in order to add components and styles to your page or library. To learn how to use UI Editor better, please refer to this documentation
UI Editor Basicsimport PageSampleDesign from "generated/pages/pageSample";
import Application from "@smartface/native/application";
import Image from "@smartface/native/ui/image";
import ImageView from "@smartface/native/ui/imageview";
import { Route, Router } from "@smartface/router";
import {
styleableContainerComponentMixin,
styleableComponentMixin,
} from "@smartface/styling-context";
import ListViewItem from "@smartface/native/ui/listviewitem";
import ListView from "@smartface/native/ui/listview";
import Label from "@smartface/native/ui/label";
import System from "@smartface/native/device/system";
import { ImageFillType } from "@smartface/native/ui/imageview/imageview";
class StyleableListViewItem extends styleableContainerComponentMixin(
ListViewItem
) {}
class StyleableListView extends styleableComponentMixin(ListView) {}
class StyleableLabel extends styleableComponentMixin(Label) {}
class StyleableImageView extends styleableComponentMixin(ImageView) {}
//You should create new Page from UI-Editor and extend with it.
export default class Sample extends PageSampleDesign {
myDataSet: String[] = this.pushDataToArray(500);
index: number = 0;
myListView: StyleableListView;
myListViewItem: StyleableListViewItem;
constructor(private router?: Router, private route?: Route) {
super({});
}
pushDataToArray(count: number): String[] {
let myDataSet = [];
for (let i = 0; i < count; i++) {
if (i % 5 == 0) {
myDataSet.push("fail");
} else {
myDataSet.push(`https://picsum.photos/400/100?image=${i}`);
}
}
return myDataSet;
}
// The page design has been made from the code for better
// showcase purposes. As a best practice, remove this and
// use WYSIWYG editor to style your pages.
centerizeTheChildrenLayout() {
this.dispatch({
type: "updateUserStyle",
userStyle: {
flexProps: {
flexDirection: "ROW",
justifyContent: "CENTER",
alignItems: "CENTER",
},
},
});
}
onShow() {
super.onShow();
const { headerBar } = this;
Application.statusBar.visible = false;
headerBar.visible = false;
}
onLoad() {
super.onLoad();
this.centerizeTheChildrenLayout();
const { myDataSet } = this;
this.myListView = new StyleableListView({
itemCount: myDataSet.length,
});
this.addChild(this.myListView, "myListView", ".sf-listView", {
height: null,
width: null,
flexGrow: 1,
rowHeight: 100,
});
this.myListView.onRowCreate = (): ListViewItem => {
let myListViewItem = new StyleableListViewItem();
this.myListView.dispatch({
type: "addChild",
component: myListViewItem,
name: `listViewItem${++this.index}`,
});
let myImageView = new StyleableImageView();
myImageView.imageFillType = ImageView.FillType.ASPECTFIT;
//@ts-ignore
myListViewItem.addChild(myImageView, "myImageView", ".sf-imageView", {
flexGrow: 1,
marginTop: 10,
marginBottom: 10,
marginLeft: 50,
marginRight: 50,
imageFillType: ImageFillType.ASPECTFIT,
});
let myLabel = new StyleableLabel();
//@ts-ignore
myListViewItem.addChild(myLabel, "myLabel", ".sf-label", {
flexGrow: 1,
});
//@ts-ignore
myListViewItem.myImageView = myImageView;
//@ts-ignore
myListViewItem.myLabel = myLabel;
return myListViewItem;
};
let placeholder = Image.createFromFile("images://imageview_off.png");
let errorImage = Image.createFromFile("images://imageview.png");
this.myListView.onRowBind = (listViewItem: ListViewItem, index: number) => {
//@ts-ignore
const { myImageView, myLabel } = listViewItem;
myImageView.image = undefined;
myLabel.text = "";
myImageView.loadFromUrl({
url: myDataSet[index],
placeholder,
onSuccess: (): void => {
let foundListViewItem =
System.OS === System.OSType.IOS
? this.myListView.listViewItemByIndex(index)
: listViewItem;
if (foundListViewItem)
//@ts-ignore
foundListViewItem.myLabel.text = "Success : " + index;
},
onFailure: (error: any): void => {
let foundListViewItem =
System.OS == "iOS"
? this.myListView.listViewItemByIndex(index)
: listViewItem;
if (foundListViewItem) {
//@ts-ignore
foundListViewItem.myLabel.text = "Error : " + index;
//@ts-ignore
foundListViewItem.myImageView.image = errorImage;
}
},
});
this.dispatch({
type: "updateUserStyle",
userStyle: {
paddingTop: 0,
paddingLeft: 0,
paddingBottom: 0,
paddingRight: 0,
},
});
};
}
}

ImageView With Tint Color
Changes the color of all the non-transparent pixels to the tintColor.
The components in the example are added from the code for better showcase purposes. To learn more about the subject you can refer to:
Adding Component From CodeAs a best practice, Smartface recommends using the WYSIWYG editor in order to add components and styles to your page or library. To learn how to use UI Editor better, please refer to this documentation
UI Editor Basicsimport PageSampleDesign from "generated/pages/pageSample";
import Application from "@smartface/native/application";
import Image from "@smartface/native/ui/image";
import ImageView from "@smartface/native/ui/imageview";
import { Route, Router } from "@smartface/router";
import {
styleableContainerComponentMixin,
styleableComponentMixin,
} from "@smartface/styling-context";
import ListViewItem from "@smartface/native/ui/listviewitem";
import ListView from "@smartface/native/ui/listview";
import Label from "@smartface/native/ui/label";
import System from "@smartface/native/device/system";
import Color from "@smartface/native/ui/color";
class StyleableImageView extends styleableComponentMixin(ImageView) {}
//You should create new Page from UI-Editor and extend with it.
export default class Sample extends PageSampleDesign {
index: number = 0;
imageView: StyleableImageView;
constructor(private router?: Router, private route?: Route) {
super({});
}
// The page design has been made from the code for better
// showcase purposes. As a best practice, remove this and
// use WYSIWYG editor to style your pages.
centerizeTheChildrenLayout() {
this.dispatch({
type: "updateUserStyle",
userStyle: {
flexProps: {
flexDirection: "ROW",
justifyContent: "CENTER",
alignItems: "CENTER",
},
},
});
}
onShow() {
super.onShow();
const { headerBar } = this;
Application.statusBar.visible = false;
headerBar.visible = false;
}
onLoad() {
super.onLoad();
this.centerizeTheChildrenLayout();
let image = Image.createFromFile("images://smartface.png");
if (System.OS === System.OSType.IOS)
image = image.ios.imageWithRenderingMode(
Image.iOS.RenderingMode.TEMPLATE
);
this.imageView = new StyleableImageView({
image,
tintColor: Color.RED,
});
this.addChild(this.imageView, "imageView", ".sf-imageView", {
height: null,
width: null,
flexGrow: 1,
});
}
}
RenderingMode for Images
On iOS, there is a property called imageWithRenderingMode that gives you the ability to determine how ImageView uses the tintColor information while displaying the image.
To learn its capabilities let's see the values we can set to this property with RenderingMode Enum.
import Image from "@smartface/native/ui/image";
let image = Image.createFromFile("images://smartface.png");
if (System.OS === System.OSType.IOS) {
  image = image.ios.imageWithRenderingMode(Image.iOS.RenderingMode.TEMPLATE);
  image = image.ios.imageWithRenderingMode(Image.iOS.RenderingMode.ORIGINAL);
  image = image.ios.imageWithRenderingMode(Image.iOS.RenderingMode.AUTOMATIC);
}
RenderingMode.TEMPLATE: When your image's RenderingMode is set to TEMPLATE, the Image's original color information will be ignored and the tintColor will be applied.RenderingMode.ORIGINAL: When your image's RenderingMode is set to ORIGINAL, the Image will always be displayed as is, tintColor will be ignored.RenderingMode.AUTOMATIC: When your image's RenderingMode is set to AUTOMATIC, the Image will use the default rendering mode for the context where the image is used.
RTL Image
When a UI is changed from LTR to RTL (or vice-versa), it’s often called mirroring. When a UI changes from one direction to another, direction of image changes automatically related to system or application direction.
On iOS flipsForRightToLeftLayoutDirection also changes direction of image.
The components in the example are added from the code for better showcase purposes. To learn more about the subject you can refer to:
Adding Component From CodeAs a best practice, Smartface recommends using the WYSIWYG editor in order to add components and styles to your page or library. To learn how to use UI Editor better, please refer to this documentation
UI Editor Basicsimport PageSampleDesign from "generated/pages/pageSample";
import Application from "@smartface/native/application";
import Image from "@smartface/native/ui/image";
import ImageView from "@smartface/native/ui/imageview";
import { Route, Router } from "@smartface/router";
import {
styleableContainerComponentMixin,
styleableComponentMixin,
} from "@smartface/styling-context";
import System from "@smartface/native/device/system";
import FlexLayout from "@smartface/native/ui/flexlayout";
import { ImageFillType } from "@smartface/native/ui/imageview/imageview";
class StyleableImageView extends styleableComponentMixin(ImageView) {}
class StyleableFlexLayout extends styleableContainerComponentMixin(
FlexLayout
) {}
//You should create new Page from UI-Editor and extend with it.
export default class Sample extends PageSampleDesign {
index: number = 0;
imageView: StyleableImageView;
image: Image;
myFlexLayout: StyleableFlexLayout;
constructor(private router?: Router, private route?: Route) {
super({});
}
// The page design has been made from the code for better
// showcase purposes. As a best practice, remove this and
// use WYSIWYG editor to style your pages.
centerizeTheChildrenLayout() {
this.dispatch({
type: "updateUserStyle",
userStyle: {
flexProps: {
flexDirection: "ROW",
justifyContent: "CENTER",
alignItems: "CENTER",
},
},
});
}
onShow() {
super.onShow();
const { headerBar } = this;
Application.statusBar.visible = false;
headerBar.visible = false;
}
onLoad() {
super.onLoad();
this.centerizeTheChildrenLayout();
this.image = Image.createFromFile("images://smartface.png");
this.image.autoMirrored = true;
if (System.OS === System.OSType.IOS)
this.image = this.image.ios.imageWithRenderingMode(
Image.iOS.RenderingMode.TEMPLATE
);
this.myFlexLayout = new StyleableFlexLayout({
width: 200,
height: 100,
});
this.imageView = new ImageView({
image: this.image,
});
this.addChild(this.myFlexLayout, "myFlexLayout", ".sf-flexLayout", {
width: 200,
height: 100,
});
this.myFlexLayout.addChild(this.imageView, "imageView", ".sf-imageView", {
flexGrow: 1,
imageFillType: ImageFillType.STRETCH,
});
}
}
How to load image from a remote service
In the path of developing a mobile app, you will be using REST services to interact your backend services. If you have a service which provides an image as a base64 string, down below we are explaining how to show that on the screen.
import Blob from "@smartface/native/blob";
import Image from "@smartface/native/ui/image";

// Get image from remote service
let base64 =
  "R0lGODlhPQBEAPeoAJosM//AwO/AwHVYZ/z595kzAP/s7P+goOXMv8+fhw/v739/f+8PD98fH/8mJl+fn/9ZWb8/PzWlwv///6wWGbImAPgTEMImIN9gUFCEm/gDALULDN8PAD6atYdCTX9gUNKlj8wZAKUsAOzZz+UMAOsJAP/Z2ccMDA8PD/95eX5NWvsJCOVNQPtfX/8zM8+QePLl38MGBr8JCP+zs9myn/8GBqwpAP/GxgwJCPny78lzYLgjAJ8vAP9fX/+MjMUcAN8zM/9wcM8ZGcATEL+QePdZWf/29uc/P9cmJu9MTDImIN+/r7+/vz8/P8VNQGNugV8AAF9fX8swMNgTAFlDOICAgPNSUnNWSMQ5MBAQEJE3QPIGAM9AQMqGcG9vb6MhJsEdGM8vLx8fH98AANIWAMuQeL8fABkTEPPQ0OM5OSYdGFl5jo+Pj/+pqcsTE78wMFNGQLYmID4dGPvd3UBAQJmTkP+8vH9QUK+vr8ZWSHpzcJMmILdwcLOGcHRQUHxwcK9PT9DQ0O/v70w5MLypoG8wKOuwsP/g4P/Q0IcwKEswKMl8aJ9fX2xjdOtGRs/Pz+Dg4GImIP8gIH0sKEAwKKmTiKZ8aB/f39Wsl+LFt8dgUE9PT5x5aHBwcP+AgP+WltdgYMyZfyywz78AAAAAAAD///8AAP9mZv///wAAAAAAAAAAAAAAAAAAAAAAAAAAAAAAAAAAAAAAAAAAAAAAAAAAAAAAAAAAAAAAAAAAAAAAAAAAAAAAAAAAAAAAAAAAAAAAAAAAAAAAAAAAAAAAAAAAAAAAAAAAAAAAAAAAAAAAAAAAAAAAAAAAAAAAAAAAAAAAAAAAAAAAAAAAAAAAAAAAAAAAAAAAAAAAAAAAAAAAAAAAAAAAAAAAAAAAAAAAAAAAAAAAAAAAAAAAAAAAAAAAAAAAAAAAAAAAAAAAAAAAAAAAAAAAAAAAAAAAAAAAAAAAAAAAAAAAAAAAAAAAAAAAAAAAAAAAAAAAAAAAAAAAAAAAAAAAAAAAAAAAAAAAACH5BAEAAKgALAAAAAA9AEQAAAj/AFEJHEiwoMGDCBMqXMiwocAbBww4nEhxoYkUpzJGrMixogkfGUNqlNixJEIDB0SqHGmyJSojM1bKZOmyop0gM3Oe2liTISKMOoPy7GnwY9CjIYcSRYm0aVKSLmE6nfq05QycVLPuhDrxBlCtYJUqNAq2bNWEBj6ZXRuyxZyDRtqwnXvkhACDV+euTeJm1Ki7A73qNWtFiF+/gA95Gly2CJLDhwEHMOUAAuOpLYDEgBxZ4GRTlC1fDnpkM+fOqD6DDj1aZpITp0dtGCDhr+fVuCu3zlg49ijaokTZTo27uG7Gjn2P+hI8+PDPERoUB318bWbfAJ5sUNFcuGRTYUqV/3ogfXp1rWlMc6awJjiAAd2fm4ogXjz56aypOoIde4OE5u/F9x199dlXnnGiHZWEYbGpsAEA3QXYnHwEFliKAgswgJ8LPeiUXGwedCAKABACCN+EA1pYIIYaFlcDhytd51sGAJbo3onOpajiihlO92KHGaUXGwWjUBChjSPiWJuOO/LYIm4v1tXfE6J4gCSJEZ7YgRYUNrkji9P55sF/ogxw5ZkSqIDaZBV6aSGYq/lGZplndkckZ98xoICbTcIJGQAZcNmdmUc210hs35nCyJ58fgmIKX5RQGOZowxaZwYA+JaoKQwswGijBV4C6SiTUmpphMspJx9unX4KaimjDv9aaXOEBteBqmuuxgEHoLX6Kqx+yXqqBANsgCtit4FWQAEkrNbpq7HSOmtwag5w57GrmlJBASEU18ADjUYb3ADTinIttsgSB1oJFfA63bduimuqKB1keqwUhoCSK374wbujvOSu4QG6UvxBRydcpKsav++Ca6G8A6Pr1x2kVMyHwsVxUALDq/krnrhPSOzXG1lUTIoffqGR7Goi2MAxbv6O2kEG56I7CSlRsEFKFVyovDJoIRTg7sugNRDGqCJzJgcKE0ywc0ELm6KBCCJo8DIPFeCWNGcyqNFE06ToAfV0HBRgxsvLThHn1oddQMrXj5DyAQgjEHSAJMWZwS3HPxT/QMbabI/iBCliMLEJKX2EEkomBAUCxRi42VDADxyTYDVogV+wSChqmKxEKCDAYFDFj4OmwbY7bDGdBhtrnTQYOigeChUmc1K3QTnAUfEgGFgAWt88hKA6aCRIXhxnQ1yg3BCayK44EWdkUQcBByEQChFXfCB776aQsG0BIlQgQgE8qO26X1h8cEUep8ngRBnOy74E9QgRgEAC8SvOfQkh7FDBDmS43PmGoIiKUUEGkMEC/PJHgxw0xH74yx/3XnaYRJgMB8obxQW6kL9QYEJ0FIFgByfIL7/IQAlvQwEpnAC7DtLNJCKUoO/w45c44GwCXiAFB/OXAATQryUxdN4LfFiwgjCNYg+kYMIEFkCKDs6PKAIJouyGWMS1FSKJOMRB/BoIxYJIUXFUxNwoIkEKPAgCBZSQHQ1A2EWDfDEUVLyADj5AChSIQW6gu10bE/JG2VnCZGfo4R4d0sdQoBAHhPjhIB94v/wRoRKQWGRHgrhGSQJxCS+0pCZbEhAAOw==";

base64 = base64.split(";base64,")[1]; // Refer the hint below
const blob = Blob.createFromBase64(base64);
const image = Image.createFromBlob(blob);

// Add an ImageView object to your page from UI editor named imageView1
this.imageView1.image = image;
Due to createFromBlobmethod using native API for both platforms, on some devices base64 header might cause the method returning as invalid base64. In that case, it is necessary to strip the header of base64 before using it.

Caching Images
There is a various library to cache images. For example Glide, Picasso, Fresco, etc.
On Smartface platform, we are using Glide library to cache images.
Glide is a fast and efficient image loading library for Android focused on smooth scrolling. Glide offers an easy to use API, a performant and extensible resource decoding pipeline and automatic resource pooling.
For more information, please refer to the Glide documentation
https://bumptech.github.io/glide/
In Android there is 3 ways to cache images.
Memory Caching
- The image is cached in memory until the device is restarted.
- Fastest way to load images.
Disk Caching
- The image is cached on device disk.
If your app contains a lot of images, be careful with disk caching. Because it is cached on device disk, it will consume a lot of disk space.
HTTP Caching
- HTTP Caching is similiar to Disk Caching.
loadFromUrlHeader parameters can be used to further control HTTP Caching:- Cache-Control : PUBLIC | PRIVATE | NO-CACHE | NO-STORE
For more information about HTTP Caching, refer to HTTP Caching
Image loading is done in the following fundamental steps:
If the memory cache is available and the image is in the memory cache, the image is loaded from the memory cache.
If the memory cache is not available or the image is not in the memory cache, the image is loaded from the disk cache.
If the HTTP cache is available, the image is loaded from the http or disk cache.
If the HTTP cache is not available, the disk cache is available, and the image cached on disk before, the image is loaded from the disk cache, otherwise the image is loaded from the network.
If HTTP caching and disk caching is not available, the image will always be loaded from the network.
The components in the example are added from the code for better showcase purposes. To learn more about the subject you can refer to:
Adding Component From CodeAs a best practice, Smartface recommends using the WYSIWYG editor in order to add components and styles to your page or library. To learn how to use UI Editor better, please refer to this documentation
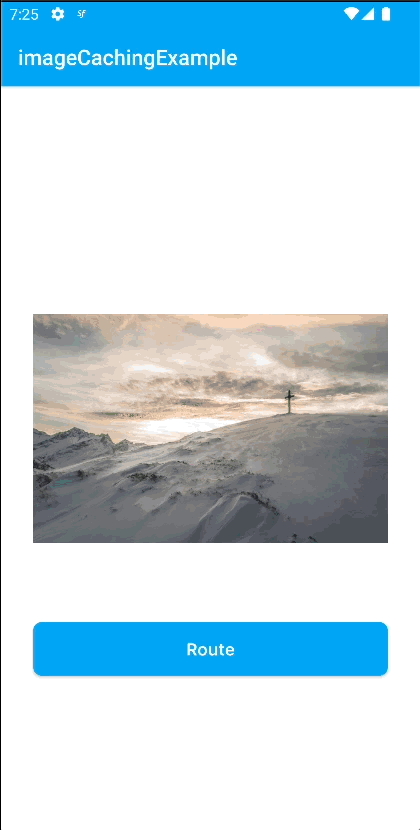
UI Editor BasicsBelow example shows what happens when disk caching is available and disk caching is not available.
- Page
import ImageCachingExampleDesign from "generated/pages/imageCachingExample";
import { withDismissAndBackButton } from "@smartface/mixins";
import { Router, Route } from "@smartface/router";
import Button from "@smartface/native/ui/button";

export default class ImageCachingExample extends withDismissAndBackButton(
  ImageCachingExampleDesign
) {
  constructor(private router?: Router, private route?: Route) {
    super({});
  }

  /**
   * @event onShow
   * This event is called when the page appears on the screen (everytime).
   */
  onShow() {
    super.onShow();
  }

  /**
   * @event onLoad
   * This event is called once when the page is created.
   */
  onLoad() {
    super.onLoad();
    this.myImageView.loadFromUrl({
      url: "https://i.picsum.photos/id/1005/5760/3840.jpg?hmac=2acSJCOwz9q_dKtDZdSB-OIK1HUcwBeXco_RMMTUgfY",
      useHTTPCacheControl: true,
      android: {
        useMemoryCache: false,
        useDiskCache: true,
      },
    });
  }
}

Memory caching share the similiar behavior as disk caching.
this.myImageView.loadFromUrl({
  url: "https://i.picsum.photos/id/1005/5760/3840.jpg?hmac=2acSJCOwz9q_dKtDZdSB-OIK1HUcwBeXco_RMMTUgfY",
  useHTTPCacheControl: true,
  android: {
    cacheSignature: "cacheSignatureHere",
  },
});
cacheSignature parameter to manually invalidate disk and memory cache. Providing the unique cacheSignature parameter invalidates cache. It can be used in loadFromUrl, loadFromFile methods in ImageView. (Android only)
Select image from generated folder or import from local
You can select image from generated folder or import from local.
ImageView.FillType Picker
Common properties in FillType Picker can be selected via IDE. Other iOS-only properties can be used in code editor.
The properties that can be select in IDE:
- NORMAL
- STRETCH
- ASPECTFIT
- ASPECTFILL
The properties that can be select in Code Editor:
- NORMAL
- STRETCH
- ASPECTFIT
- ASPECTFILL
- MIDCENTER
- TOPCENTER
- BOTTOMCENTER
- MIDLEFT
- MIDRIGHT
- TOPLEFT
- TOPRIGHT
- BOTTOMLEFT
- BOTTOMRIGHT