Localization
This guide explains how to implement multilanguage support in your Smartface applications. Smartface applications uses Smartface/i18n package by default. Smartface/i18n package built with i18next. It creates an instance on application launch and uses that instance in every import.
Adding a New Language to the App
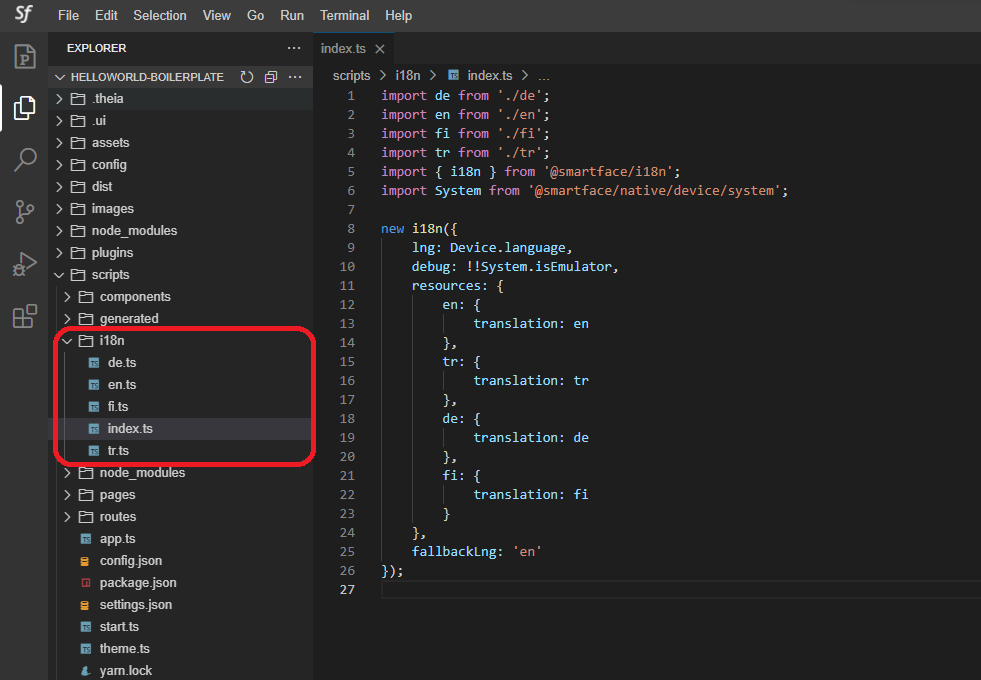
Smartface supports the i18n localization system. index.ts is available in the scripts/i18n folder. Some language files added by default. You can also add your own language with the following steps:
- Create a copy of one of the language .ts files in the i18n folder.
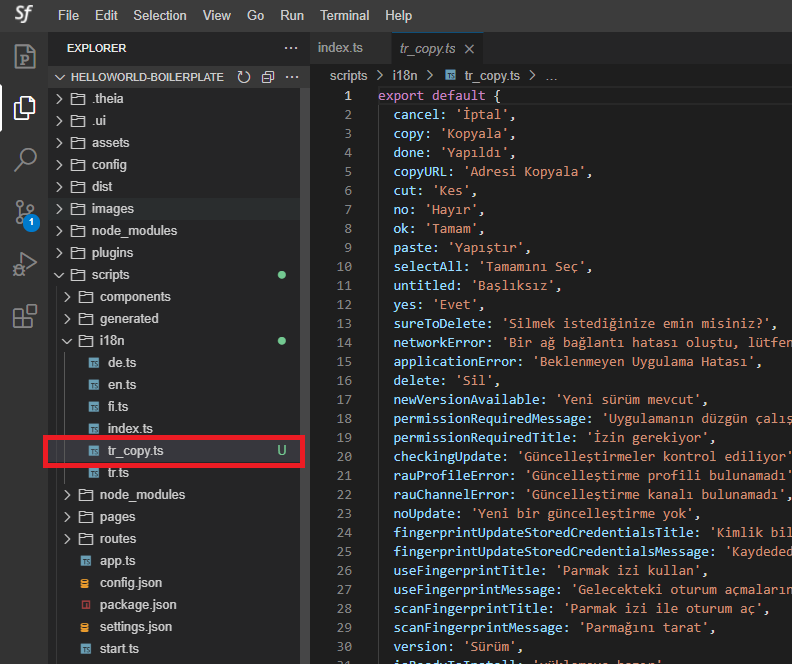
- Rename and edit the .ts file accordingly. (tr_copy.ts in this case)
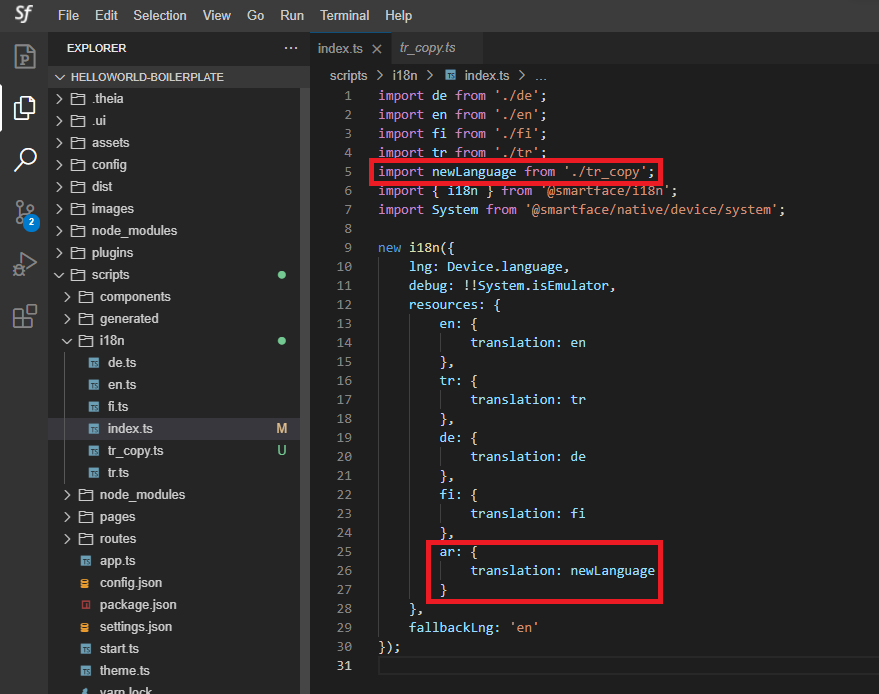
- In the next step, you need to “import” that file in the i18n/index.ts file.
Changing the Default App Language
If you want to change the app language, go to i18n/index.ts file and edit the “lng” parameter inside i18n object. For example; set “en” for English. To use the device locale as default, you can leave as “Device.language”.
Changing the Language in Runtime
First import the Smartface/i18n package.
import { i18n } from '@smartface/i18n';
After that you can use i18n.changeLanguage('ar', (error) => console.error(error)) function to change the language. Error callback is optional.
After changing the language in runtime you need to reassign strings to User Interfaces.
i18n.instance.languagereturns the current language code of the app is being run.
Few languages such as Arabic, Hebrew, or Persian are written from Right to Left. To handle them, views can be converted to RTL theme within Smartface.
When your app calls checkPermission(permission), the system shows a standard dialog box to the user. Your app cannot configure or alter that dialog box. If you need to provide any information or explanation to the user, you should do that before you call checkPermission(permission), as described in Explain why the app needs permissions.
Language Implementation in the User Interface
Let's add some key-value pairs to language files.
export default {
  /*
   *
   *
   */
  helloWorld: "Hello World",
  welcomeUser: "Welcome {{user}}",
  keyWithCount_one: "{{count}} key",
  keyWithCount_other: "{{count}} keys",
};
To assign these strings we need to import Smartface/i18n package first.
import { i18n } from '@smartface/i18n';
After that you can get the strings like below:
i18n.instance.t('helloWorld') this will return “Hello World”
The instance we are using is an i18next instance. We can use every capability that i18next offers.
i18n.instance.t('welcomeUser', { user: 'Smartface' }) // Using variables inside strings. This line will print “Welcome Smartface”
i18n.instance.t('keyWithCount', {count: 0}) // Using count to modify the string. This line will print “0 keys”
i18n.instance.t('keyWithCount', {count: 1}) // Using count to modify the string. This line will print “1 key”
i18n.instance.t('keyWithCount', {count: 5}) // Using count to modify the string. This line will print “5 keys”
You can assign strings directly in constructor on pages or components
- Page Usage
- Component Usage
import Page1Design from "generated/pages/page1";
import { Route, Router } from "@smartface/router";
import { i18n } from "@smartface/i18n";

export default class Page1 extends Page1Design {
  constructor(private router?: Router, private route?: Route) {
    super({});
    this.btnNext.text = i18n.instance.t("nextPage"); // Text is assigned
  }
  onShow() {
    super.onShow();
  }
  onLoad() {
    super.onLoad();
  }

  onHide(): void {
    this.dispose();
  }
}
import Simple_gridviewItemDesign from "generated/my-components/Simple_gridviewItem";
import { i18n } from "@smartface/i18n";

export default class Simple_gridviewItem extends Simple_gridviewItemDesign {
  pageName?: string | undefined;
  constructor(props?: any, pageName?: string) {
    super(props);
    this.pageName = pageName;
    this.lblTitle.text = i18n.instance.t("helloWorld"); // Text is assigned
  }
}
Handling permission and platform controlled dialog contents
Both Android and iOS has their own dialog structure. For native experience, Smartface advises to use what platform offers.
Texts on Android can be changed by the developer, so you can use common localization methods to customize them.
For iOS, Permission and some native dialogs cannot be customized on runtime, therefore developer needs to define what texts to use on Info.plist.
- Create a folder called Localization inside of config/iOS.
- Create a folder called e.g. en.lproj and a new folder for each language you want to include. Languages should be alpha2 coded.
- Inside of each folder, create a new file called InfoPlist.strings and populate the file like example is shown at below:
- config/iOS/Localization/en.Iproj/InfoPlist.strings
- config/iOS/Localization/fr.lproj/InfoPlist.strings
"NSLocationWhenInUseUsageDescription" = "Location access is required";
"NSPhotoLibraryUsageDescription" = "Gallery access is required";
"NSCameraUsageDescription" = "Camera access is required";
"NSLocationWhenInUseUsageDescription" = "L'accès à l'emplacement est requis";
"NSPhotoLibraryUsageDescription" = "L'accès à la galerie est obligatoire";
"NSCameraUsageDescription" = "L'accès à la caméra est requis";
You can check what keys can be customized on this Apple documentation
Don't forget to add relevant keys in Info.plist file in xml format as well. The language in the xml module should be in your default language, for failsafe approach.
Also refer: AboutInformationPropertyListFiles