Image Generation
iOS and Android handles images differently. iOS uses 1x..3x format and Android uses xxhdpi, hdpi format and so on. To overcome those quirks and seamlessly handle image handling for both OS, Smartface has auto image generation feature in the Smartface IDE.
You need to have package sfImageProcessor for image generation. This package is installed by default on the boilerplate. You can also use cli of the package directly if you have lots of image or some other purposes.
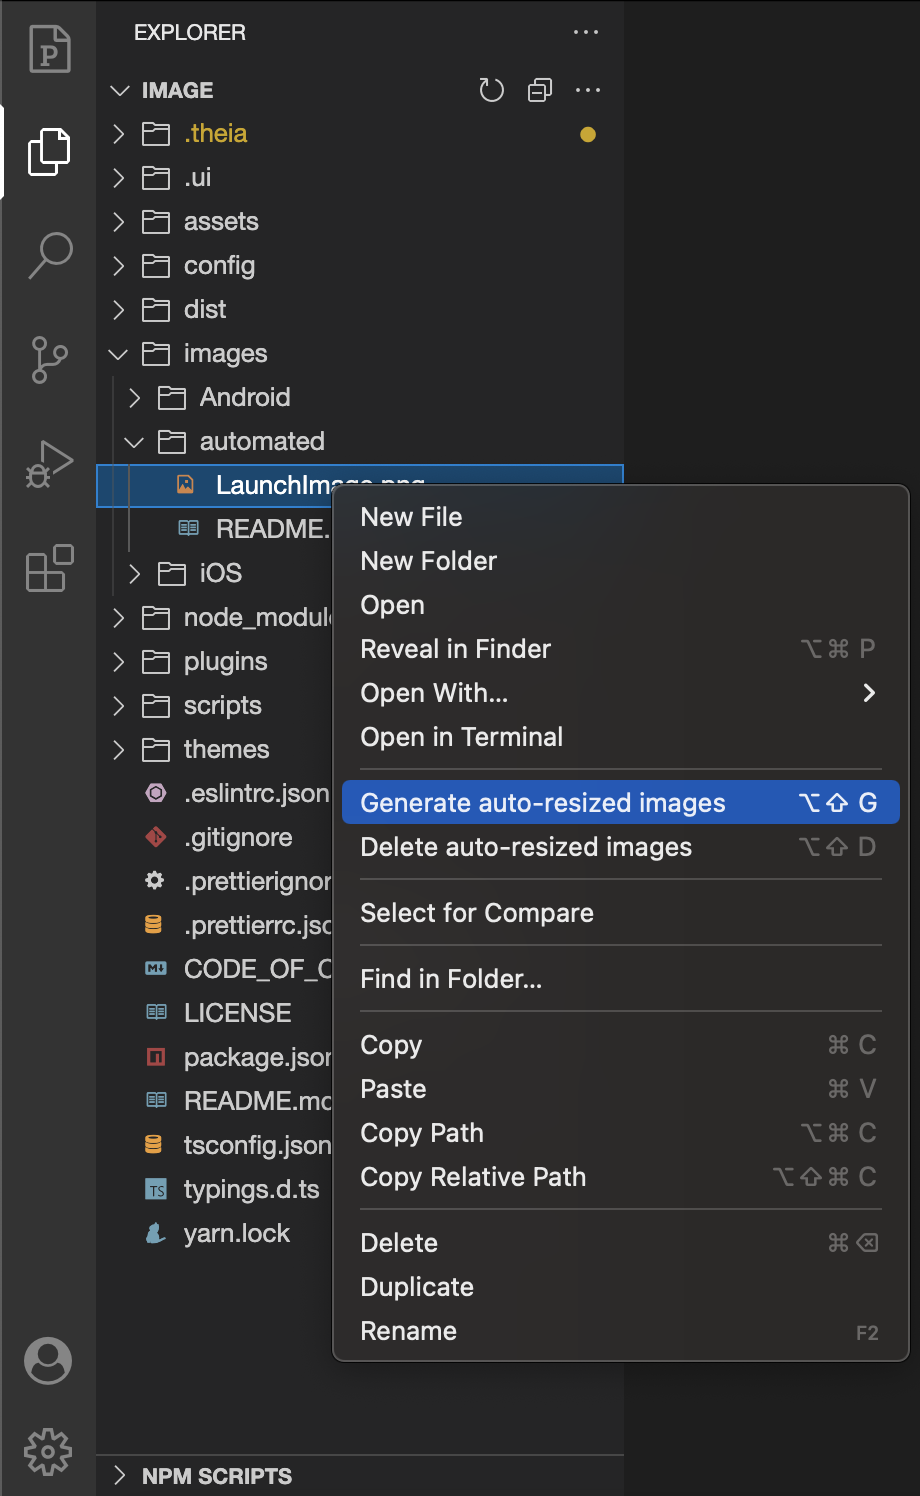
- Create automated folder on
/images**** directory if it doesn't exist Upload your highest resolution image to/images/automatedfolder. It will compress and resize the image accordingly. - Right click on the image
- Select Generate auto-resized images
- Images for different resolutions for both platforms will be generated.
You can use generated images on your project, like images://yourimage.png. For further information about how to use images, refer the document below:
Only .png images are supported.
You cant use !@#$%^&*()_+-=[]{}|;':",./<>? in the image name.
Except for AppIcon and LaunchImage, all image names should be in lowercase.
Multiple image selection is not supported at the moment. For bulk image generation, you can use the script mentioned below or generate them one by one.
iOS Image Resize and Quality
Upon image generation, iOS resizes the image to 3 different images and uses whatever it sees fit. Because of that, the images might appear in lower quality than needed.
If quality is the 1st priority for the image (on cases like detailed plan images or zoomable images), put your image in the assets directory and use it directly like assets://yourimage.png
Image Resource Manager
You can use the Image Resource Manager to generate images for all resolutions and platforms. It is located under View menu. You can also use the shortcut Ctrl + Shift + U or Cmd + Shift + U to open the Image Resource Manager.