Page
API Reference: UI.Page
Basic Page
Page class stands for showing different interfaces. Pages can be considered as screens.
Every page has its own lifecycle: load, show and hide. Application should have at least one page otherwise user will just see a black screen.
Page has an embedded flex layout, into which you can add views.
Please refer to the related guides for best practices of page usage and page navigation.
See also UI.Pages to see how to display a page on the screen.
import PageSampleDesign from "generated/pages/pageSample";
import { Route, Router } from "@smartface/router";

//You should create new Page from UI-Editor and extend with it.
export default class Sample extends PageSampleDesign {
  constructor(private router?: Router, private route?: Route) {
    super({});
  }

  /**
   * @event onShow
   * This event is called when a page appears on the screen (everytime).
   */
  onShow() {
    super.onShow();
  }

  /**
   * @event onLoad
   * This event is called once when page is created.
   */
  onLoad() {
    super.onLoad();
  }
}
On iOS, onShow() function is called when page is about to show.
On Android, it is called when page is shown on screen.
On Android device screen coordinates start after statusBar, the most top left; on iOS it starts the most top left.
Passing Data between Pages
Like in the example shown at Reveal Pages section, you can pass any data to another page while navigating to another page. However, There is no OOTB (Out of the Box) way to pass a variable while going back.
Check our Router Module to get more information about passing data between pages.
Best Practice of Passing data while going back or dismissing
When passing data in-between modal pages, you should use a mutual medium. In this example, a module scoped variable was used to get username which was received under login page. Normally, a state management like redux should be used. More info can be found at this guide.
Disabling Touch of Page
When dealing with services or async methods, you might want to disable all touch interaction to the page. There are two ways of doing that:
- Adding a full-page indicator to let user know that application is processing
- Adding an indicator to a component (e.g. button)
- Adding a label or something different to let the user know that you are loading something
For full-page indicator, refer to the Dialog document below:
DialogFor component indicators, you can have two different approach:
- Adding a fully transparent Dialog to prevent users from touching anything
- Disabling the touch interactions programmatically
If you are implementing an upload service or something that can be shut off during the process, transparent dialog will not be a good solution for you.
For other 2 solutions, you need to temporarily disable the touch action of the page. Here is an example scenario:
- Page Code
- Page UI
import PgNoTouchDesign from "generated/pages/pgNoTouch";
import System from "@smartface/native/device/system";
import { Route, Router } from "@smartface/router";

export default class PgNoTouch extends PgNoTouchDesign {
  isPageTouchEnabled = true;
  touchCounter = 0;
  constructor(private router?: Router, private route?: Route) {
    super({});
  }

  async yourServiceCall(): Promise<void> {
    return new Promise((resolve, reject) => {
      setTimeout(() => resolve(), 3000);
    });
  }

  initButtons() {
    this.btnTimeout.onPress = async () => {
      this.togglePageTouch(false);
      await this.yourServiceCall();
      this.togglePageTouch(true);
    };
    this.btnCounter.onPress = () => {
      this.touchCounter++;
      this.btnCounter.text = `Touch Counter : ${this.touchCounter}`;
    };
  }

  togglePageTouch(touchEnabled: boolean) {
    this.isPageTouchEnabled = touchEnabled;
    this.btnTimeout.enabled = this.isPageTouchEnabled;
    this.lblTouchIndicator.text = `Current Touch Status : ${
      this.isPageTouchEnabled ? "Enabled" : "Disabled"
    }`;
    if (System.OS === System.OSType.IOS) {
      this.layout.touchEnabled = this.isPageTouchEnabled;
    } else {
      /**
       * If you need to use this event somewhere else, add the code snippet below.
       */
      this.layout.android.onInterceptTouchEvent = () => {
        if (this.isPageTouchEnabled === false) {
          return !this.isPageTouchEnabled;
        }
        // ...your other code
      };
    }
  }

  onShow() {
    super.onShow();
  }

  onLoad() {
    super.onLoad();
    this.initButtons();
  }
}
{
    "components": [
        {
            "className": ".sf-page",
            "id": "59ae-5eb2-b7e9-b48f",
            "initialized": true,
            "props": {
                "children": [
                    "729a-fbfb-2fa3-cef2",
                    "f5df-c94a-d994-7bd0",
                    "f3e7-d604-667c-0e8d",
                    "e9c6-4c11-7d9d-567b",
                    "43a6-8ff8-9b47-419f"
                ],
                "name": "pgNoTouch",
                "orientation": "PORTRAIT",
                "parent": null
            },
            "type": "Page",
            "userProps": {}
        },
        {
            "className": ".sf-statusBar",
            "id": "729a-fbfb-2fa3-cef2",
            "props": {
                "children": [],
                "isRemovable": false,
                "name": "statusBar",
                "parent": "59ae-5eb2-b7e9-b48f"
            },
            "type": "StatusBar",
            "userProps": {
                "visible": true
            }
        },
        {
            "className": ".sf-headerBar",
            "id": "f5df-c94a-d994-7bd0",
            "props": {
                "children": [],
                "isRemovable": false,
                "name": "headerBar",
                "parent": "59ae-5eb2-b7e9-b48f",
                "title": "pgNoTouch"
            },
            "type": "HeaderBar",
            "userProps": {
                "title": "pgNoTouch"
            }
        },
        {
            "className": ".sf-button",
            "id": "f3e7-d604-667c-0e8d",
            "props": {
                "children": [],
                "name": "btnTimeout",
                "parent": "59ae-5eb2-b7e9-b48f",
                "text": "Press to wait for 3 seconds",
                "usePageVariable": true
            },
            "type": "Button",
            "userProps": {
                "testId": "omUxalyxe",
                "text": "Press to wait for 3 seconds",
                "usePageVariable": true
            }
        },
        {
            "className": ".sf-label",
            "id": "e9c6-4c11-7d9d-567b",
            "props": {
                "children": [],
                "name": "lblTouchIndicator",
                "parent": "59ae-5eb2-b7e9-b48f",
                "text": "Current Touch Status : Enabled",
                "usePageVariable": true
            },
            "type": "Label",
            "userProps": {
                "testId": "_wfqiTALG",
                "text": "Current Touch Status : Enabled",
                "textAlignment": "MIDCENTER",
                "usePageVariable": true
            }
        },
        {
            "className": ".sf-button",
            "id": "43a6-8ff8-9b47-419f",
            "props": {
                "children": [],
                "name": "btnCounter",
                "parent": "59ae-5eb2-b7e9-b48f",
                "text": "Touch Counter : 0",
                "usePageVariable": true
            },
            "type": "Button",
            "userProps": {
                "marginTop": 100,
                "testId": "lh0q4UC9K",
                "text": "Touch Counter : 0",
                "usePageVariable": true
            }
        }
    ]
}
If you have a SwipeView, TabbarController or BottomTabbar, those are outside of the page scope so their touches cannot be prevented by this method. You have to use a dialog to prevent their touches.
Other Page Types
Aside from normal page which opens left to right (or right to left on RTL interfaces), there are some other page types that you can use.
Pop-up Pages (Modal)
Pop-up page act like full-screen dialog, but also it is a fully fledged page. After using the pop-up page, you can dismiss the pop-up page and will return the page that used before pop-up. To use pop-up page, set modal property of route in your router. You can find an example below.
In this example, styling scheme of this guide is used with a few addition. Also, the theme smartfaceLightTheme was used.
More info can be found on page below:
Using UI Editor and ClassesBefore you use the example, make sure to create following pages and theme:
- pgWelcome as page
- pgLogin as page
- smartfaceLightTheme as a theme
- Router Code
- Welcome Page
- Welcome UI
- Login Page
- Login UI
- Service Code
import {
  NativeRouter,
  NativeStackRouter,
  Route
} from "@smartface/router";
import System from "@smartface/native/device/system";
import Application from "@smartface/native/application";
import * as Pages from "pages";

Application.on('backButtonPressed', () => {
  NativeRouter.getActiveRouter()?.goBack();
});

const router = NativeRouter.of({
  path: "/",
  to: "/root",
  isRoot: true,
  routes: [
    NativeStackRouter.of({
      path: "/root",
      to: "/root/welcome",
      routes: [
        Route.of({
          path: "/root/welcome",
          build: (router, route) => new Pages.PgWelcome(router, route),
        }),
        NativeStackRouter.of({
          path: "/root/user",
          to: "/root/user/login",
          modal: true, // This is essential
          routes: [
            Route.of({
              path: "/root/user/login",
              build: (router, route) => new Pages.PgLogin(router, route)
            })
          ]
        })
      ]
    })
  ]
});

export default router;
import PgProfileDesign from "generated/pages/pgProfile";
import { Route, Router } from "@smartface/router";
import { getUsername, logout } from "services/login";
export default class PgProfile extends PgProfileDesign {
router: any;
isLoggedIn = false;
constructor(private router?: Router, private route?: Route) {
super({});
}
initLoginButton() {
this.btnLogin.onPress = () => {
if (this.isLoggedIn) {
this.logout();
} else {
this.router.push("user/login");
}
};
}
updateText() {
if (this.isLoggedIn) {
this.lblLogin.text = `Welcome, ${getUsername()}`;
this.btnLogin.text = `Logout`;
} else {
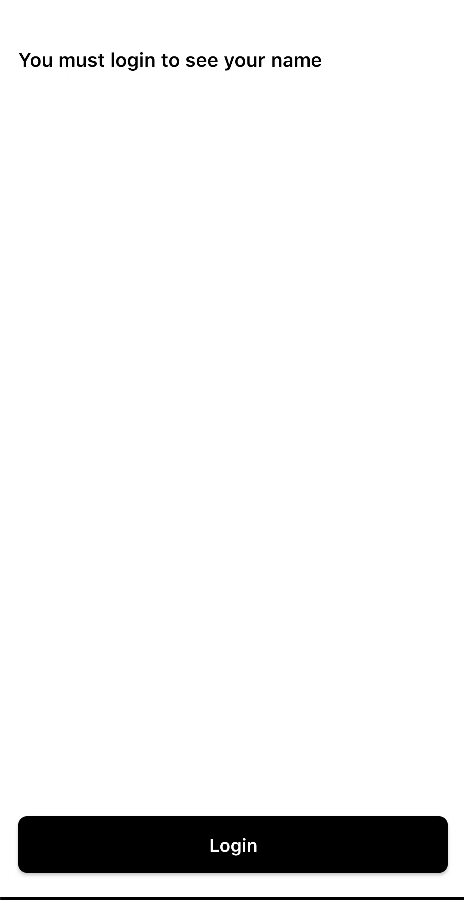
this.lblLogin.text = `You must login to see your name`;
this.btnLogin.text = `Login`;
}
}
logout() {
logout();
this.isLoggedIn = false;
this.updateText();
}
onShow() {
super.onShow();
this.isLoggedIn = getUsername().length;
this.updateText();
}
onLoad() {
super.onLoad();
this.initLoginButton();
}
}
{
    "components": [
        {
            "className": ".sf-page",
            "id": "e891b86d",
            "initialized": false,
            "props": {
                "children": [
                    "42b807d1",
                    "b7d28cff",
                    "88af-db55-523d-267e",
                    "e2d2-6802-42cf-d32d"
                ],
                "isRemovable": true,
                "name": "pgWelcome",
                "orientation": "PORTRAIT",
                "parent": null,
                "safeAreaEnabled": true
            },
            "type": "Page",
            "userProps": {
                "flexProps": {
                    "justifyContent": "SPACE_BETWEEN",
                    "alignItems": "STRETCH"
                },
                "orientation": "PORTRAIT",
                "paddingBottom": 20,
                "paddingLeft": 16,
                "paddingRight": 16,
                "safeAreaEnabled": true
            },
            "version": "6.15.1"
        },
        {
            "className": ".sf-statusBar",
            "id": "42b807d1",
            "props": {
                "children": [],
                "isRemovable": false,
                "name": "statusBar",
                "parent": "e891b86d"
            },
            "type": "StatusBar",
            "userProps": {}
        },
        {
            "className": ".sf-headerBar",
            "id": "b7d28cff",
            "props": {
                "children": [],
                "isRemovable": false,
                "name": "headerBar",
                "parent": "e891b86d",
                "title": "Profile"
            },
            "type": "HeaderBar",
            "userProps": {
                "title": "Profile"
            }
        },
        {
            "className": ".sf-label #pgLogin-lblLogin",
            "id": "88af-db55-523d-267e",
            "props": {
                "children": [],
                "name": "lblLogin",
                "parent": "e891b86d",
                "text": "You must login to see your name",
                "usePageVariable": true
            },
            "type": "Label",
            "userProps": {
                "testId": "tuHBk9XRa",
                "text": "You must login to see your name",
                "usePageVariable": true
            }
        },
        {
            "className": ".sf-button #pgLogin-btnLogin",
            "id": "e2d2-6802-42cf-d32d",
            "props": {
                "children": [],
                "name": "btnLogin",
                "parent": "e891b86d",
                "text": "Login",
                "usePageVariable": true
            },
            "type": "Button",
            "userProps": {
                "testId": "YXfMaNYMP",
                "text": "Login",
                "usePageVariable": true
            }
        }
    ]
}
import PgLoginDesign from "generated/pages/pgLogin";
import { Route, Router } from "@smartface/router";
import { login } from "services/login";

export default class PgLogin extends PgLoginDesign {
  router: any;
  constructor(private router?: Router, private route?: Route) {
    super({});
  }

  initMaterialTextBoxes() {
    this.mtbUsername.options = {
      hint: "Username"
    };
    this.mtbPassword.options = {
      hint: "Password"
    };
    this.mtbPassword.materialTextBox.isPassword = true;
  }

  initButtons() {
    this.btnLogin.onPress = async () => {
      try {
        const username = this.mtbUsername.materialTextBox.text;
        const password = this.mtbPassword.materialTextBox.text;
        this.btnLogin.text = `Logging in ...`;
        await login(username, password);
        this.router.dismiss();
      } catch (e) {
        // Empty text is not allowed
        this.btnLogin.text = `Login`;
      }
    };
    this.btnCancel.onPress = () => {
      this.router.dismiss();
    };
  }

  initMockUserPass() {
    this.lblLoginText.onTouchEnded = () => {
      this.mtbUsername.materialTextBox.text = `Smartface`;
      this.mtbPassword.materialTextBox.text = `welcome`;
    };
  }

  onShow() {
    super.onShow();
  }

  onLoad() {
    super.onLoad();
    this.initMaterialTextBoxes();
    this.initButtons();
    this.initMockUserPass();
  }
}
{
    "components": [
        {
            "className": ".sf-page #pgLogin .padding-vertical",
            "id": "e891b86d",
            "initialized": true,
            "props": {
                "children": [
                    "42b807d1",
                    "b7d28cff",
                    "01ee-3b7d-fae4-a0fe",
                    "e8d0-e028-be62-a7e2",
                    "80c4-be9c-a3f5-3e3b",
                    "0855-e9ce-5840-6caf",
                    "0cff-66df-b749-b9f8",
                    "4c56-9a45-4bd6-d78a"
                ],
                "isRemovable": true,
                "name": "pgLogin",
                "orientation": "PORTRAIT",
                "parent": null,
                "safeAreaEnabled": true
            },
            "type": "Page",
            "userProps": {
                "orientation": "PORTRAIT",
                "safeAreaEnabled": true
            },
            "version": "6.15.1"
        },
        {
            "className": ".sf-statusBar",
            "id": "42b807d1",
            "props": {
                "children": [],
                "isRemovable": false,
                "name": "statusBar",
                "parent": "e891b86d"
            },
            "type": "StatusBar",
            "userProps": {}
        },
        {
            "className": ".sf-headerBar",
            "id": "b7d28cff",
            "props": {
                "children": [],
                "isRemovable": false,
                "name": "headerBar",
                "parent": "e891b86d",
                "title": "Login"
            },
            "type": "HeaderBar",
            "userProps": {
                "title": "Login"
            }
        },
        {
            "className": ".sf-label #pgLogin-lblLoginText",
            "id": "01ee-3b7d-fae4-a0fe",
            "props": {
                "children": [],
                "name": "lblLoginText",
                "parent": "e891b86d",
                "text": "Login",
                "usePageVariable": true
            },
            "type": "Label",
            "userProps": {
                "testId": "31XoZqypi",
                "text": "Login",
                "usePageVariable": true
            }
        },
        {
            "className": ".flexLayout .materialTextBox-wrapper",
            "hiddenComponent": false,
            "id": "e8d0-e028-be62-a7e2",
            "initialized": false,
            "props": {
                "children": [],
                "name": "mtbUsername",
                "parent": "e891b86d",
                "usePageVariable": true
            },
            "source": {
                "page": "__library__",
                "type": "materialTextBox",
                "id": "574a-10da-b765-48e5"
            },
            "type": "FlexLayout",
            "userProps": {
                "flex": {
                    "positionType": 0
                },
                "flexProps": {
                    "positionType": "RELATIVE"
                },
                "left": 0,
                "testId": "GBgEp8H6g",
                "top": 0,
                "usePageVariable": true
            }
        },
        {
            "className": ".flexLayout .materialTextBox-wrapper",
            "hiddenComponent": false,
            "id": "80c4-be9c-a3f5-3e3b",
            "initialized": false,
            "props": {
                "children": [],
                "name": "mtbPassword",
                "parent": "e891b86d",
                "usePageVariable": true
            },
            "source": {
                "page": "__library__",
                "type": "materialTextBox",
                "id": "574a-10da-b765-48e5"
            },
            "type": "FlexLayout",
            "userProps": {
                "flex": {
                    "positionType": 0
                },
                "flexProps": {
                    "positionType": "RELATIVE"
                },
                "left": 0,
                "testId": "2VkXyj8Sk",
                "top": 0,
                "usePageVariable": true
            }
        },
        {
            "className": ".sf-label #pgLogin-lblForgotPassword",
            "id": "0855-e9ce-5840-6caf",
            "props": {
                "children": [],
                "name": "lblForgotPassword",
                "parent": "e891b86d",
                "text": "Forgot Password?",
                "usePageVariable": true
            },
            "type": "Label",
            "userProps": {
                "testId": "cxb0GrKoG",
                "text": "Forgot Password?",
                "usePageVariable": true
            }
        },
        {
            "className": ".sf-button #pgLogin-btnLogin",
            "id": "0cff-66df-b749-b9f8",
            "props": {
                "children": [],
                "name": "btnLogin",
                "parent": "e891b86d",
                "text": "Login",
                "usePageVariable": true
            },
            "type": "Button",
            "userProps": {
                "testId": "lU2lMxhdz",
                "text": "Login",
                "usePageVariable": true
            }
        },
        {
            "className": ".sf-button #pgLogin-btnLogin",
            "id": "4c56-9a45-4bd6-d78a",
            "props": {
                "children": [],
                "name": "btnCancel",
                "parent": "e891b86d",
                "text": "Cancel",
                "usePageVariable": true
            },
            "type": "Button",
            "userProps": {
                "testId": "ERnreq7sS",
                "text": "Cancel",
                "usePageVariable": true
            }
        }
    ]
}
let userName = "";

export function login(username: string, password: string): Promise<string> {
  return new Promise((resolve, reject) => {
    const token = "Your token goes here";
    if (!username.length) {
      reject("Empty username");
    }
    setTimeout(() => {
      userName = username;
      resolve(token);
    }, 500);
  });
}

export function logout() {
  userName = "";
}

export function getUsername() {
  return userName;
}
Do not forget to change your route path defined on start.ts file.
Reveal Pages
API Reference: TransitionViews
Transitions are the animated changes between two pages, states or views to provide visual continuity to the user interface. It works like PopupPage. Use transitionId to mark related View_s. Each _View must be linked with unique id.
TransitionId of View must be set and link before onShow methods and creating instance of second page.
Before running the sample code below, make sure you create the following pages on UI Editor:
- pgUserList
- pgUser
While creating the pages, UI Editor was used. Please make sure to add the pages and their UI style properly.
Using UI Editor and Classes- User List UI
- User List Page
- User UI
- User Code
- Component UI
- Service Code
- Router Code
{
    "components": [
        {
            "className": ".sf-page",
            "id": "0216-a586-68ea-ef16",
            "initialized": true,
            "props": {
                "children": [
                    "e251-dc93-1cce-a061",
                    "e5bc-0b15-1b36-b8d6",
                    "c8dc-c2bc-eac7-33e3"
                ],
                "name": "pgUserList",
                "orientation": "PORTRAIT",
                "parent": null
            },
            "type": "Page",
            "userProps": {}
        },
        {
            "className": ".sf-statusBar",
            "id": "e251-dc93-1cce-a061",
            "props": {
                "children": [],
                "isRemovable": false,
                "name": "statusBar",
                "parent": "0216-a586-68ea-ef16"
            },
            "type": "StatusBar",
            "userProps": {}
        },
        {
            "className": ".sf-headerBar",
            "id": "e5bc-0b15-1b36-b8d6",
            "props": {
                "children": [],
                "isRemovable": false,
                "name": "headerBar",
                "parent": "0216-a586-68ea-ef16",
                "title": "User List"
            },
            "type": "HeaderBar",
            "userProps": {
                "title": "User List"
            }
        },
        {
            "className": ".sf-gridView",
            "id": "c8dc-c2bc-eac7-33e3",
            "props": {
                "children": [
                    "a41a-fe3a-cfe8-7bb5"
                ],
                "name": "gvUsers",
                "parent": "0216-a586-68ea-ef16",
                "usePageVariable": true
            },
            "type": "GridView",
            "userProps": {
                "flexProps": {
                    "flexGrow": 1
                },
                "layoutManager": {
                    "spanCount": 2
                },
                "testId": "pRB1URCFU",
                "usePageVariable": true
            }
        },
        {
            "className": ".sf-gridViewItem .sf-gridViewItem-simple",
            "hiddenComponent": false,
            "id": "a41a-fe3a-cfe8-7bb5",
            "initialized": true,
            "props": {
                "children": [],
                "name": "gviUser",
                "parent": "c8dc-c2bc-eac7-33e3"
            },
            "source": {
                "page": "__library__",
                "type": "gviUser",
                "id": "aea8-55c1-833e-4baa"
            },
            "type": "GridViewItem",
            "userProps": {
                "flex": {
                    "positionType": 0
                },
                "flexProps": {
                    "positionType": "RELATIVE"
                },
                "height": 227,
                "left": 0,
                "testId": "6PcXnnHpZ",
                "top": 0
            }
        }
    ]
}
import PgUserListDesign from "generated/pages/pgUserList";
import { Route, Router } from "@smartface/router";
import { getUserList, User } from "services/users";
import GviUser from "components/GviUser";

export default class PgUserList extends PgUserListDesign {
  private data: User[] = [];
  router: any;
  constructor(private router?: Router, private route?: Route) {
    super({});
  }

  async getUsers() {
    try {
      this.data = await getUserList();
      this.refreshGridView();
    } catch (e) {
      console.error(e);
    }
  }

  initGridView() {
    this.gvUsers.onItemBind = (gridViewItem: GviUser, index: number) => {
      gridViewItem.lblTitle.text = `${this.data[index].first_name} ${this.data[index].last_name}`;
      gridViewItem.lblSubtitle.text = ``;
      gridViewItem.imgUser.loadFromUrl({
        url: this.data[index].avatar,
        useHTTPCacheControl: true
      });
    };
    this.gvUsers.onPullRefresh = async () => {
      try {
        await this.getUsers();
      } finally {
        this.gvUsers.stopRefresh();
      }
    };
    this.gvUsers.onItemSelected = (gridViewItem: GviUser, index: number) => {
      //@ts-ignore
      gridViewItem.imgUser.transitionId = String(this.data[index].id);
      //@ts-ignore
      this.transitionViews = [gridViewItem.imgUser];
      this.router.push("user/detail", {
        transitionImage: gridViewItem.imgUser.image,
        imageURL: this.data[index].avatar,
        transitionId: String(this.data[index].id),
        title: gridViewItem.lblTitle.text,
        subTitle: this.data[index].email
      });
    };
  }

  refreshGridView() {
    this.gvUsers.itemCount = this.data.length;
    this.gvUsers.refreshData();
  }

  onShow() {
    super.onShow();
  }

  onLoad() {
    super.onLoad();
    this.initGridView();
    this.getUsers();
  }
}
{
    "components": [
        {
            "className": ".sf-page",
            "id": "f8cf-6172-1673-f91a",
            "initialized": true,
            "props": {
                "children": [
                    "c67c-e972-e3a7-1b74",
                    "748e-84f9-8e99-af0c",
                    "f30b-c1ed-884e-4a1e",
                    "c651-f5e8-df46-a642",
                    "0d22-df6d-e330-2c57",
                    "9265-6282-5efb-696b"
                ],
                "name": "pgUser",
                "orientation": "PORTRAIT",
                "parent": null,
                "safeAreaEnabled": true
            },
            "type": "Page",
            "userProps": {
                "safeAreaEnabled": true
            }
        },
        {
            "className": ".sf-statusBar",
            "id": "c67c-e972-e3a7-1b74",
            "props": {
                "children": [],
                "isRemovable": false,
                "name": "statusBar",
                "parent": "f8cf-6172-1673-f91a"
            },
            "type": "StatusBar",
            "userProps": {}
        },
        {
            "className": ".sf-headerBar",
            "id": "748e-84f9-8e99-af0c",
            "props": {
                "children": [],
                "isRemovable": false,
                "name": "headerBar",
                "parent": "f8cf-6172-1673-f91a",
                "title": "pgUser"
            },
            "type": "HeaderBar",
            "userProps": {
                "title": "pgUser",
                "visible": false
            }
        },
        {
            "className": ".sf-imageView",
            "id": "f30b-c1ed-884e-4a1e",
            "props": {
                "children": [],
                "name": "imgProfile",
                "parent": "f8cf-6172-1673-f91a",
                "usePageVariable": true
            },
            "type": "ImageView",
            "userProps": {
                "imageFillType": "ASPECTFIT",
                "testId": "Hy6YUKnTK",
                "usePageVariable": true
            }
        },
        {
            "className": ".sf-label",
            "id": "c651-f5e8-df46-a642",
            "props": {
                "children": [],
                "name": "lblTitle",
                "parent": "f8cf-6172-1673-f91a",
                "text": "label1",
                "usePageVariable": true
            },
            "type": "Label",
            "userProps": {
                "testId": "Coy_7oKpF",
                "text": "label1",
                "textAlignment": "MIDCENTER",
                "textColor": "rgba( 0, 0, 0, 1 )",
                "usePageVariable": true
            }
        },
        {
            "className": ".sf-label",
            "id": "0d22-df6d-e330-2c57",
            "props": {
                "children": [],
                "name": "lblSubtitle",
                "parent": "f8cf-6172-1673-f91a",
                "text": "label2",
                "usePageVariable": true
            },
            "type": "Label",
            "userProps": {
                "testId": "QbQyD2HTK",
                "text": "label2",
                "textAlignment": "MIDCENTER",
                "textColor": "rgba( 0, 0, 0, 1 )",
                "usePageVariable": true
            }
        },
        {
            "className": ".sf-flexLayout",
            "id": "9265-6282-5efb-696b",
            "props": {
                "children": [
                    "3701-d69f-bbee-1d5f"
                ],
                "name": "flWrapper",
                "parent": "f8cf-6172-1673-f91a"
            },
            "type": "FlexLayout",
            "userProps": {
                "flexProps": {
                    "flexGrow": 1,
                    "justifyContent": "FLEX_END"
                },
                "height": null,
                "testId": "tKXqeskD0"
            }
        },
        {
            "className": ".sf-button",
            "id": "3701-d69f-bbee-1d5f",
            "props": {
                "children": [],
                "name": "btnCancel",
                "parent": "9265-6282-5efb-696b",
                "text": "Cancel",
                "usePageVariable": true
            },
            "type": "Button",
            "userProps": {
                "testId": "r0pETCd27",
                "text": "Cancel",
                "usePageVariable": true
            }
        }
    ]
}
import PgUserDesign from "generated/pages/pgUser";
import { Route, Router } from "@smartface/router";
import Image from "@smartface/native/ui/image";

export default class PgUser extends PgUserDesign {
  router: any;
  routeData: {
    transitionImage: Image;
    imageURL: string;
    transitionId: string;
    title: string;
    subTitle: string;
  };
  constructor(private router?: Router, private route?: Route) {
    super({});
  }

  initImage() {
    //@ts-ignore
    this.transitionViews = [this.imgProfile];
    //@ts-ignore
    this.imgProfile.transitionId = this.routeData.transitionId;
    this.imgProfile.image = this.routeData.transitionImage;
  }

  initTexts() {
    this.lblTitle.text = this.routeData.title;
    this.lblSubtitle.text = this.routeData.subTitle;
  }

  initButton() {
    this.btnCancel.onPress = () => {
      this.router.dismiss();
    };
  }

  onShow() {
    super.onShow();
  }

  onLoad() {
    super.onLoad();
    this.initImage();
    this.initButton();
    this.initTexts();
  }
}
{
    "components": [
        {
            "className": ".sf-gridViewItem .sf-gridViewItem-simple",
            "hiddenComponent": false,
            "id": "aea8-55c1-833e-4baa",
            "initialized": true,
            "props": {
                "children": [
                    "58e6-e69e-a1c1-d4b9",
                    "67de-5d59-e18c-7727",
                    "e92d-12a6-d5ab-b6da"
                ],
                "name": "gviUser",
                "parent": "57f4-201f-4bfc-5fc6"
            },
            "source": {
                "page": "__library__"
            },
            "type": "GridViewItem",
            "userProps": {
                "flexProps": {},
                "height": 227,
                "left": 102.77777777777779,
                "top": 88.88888888888889
            }
        },
        {
            "className": ".sf-imageView .sf-gridViewItem-simple-preview",
            "id": "58e6-e69e-a1c1-d4b9",
            "props": {
                "autoHeight": 343.4782608695652,
                "autoWidth": 343.4782608695652,
                "children": [],
                "name": "imgUser",
                "parent": "aea8-55c1-833e-4baa",
                "usePageVariable": true
            },
            "source": {
                "page": "__library__"
            },
            "type": "ImageView",
            "userProps": {
                "autoHeight": 343.4782608695652,
                "autoWidth": 343.4782608695652,
                "usePageVariable": true,
                "width": 165
            }
        },
        {
            "className": ".sf-label .sf-gridViewItem-simple-title",
            "id": "67de-5d59-e18c-7727",
            "props": {
                "autoHeight": 20.652173913043477,
                "children": [],
                "name": "lblTitle",
                "parent": "aea8-55c1-833e-4baa",
                "text": "Grid Title Here",
                "usePageVariable": true
            },
            "source": {
                "page": "__library__"
            },
            "type": "Label",
            "userProps": {
                "autoHeight": 20.652173913043477,
                "text": "Grid Title Here",
                "usePageVariable": true
            }
        },
        {
            "className": ".sf-label .sf-gridViewItem-simple-subtitle",
            "id": "e92d-12a6-d5ab-b6da",
            "props": {
                "autoHeight": 18.478260869565215,
                "children": [],
                "name": "lblSubtitle",
                "parent": "aea8-55c1-833e-4baa",
                "text": "Grid subtitle here",
                "usePageVariable": true
            },
            "source": {
                "page": "__library__"
            },
            "type": "Label",
            "userProps": {
                "autoHeight": 18.478260869565215,
                "text": "Grid subtitle here",
                "usePageVariable": true
            }
        }
    ]
}
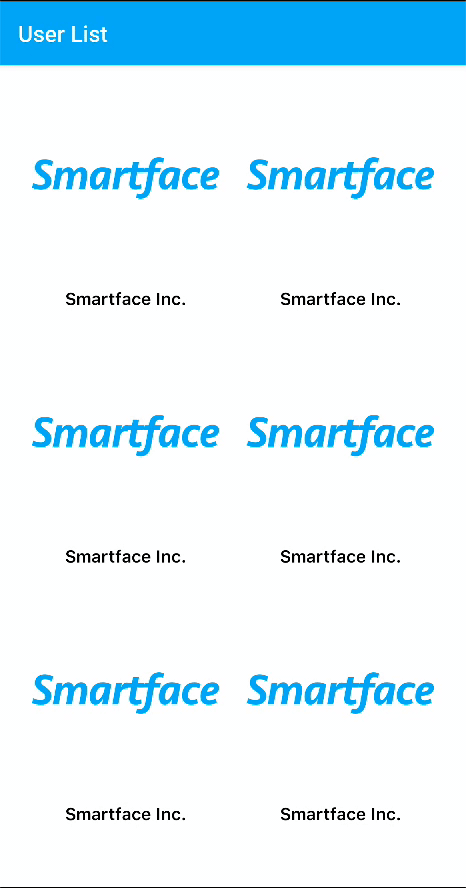
const smartfaceItem = {
  id: 0,
  email: "info@smartface.io",
  first_name: "Smartface",
  last_name: "Inc.",
  avatar: "https://upload.wikimedia.org/wikipedia/en/7/7d/Smartface_Logo.png"
};

export type User = {
  id: number;
  email: string;
  first_name: string;
  last_name: string;
  avatar: string; // Url
};

type UserList = {
  data: User[];
};

export async function getUserList(): Promise<UserList["data"]> {
  return new Promise((resolve, reject) => {
    setTimeout(() => {
      let response: User[] = Array(16).fill(smartfaceItem);
      response = response.map((item, index) => {
        const newItem = Object.assign({}, item);
        newItem.id = index;
        return newItem;
      });
      resolve(response);
    }, 500);
  });
}
import {
  NativeRouter,
  NativeStackRouter,
  Route
} from "@smartface/router";
import "@smartface/extension-utils/lib/router/back-close";
import System from "@smartface/native/device/system";
import Application from "@smartface/native/application";
import * as Pages from "pages";

Application.on('backButtonPressed', () => {
  NativeRouter.getActiveRouter()?.goBack();
});


const router = NativeRouter.of({
  path: "/",
  to: "/root",
  isRoot: true,
  routes: [
    NativeStackRouter.of({
      path: "/root",
      to: "/root/userlist",
      routes: [
        Route.of({
          path: "/root/userlist",
          build: (router, route) => new Pages.PgUserList(router, route),
        }),
        NativeStackRouter.of({
          path: "/root/user",
          to: "/root/user/detail",
          modal: true, // This is essential
          routes: [
            Route.of({
              path: "/root/user/detail",
              build: (router, route) => new Pages.PgUser(router, route)
            })
          ]
        })
      ]
    })
  ]
});

export default router;
Do not forget to change your main route push on start.ts

The guides which are used:
GridViewUsing ListView with UI EditorAlso, take a look into Router Repository