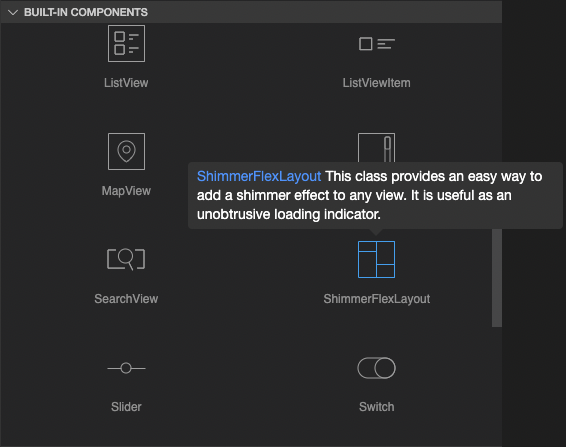
ShimmerFlexLayout
API Reference: UI.ShimmerFlexLayout
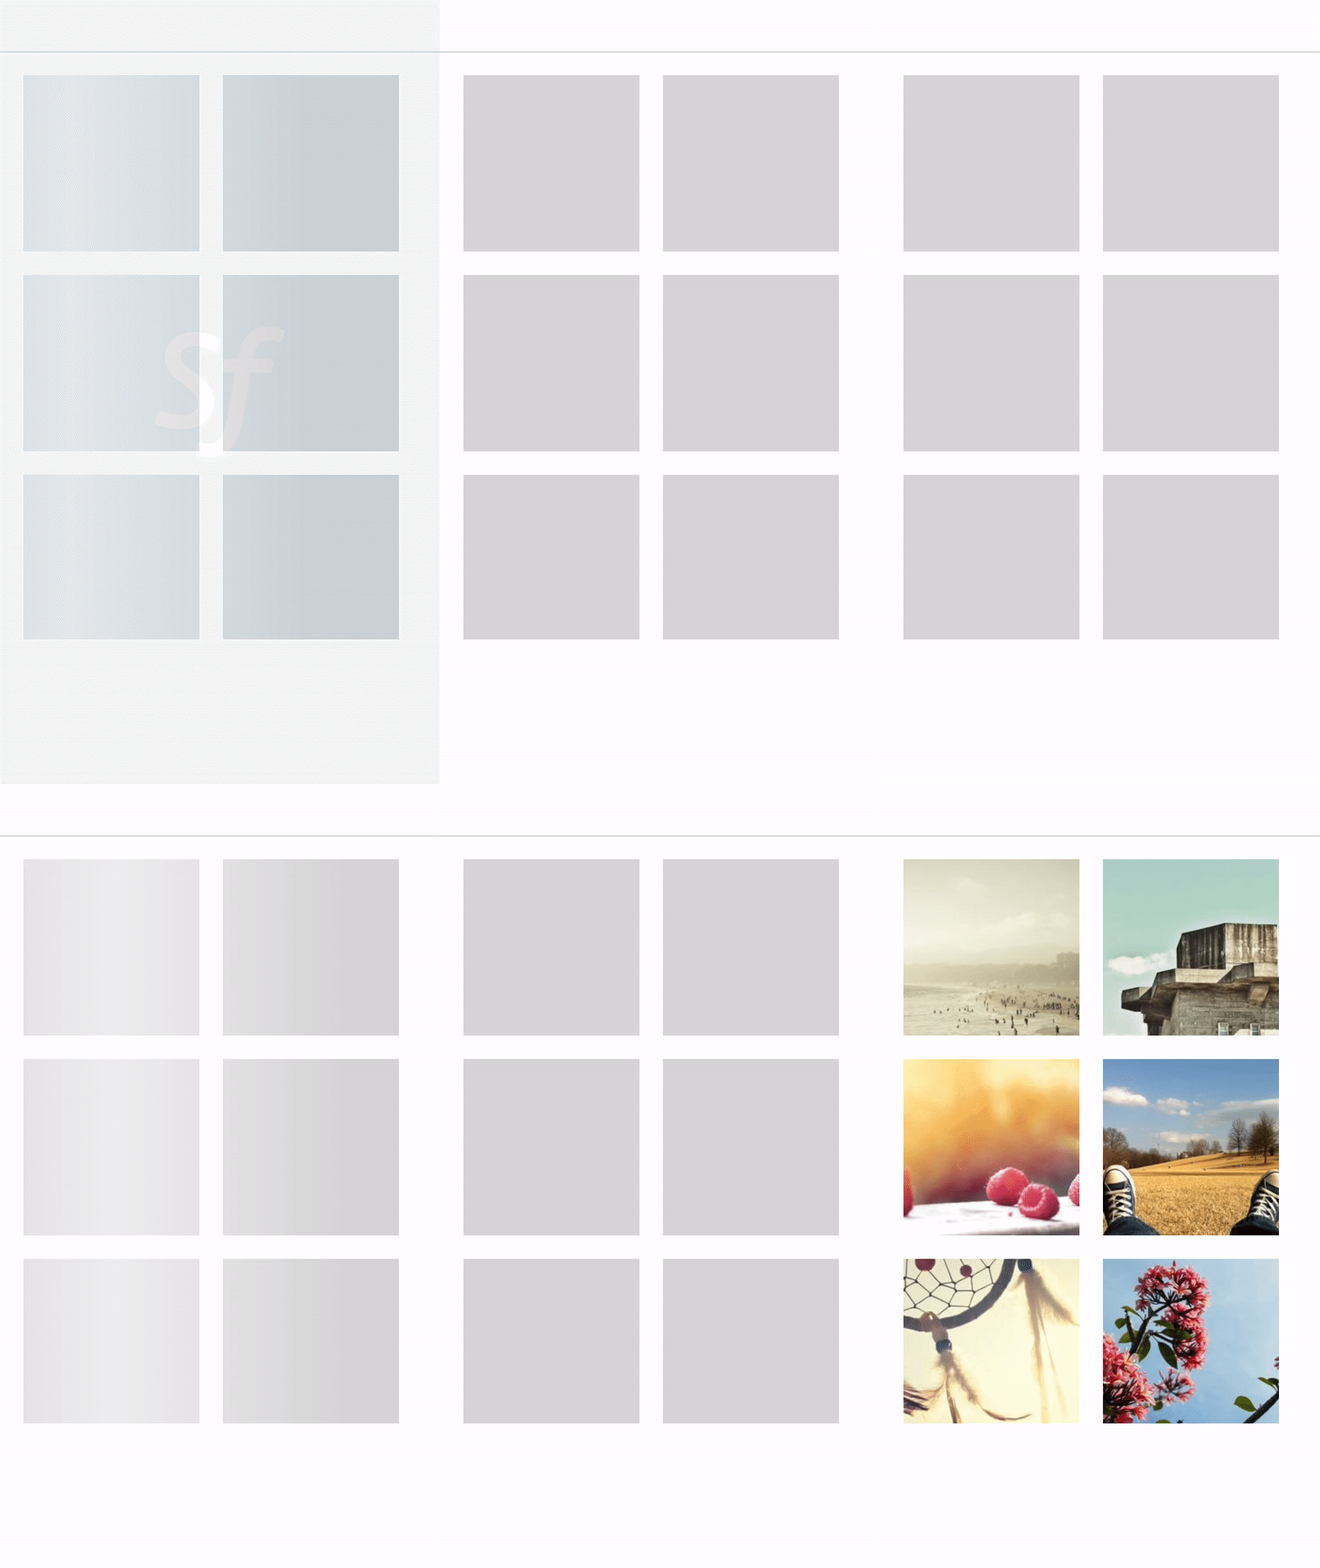
ShimmerFlexLayout helps load a user interface gradually, a little at a time. While doing that, the labels and pictures have some gray colored placeholders on them with some moving gradient animation. Shimmer effect was created by Facebook to indicate a loading status, so instead of using ProgressBar or usual loader.
Android includes build method which build the shimmer FlexLayout with given enum.
The components in the example are added from the code for better showcase purposes. To learn more about the subject you can refer to:
Adding Component From CodeAs a best practice, Smartface recommends using the WYSIWYG editor in order to add components and styles to your page or library. To learn how to use UI Editor better, please refer to this documentation
UI Editor Basicsimport PageSampleDesign from "generated/pages/pageSample";
import { Route, Router } from "@smartface/router";
import { styleableComponentMixin, styleableContainerComponentMixin } from '@smartface/styling-context';
import Button from "@smartface/native/ui/button";
import ShimmerFlexLayout from "@smartface/native/ui/shimmerflexlayout";
import ImageView from "@smartface/native/ui/imageview";
import Application from "@smartface/native/application";
import FlexLayout from "@smartface/native/ui/flexlayout";
import { themeService } from "theme";
class StyleableImageView extends styleableComponentMixin(ImageView) {}
class StyleableFlexLayout extends styleableContainerComponentMixin(FlexLayout) {}
class StyleableShimmerFlexLayout extends styleableComponentMixin(ShimmerFlexLayout) {}
//You should create new Page from UI-Editor and extend with it.
export default class Sample extends PageSampleDesign {
myShimmerFlexLayout: StyleableShimmerFlexLayout;
imageViews: ImageView[] = new Array<ImageView>();
flex: StyleableFlexLayout;
constructor(private router?: Router, private route?: Route) {
super({});
}
// The page design has been made from the code for better
// showcase purposes. As a best practice, remove this and
// use WYSIWYG editor to style your pages.
centerizeTheChildrenLayout() {
this.dispatch({
type: "updateUserStyle",
userStyle: {
flexProps: {
flexDirection: 'ROW',
justifyContent: 'CENTER',
alignItems: 'CENTER'
}
}
})
}
onShow() {
super.onShow();
const { headerBar } = this;
Application.statusBar.visible = false;
headerBar.visible = false;
setTimeout(() => {
this.myShimmerFlexLayout.stopShimmering();
this.myShimmerFlexLayout.baseAlpha = 1;
this.myShimmerFlexLayout.android.build(
ShimmerFlexLayout.Android.Shimmer.AlphaHighlight
);
for (let index = 0; index < this.imageViews.length; index++) {
this.imageViews[index].loadFromUrl({
url: "https://picsum.photos/200/300/?image=10" + index,
});
}
}, 4000);
}
onLoad() {
super.onLoad();
this.centerizeTheChildrenLayout();
this.flex = new StyleableFlexLayout();
themeService.addGlobalComponent(this.flex, "flex");
this.flex.dispatch({
type: "updateUserStyle",
userStyle: {
width: 350,
height: 750,
marginLeft: 20,
flexProps: {
positionType: "ABSOLUTE",
flexDirection: "ROW",
flexWrap: "WRAP",
alignContent: "AUTO",
},
},
});
for (let index = 1; index <= 6; index++) {
let imageViewName = "img" + index;
this[imageViewName] = new StyleableImageView();
this.flex.addChild(this[imageViewName], imageViewName, ".sf-imageView", {
height: 150,
width: 150,
marginLeft: 20,
marginBottom: 20,
marginTop: 10,
backgroundColor: "#a1a1a1",
imageFillType: "ASPECTFILL",
});
this.imageViews.push(this[imageViewName]);
}
this.myShimmerFlexLayout = new StyleableShimmerFlexLayout();
this.addChild(
this.myShimmerFlexLayout,
"myShimmerFlexLayout",
".sf-shimmerFlexLayout",
{
height: 500,
width: 400,
baseAlpha: 0.5,
pauseDuration: 500,
android: {
highlightAlpha: 1,
},
ios: {
animationAlpha: 0.2,
},
}
);
this.myShimmerFlexLayout.android.build(
ShimmerFlexLayout.Android.Shimmer.AlphaHighlight
);
this.myShimmerFlexLayout.contentLayout = this.flex;
this.myShimmerFlexLayout.startShimmering();
this.dispatch({
type: "updateUserStyle",
userStyle: {
flexProps: {
paddingTop: 0,
paddingLeft: 0,
paddingBottom: 0,
paddingRight: 0,
},
},
});
}
}
After stopping shimmering effect; baseAlpha value must be set again and Android only builder function must be triggered.


Adding ShimmerFlexLayout Using UI Editor
Shimmer FlexLayouts can be created by using UI Editor all the way. When created it starts to shimmer from the very beginning, stopping and loading views need managed programmatically.

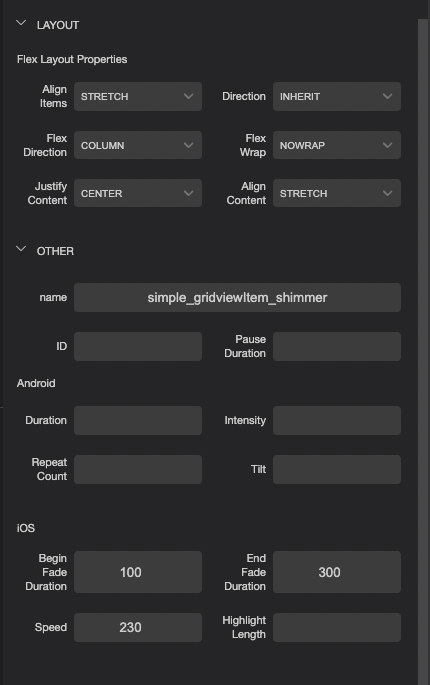
ShimmerFlexLayout properties can be added on UI Editor.
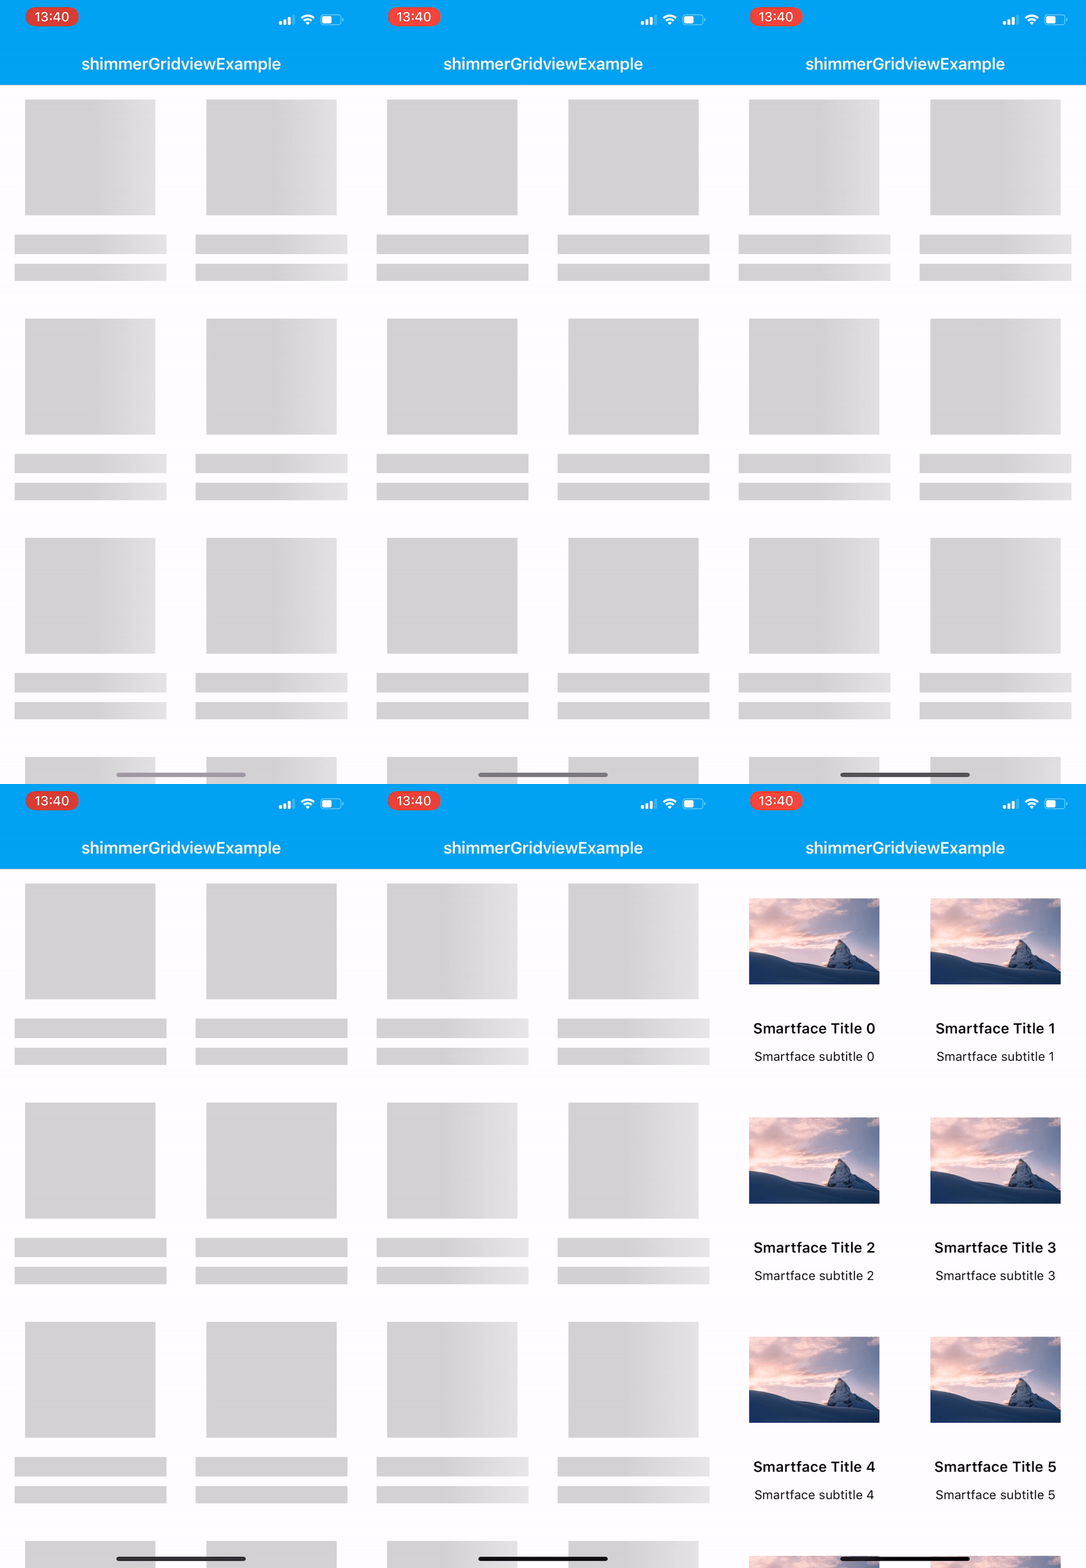
Simple example of ShimmerFlexLayout with custom component
- Page
- Page Design
- Component
- Component Styles
import ShimmerGridviewExampleDesign from 'generated/pages/shimmerGridviewExample';
import { Route, Router } from '@smartface/router';
import { withDismissAndBackButton } from '@smartface/mixins';
import SimpleGridviewItem from 'components/Simple_gridviewItem';
type DatasetType = { title: string; subTitle: string; image: string; isLoaded: boolean };
export default class ShimmerGridviewExample extends withDismissAndBackButton(ShimmerGridviewExampleDesign) {
  private disposeables: (() => void)[] = [];
  myDataSet: DatasetType[] = Array.from({ length: 10 }).map((_, index: number) => ({
    title: ``,
    subTitle: ``,
    image: '',
    isLoaded: false
  }));
  constructor(private router?: Router, private route?: Route) {
    super({});
  }
  initGridView() {
    this.gridViewMain.onItemBind = (gridViewItem: SimpleGridviewItem, index) => {
      const { title, subTitle, image, isLoaded } = this.myDataSet[index];
      gridViewItem.gridTitle = title;
      gridViewItem.gridSubTitle = subTitle;
      gridViewItem.gridImage = image;
      isLoaded ? gridViewItem.stopShimmering() : gridViewItem.startShimmering();
    };
  }
  refreshGridView() {
    this.gridViewMain.itemCount = this.myDataSet.length;
    this.gridViewMain.refreshData();
  }

  initData() {
    this.myDataSet = this.myDataSet.map((_, index: number) => ({
      title: `Smartface Title ${index}`,
      subTitle: `Smartface subtitle ${index}`,
      image: 'images://swiper_image_1.png',
      isLoaded: true
    }));
  }
  /**
   * @event onShow
   * This event is called when a page appears on the screen (everytime).
   */
  onShow() {
    super.onShow();
    this.refreshGridView();
    setTimeout(() => {
      this.initData();
      this.refreshGridView();
    }, 3000);
  }
  /**
   * @event onLoad
   * This event is called once when page is created.
   */
  onLoad() {
    super.onLoad();
    this.headerBar.leftItemEnabled = false;
    this.initGridView();
  }
  onHide(): void {
    this.dispose();
  }
  dispose(): void {
    this.disposeables.forEach((item) => item());
  }
}
{
    "components": [
        {
            "className": ".sf-page",
            "id": "5da0-43ba-577e-64b4",
            "initialized": true,
            "props": {
                "children": [
                    "6af0-fb26-e5ec-b9bd",
                    "adea-15fe-bd8d-7352",
                    "eb3e-a81f-b3bc-f133"
                ],
                "name": "shimmerGridviewExample",
                "orientation": "PORTRAIT",
                "parent": null
            },
            "type": "Page",
            "userProps": {},
            "version": "0.0.1.a"
        },
        {
            "className": ".sf-statusBar",
            "id": "6af0-fb26-e5ec-b9bd",
            "props": {
                "children": [],
                "isRemovable": false,
                "name": "statusBar",
                "parent": "5da0-43ba-577e-64b4"
            },
            "type": "StatusBar",
            "userProps": {}
        },
        {
            "className": ".sf-headerBar",
            "id": "adea-15fe-bd8d-7352",
            "props": {
                "children": [],
                "isRemovable": false,
                "name": "headerBar",
                "parent": "5da0-43ba-577e-64b4",
                "title": "shimmerGridviewExample"
            },
            "type": "HeaderBar",
            "userProps": {
                "title": "shimmerGridviewExample"
            }
        },
        {
            "className": ".sf-gridView",
            "id": "eb3e-a81f-b3bc-f133",
            "oldName": "gridView1",
            "props": {
                "children": [
                    "8670-10a4-5ff7-5547"
                ],
                "name": "gridViewMain",
                "parent": "5da0-43ba-577e-64b4",
                "usePageVariable": true
            },
            "ref": null,
            "type": "GridView",
            "userProps": {
                "flexProps": {
                    "flexGrow": 1
                },
                "layoutManager": {
                    "spanCount": 2
                },
                "testId": "lHRpqqGMe",
                "usePageVariable": true
            }
        },
        {
            "className": ".sf-gridViewItem .simple-gridviewItem",
            "hiddenComponent": false,
            "id": "8670-10a4-5ff7-5547",
            "initialized": true,
            "props": {
                "children": [],
                "name": "simple_gridviewItem",
                "parent": "eb3e-a81f-b3bc-f133"
            },
            "source": {
                "page": "__library__",
                "type": "simple_gridviewItem",
                "id": "aea8-55c1-833e-4baa"
            },
            "type": "GridViewItem",
            "userProps": {
                "flex": {
                    "positionType": 0
                },
                "flexProps": {
                    "positionType": "RELATIVE"
                },
                "height": 227,
                "left": 0,
                "top": 0
            }
        }
    ]
}

import Image from '@smartface/native/ui/image';
import ShimmerFlexLayout from '@smartface/native/ui/shimmerflexlayout';
import Simple_gridviewItemDesign from 'generated/my-components/Simple_gridviewItem';

export default class Simple_gridviewItem extends Simple_gridviewItemDesign {
  pageName?: string | undefined;
  constructor(props?: any, pageName?: string) {
    // Initalizes super class for this scope
    super(props);
    this.pageName = pageName;
  }
  get gridTitle(): string {
    return this.lblTitle.text;
  }
  set gridTitle(value: string) {
    this.lblTitle.text = value;
  }
  get gridSubTitle(): string {
    return this.lblSubtitle.text;
  }
  set gridSubTitle(value: string) {
    this.lblSubtitle.text = value;
  }
  get gridImage(): string | Image {
    return this.imgPreview.image;
  }
  set gridImage(value: string | Image) {
    if (value instanceof Image) {
      this.imgPreview.image = value;
    } else if (typeof value === 'string' && value.length === 0) {
      this.imgPreview.image = undefined;
    } else if (typeof value === 'string') {
      this.imgPreview.image = Image.createFromFile(value);
    }
  }
  startShimmering() {
    this.shimmerMain.startShimmering();
    this.lblSubtitle.dispatch({
      type: 'updateUserStyle',
      userStyle: {
        backgroundColor: '#D2D2D2'
      }
    });

    this.lblTitle.dispatch({
      type: 'updateUserStyle',
      userStyle: {
        backgroundColor: '#D2D2D2'
      }
    });
    this.imgPreview.dispatch({
      type: 'updateUserStyle',
      userStyle: {
        backgroundColor: '#D2D2D2'
      }
    });
  }
  stopShimmering() {
    this.shimmerMain.stopShimmering();
    this.shimmerMain.baseAlpha = 1;
    this.shimmerMain.android.build(ShimmerFlexLayout.Android.Shimmer.AlphaHighlight);
    this.imgPreview.dispatch({
      type: 'updateUserStyle',
      userStyle: {
        backgroundColor: 'rgba(0,0,0,0)'
      }
    });
    this.lblSubtitle.dispatch({
      type: 'updateUserStyle',
      userStyle: {
        backgroundColor: 'rgba(0,0,0,0)'
      }
    });

    this.lblTitle.dispatch({
      type: 'updateUserStyle',
      userStyle: {
        backgroundColor: 'rgba(0,0,0,0)'
      }
    });
  }
}
{
  ".simple-gridviewItem": {
    "flexProps": {
      "justifyContent": "FLEX_START",
      "alignItems": "STRETCH"
    },
    "height": 227,
    "width": 165,
    "&-preview": {
      "height": 165,
      "flexProps": {
        "alignSelf": "CENTER"
      },
      "imageFillType": "ASPECTFIT",
      "marginBottom": null,
      "marginTop": null,
      "marginLeft": 15,
      "marginRight": 15,
      "width": null
    },
    "&-title": {
      "flexProps": {
        "positionType": "RELATIVE",
        "alignSelf": "AUTO"
      },
      "font": {
        "size": 15,
        "bold": true,
        "italic": false,
        "family": "SFProText",
        "style": "Semibold"
      },
      "height": 20,
      "marginBottom": null,
      "marginTop": 13,
      "textAlignment": "MIDCENTER",
      "textColor": "rgba( 0, 0, 0, 1 )"
    },
    "&-subtitle": {
      "flexProps": {
        "positionType": "RELATIVE",
        "alignSelf": "AUTO"
      },
      "font": {
        "size": 13,
        "bold": false,
        "italic": false,
        "family": "SFProText",
        "style": "Regular"
      },
      "height": 18,
      "marginBottom": 12,
      "marginTop": null,
      "textAlignment": "MIDCENTER",
      "textColor": "rgba( 0, 0, 0, 1 )"
    }
  }
}

